Overview
Sometimes you need to do two things at once. For example you might want to blink an LED while reading a button press. In this case, you can’t use delay(), because Arduino pauses your program during the delay(). If the button is pressed while Arduino is paused waiting for the delay() to pass, your program will miss the button press.
This sketch demonstrates how to blink an LED without using delay(). It turns the LED on and then makes note of the time. Then, each time through loop(), it checks to see if the desired blink time has passed. If it has, it toggles the LED on or off and makes note of the new time. In this way the LED blinks continuously while the sketch execution never lags on a single instruction.
An analogy would be warming up a pizza in your microwave, and also waiting some important email. You put the pizza in the microwave and set it for 10 minutes. The analogy to using delay() would be to sit in front of the microwave watching the timer count down from 10 minutes until the timer reaches zero. If the important email arrives during this time you will miss it.
What you would do in real life would be to turn on the pizza, and then check your email, and then maybe do something else (that doesn’t take too long!) and every so often you will come back to the microwave to see if the timer has reached zero, indicating that your pizza is done.
Components Required
Note: Refer to Part 2 to check details of hardware.
Fritzing Circuit
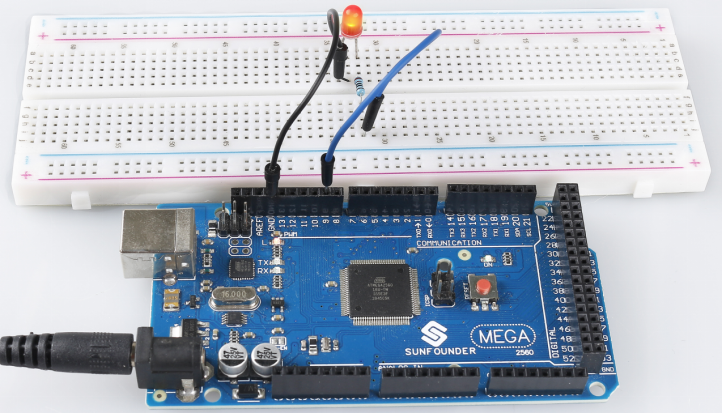
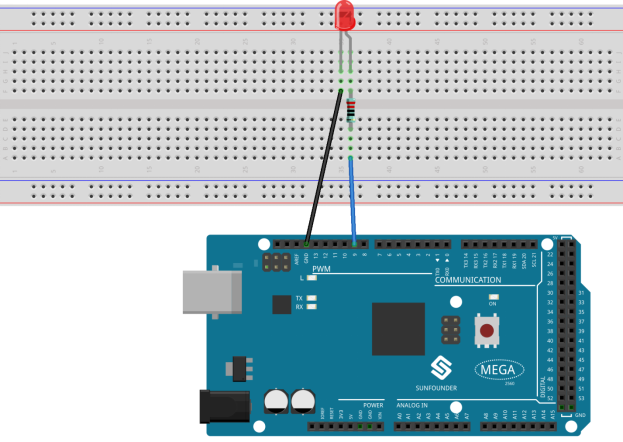
In this example, we use digital pin 9 to drive the LED, and we attach one side of the resistor to the corresponding digital pins. The longer pin of LED (a positive electrode, referred to as anode) is connected to the other side of the resistor. The shorter pin (a negative electrode, referred to as cathode) of LED is attached to GND.
Schematic Diagram

Code
const int ledPin =  9;
int ledState = LOW;
unsigned long previousMillis = 0;
const long interval = 1000;

void setup()
{
  pinMode(ledPin, OUTPUT);
}

void loop()
{
  unsigned long currentMillis = millis();
  if (currentMillis - previousMillis >= interval)
  {
    previousMillis = currentMillis;// save the last time you blinked the LED
    if (ledState == LOW)
    {
      ledState = HIGH;
    }
    else
    {
      ledState = LOW;
    }
    digitalWrite(ledPin, ledState);
  }
}
When you finish uploading the codes to the Mega2560 board, you can see the LED uploading.
Code Analysis
Declare the digital pin 9 as ledPin.
const int ledPin = 9;Set the state of ledState to LOW to turn off the LED.
int ledState = LOW;Initial a variable named previousMillis to store previous operating time of microcontroller.
unsigned long previousMillis = 0; Set the interval time to 1000ms (milliseconds).
const long interval = 1000; Set ledPin to OUTPUT mode.
pinMode(ledPin, OUTPUT);In loop(), declare currentMillis to store the current time.
unsigned long currentMillis = millis();When the interval between the current operating time and last updating time is larger than 1000ms, certain functions are triggered. Meanwhile, update the previousMillis to the current time for the next triggering that is to happen 1 second latter.
if (currentMillis - previousMillis >= interval)
{
    previousMillis = currentMillis;// save the last time you blinked the LED
    //...
}
Here, certain functions executed at intervals are to change the state of LED.
if (ledState == LOW)
{ledState = HIGH;}
else
{ledState = LOW;}
digitalWrite(ledPin, ledState);
Phenomenon Picture