Can’t wait to have a try now? Woo, just hold on. Let’s get to know its code-editing software, namely the Arduino IDE first. Just like the Arduino board, the Arduino IDE is also open source. You can download on this page: https://www.arduino.cc/en/Main/Software.
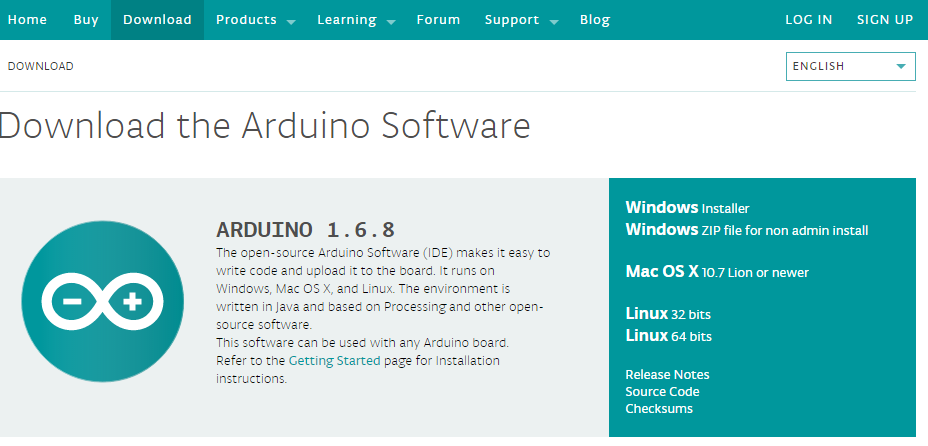
The Arduino IDE is a code editor with powerful functions which is easy to use. It runs on Windows, Mac OS X and Linux. The environment is written in Java and based on Processing and other open source software. The IDE can be used with any Arduino board.
2.2.1 Install IDE on Windows
There are two choices for Windows version: Installer or ZIP file. You’re recommended to use the Installer since it will automatically install the driver for Arduino IDE installation. So you can just download it and run the executable file to begin installation. If you download the zip file, you need to unzip it and install the driver by yourself.
2.2.2 Install the IDE (Installer)
Step 1: Find the .exe file just downloaded

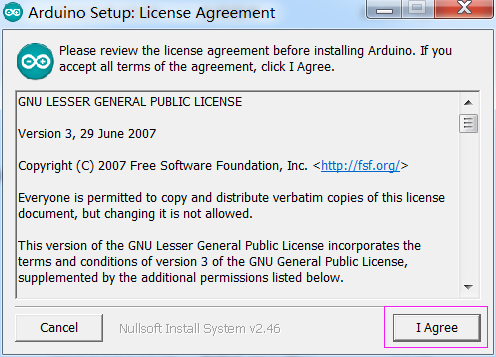
Step 2: Double click the file and a window will pop up as below. Click I Agree.
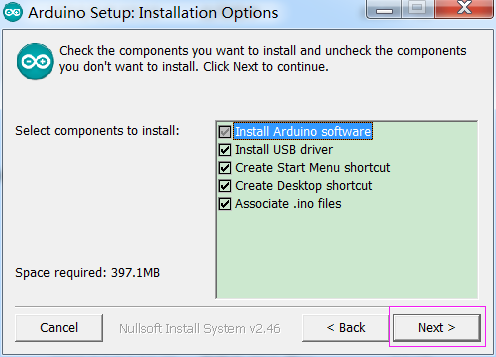
Step 3: Click Next.
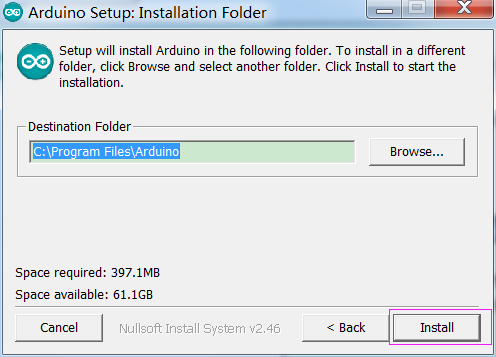
Step 4: Select the path to install. By default, it’s set in the C disk: C:\Program Files\Arduino. You can click Browse and choose another path. Click OK. Then click Install.
Step 5: After the installation is done, click Close.
For the installation and usage for Linux and Mac OS X, please refer to WIKI on our website:
2.2.3 Plug in the Board
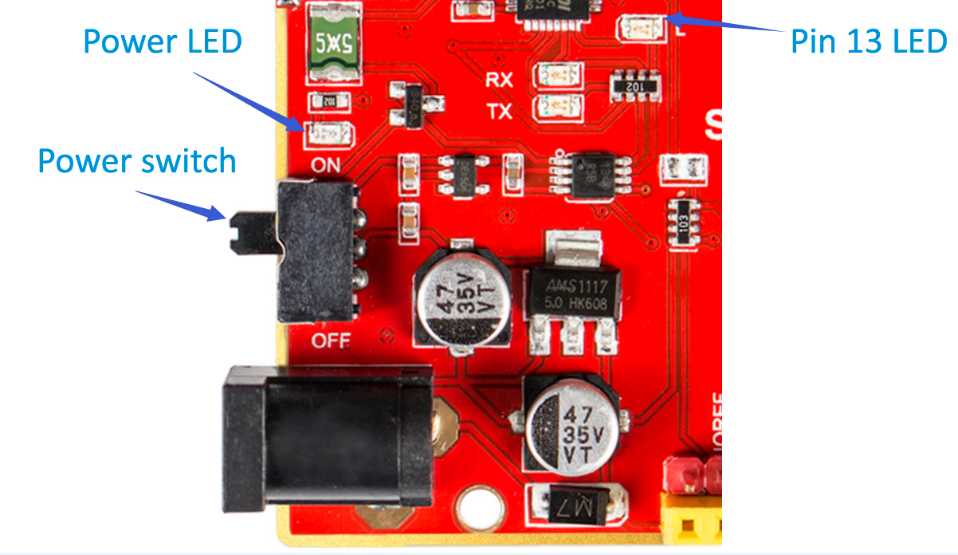
Connect the board to your computer via a USB Type-C cable. Now you need to know whether the power switch is ON or OFF. Observe whether the green LED, namely the power indicator, brightens or not and that the LED connected to pin 13 blinks slowly. If yes, it means the switch is pushed at ON state. The USB connection with the PC is necessary to program the board and not just to power it up.
If you’ve downloaded the Windows Installer, when you plug the board into the computer, the system will install the driver automatically. After a while, there may appear a prompt message (some computers may not prompt), which means the driver is installed successfully.
You can check the port which the board is connected to, by going to Device Manager -> Ports. Then you can see USB Serial Port (COMx) (x means the port number. E.g. In my computer it’s COM50; but yours should be different). If this appears, it means your computer have recognized the board.

2.2.4 Know the IDE
Double click the Arduino icon (arduino.exe) created by the installation process. After opening the IDE, an empty program will be created automatically and its name is temporarily the current date. We’re going to learn more about the IDE in the following part and you can check it later.
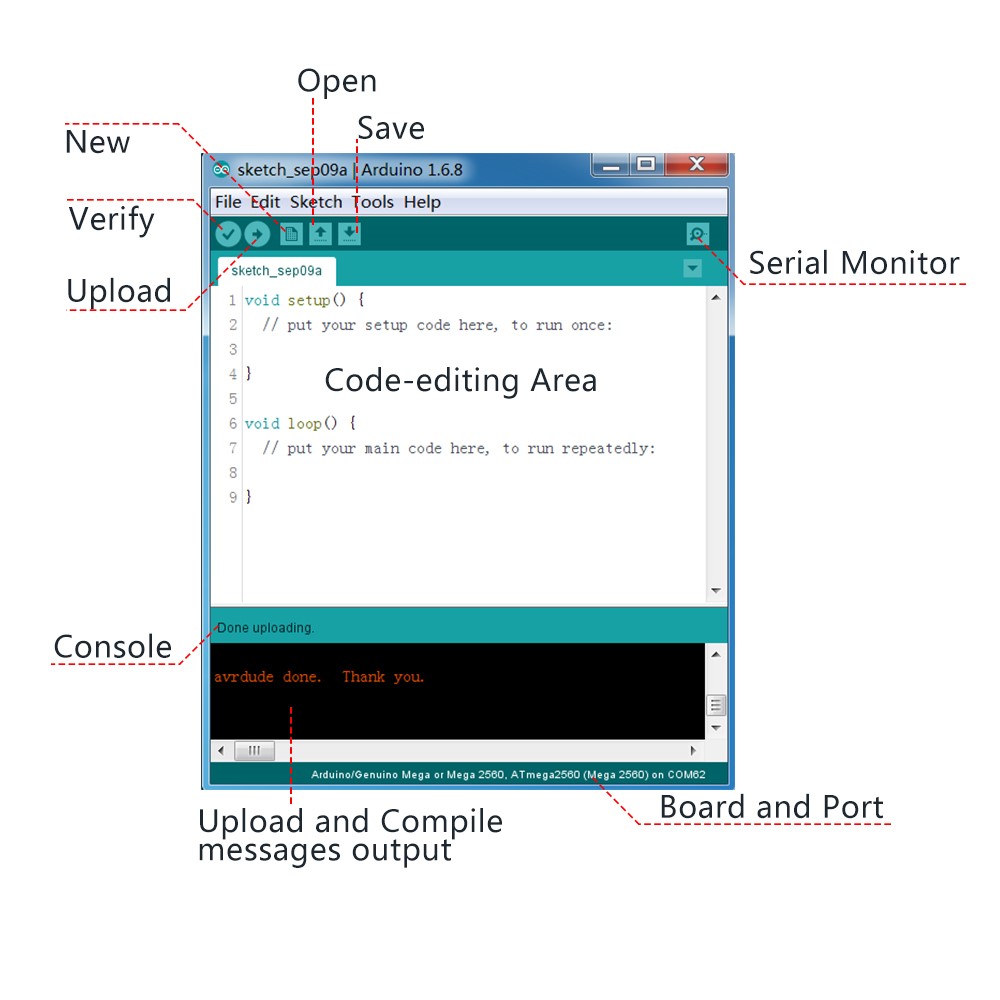
Code-editing Area: Both setup () and loop () functions must be included in this area. You can see in the figure above.
Verify—Compile your code. Any syntax problem will be prompted with errors.
Upload—Upload the code to your board. When you click the button, the RX and TX LEDs on the board will flicker fast and won’t stop until the upload is done.
New— Create a new code editing window.
Open—Open an .ino sketch.
Save—Save the sketch.
Serial Monitor—Click the button and a window will appear. It receives the data sent from your control board. It is very useful for debugging and we’ll see details in the lessons later.
File: Click the menu and a drop-down list will appear, including file creating, opening, saving, closing, some parameter configuring, etc.
Edit: Click the menu. On the drop-down list, there are some editing operations like Cut, Copy, Paste, Find, and so on, with their corresponding shortcuts.
Sketch: Includes operations like Verify, Upload, Add files, etc. More important function is Include Library – where you can add libraries.
Tool: Includes some tools – the most frequently used Board (the board you use) and Port (the port your board is at). Every time you want to upload the code, you need to select or check them.
Help: If you’re a beginner, you may check the options under the menu and get the help you need, including operations in IDE, introduction information, troubleshooting, code explanation, etc.
Console: In this message area, no matter when you compile or upload, the summary message will always appear.
Detailed messages during compile and upload. For example, the file used lies in which path, the details of error prompts.
Board and Port: Here you can preview the board and port selected for code upload. You can select them again by Tools -> Board / Port if any is incorrect.