Introduction
In this experiment, we will learn how to control the direction and speed of a small-sized DC motor by a driver chip L293D. Making simple experiments, we will just make the motor rotate left and right, and accelerate or decelerate automatically.
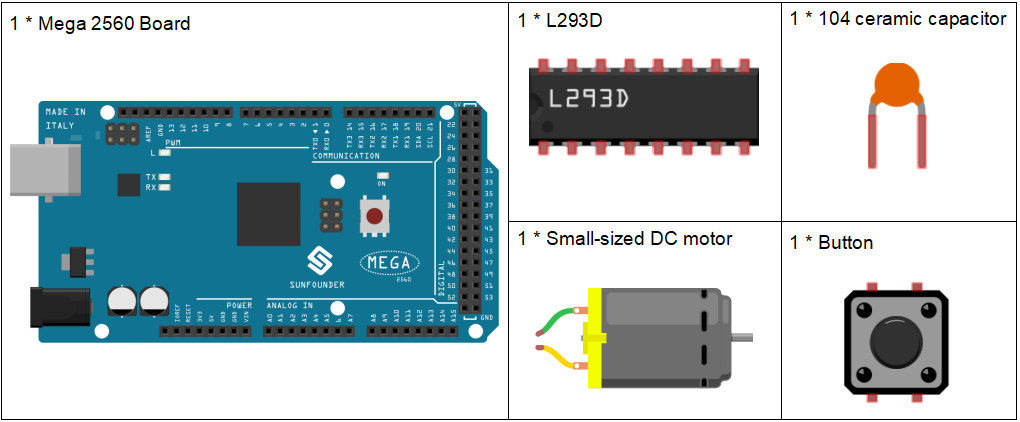
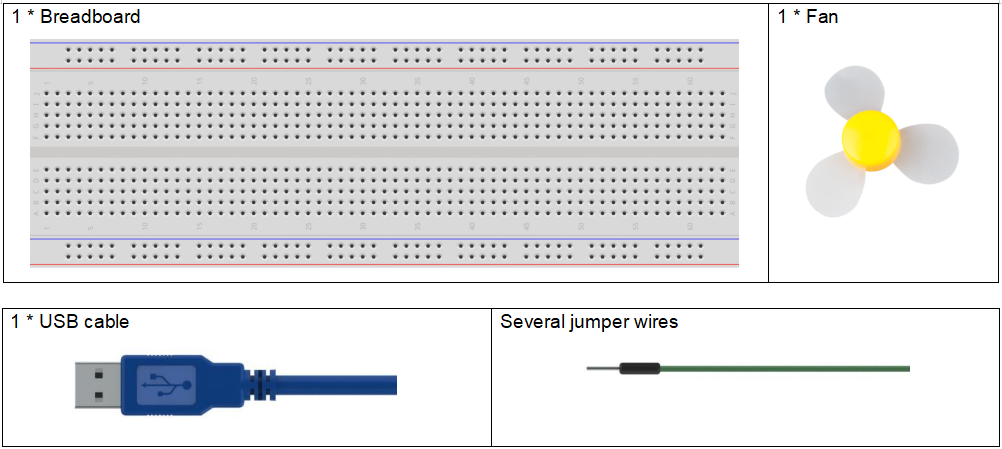
Components
Experimental Principle
The maximum current of an Arduino I/O port is 20mA but the drive current of a motor is at least 70mA. Therefore, we cannot directly use the I/O port to drive the current; instead, we can use an L293D to drive the motor.
L293D
L293D is designed to provide bidirectional drive currents of up to 600mA at voltages from 4.5V to 36V. It’s used to drive inductive loads such as relays, solenoids, DC and bipolar stepping motors, as well as other high-current/high-voltage loads in positive-supply applications.
See the figure of pins below. L293D has two pins (Vcc1 and Vcc2) for power supply. Vcc2 is used to supply power for the motor, while Vcc1, for the chip. Since a small-sized DC motor is used here, connect both pins to +5V. If you use a higher power motor, you need to connect Vcc2 to an external power supply.
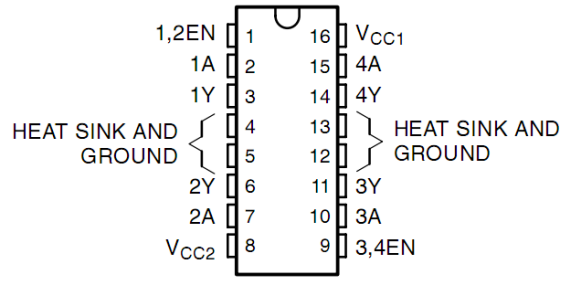
Pin EN is an enabling pin and works with High level. A stands for input and Y for output. When pin EN is High level, if A is High, Y outputs High level; if A is Low, Y outputs Low level. When pin EN is Low level, the L293D does not work. It just needs to drive one motor in this experiment, so here use one side of the L293D.
DC Motor
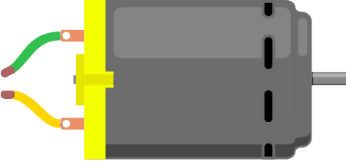
This is a 5V DC motor. Give the two terminals of the copper sheet one high and one low level, and the motor will rotate. For convenient purposes, you can weld the pins to it.
Size: 25*20*15MM Free-run speed (3V): 13000RPM
Stall current (3V): 800 mA Shaft diameter: 2 mm
Operation Voltage: 1-6V Free-run current (3V): 70 mA
Principle:
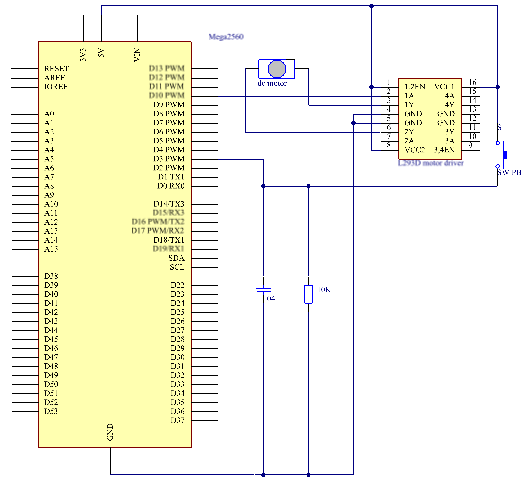
The Enable pin 1,2EN of the L293D are connected to 5V already, so L293D is always in the working state. Connect pin 1A and 2A to pin 9 and 10 of the control board respectively. The two pins of the motor are connected to pin 1Y and 2Y respectively. When pin 10 is set as High level and pin 9 as Low, the motor will start to rotate towards one direction. When the pin 10 is Low and pin 9 is High, it rotates in the opposite direction.
The schematic diagram:
Experimental Procedures
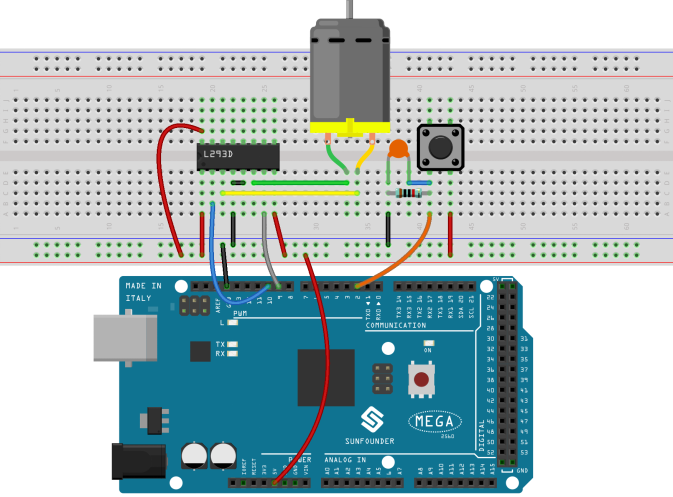
Step 1: Build the circuit
Step 2: Open the code file.
Step 3: Select the Board and Port.
Step 4: Upload the sketch to the board.
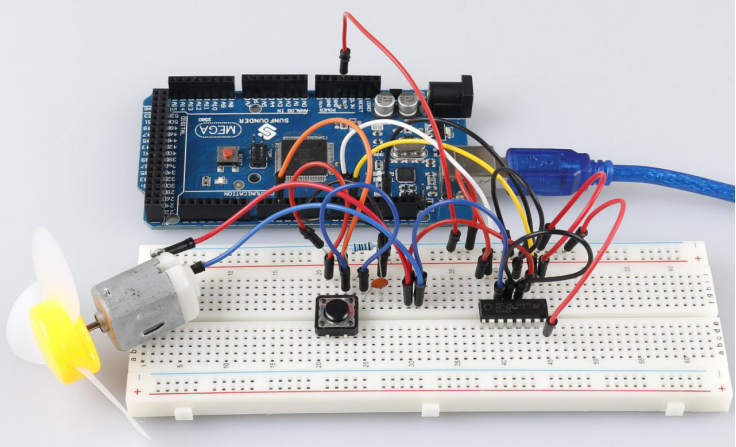
The blade of the DC motor will begin rotating left and right, in a speed that varies accordingly.
Code Analysis
Code Analysis 24-1 Workflow of the Small Fan
void loop()
{
  // read the state of the switch into a local variable:
  int reading = digitalRead(buttonPin);
  if (reading != lastButtonState)    // If the button state is different from last time
  {
    lastDebounceTime = millis();     // reset the debouncing timer
  }
  if((millis() - lastDebounceTime) > debounceDelay)// Determine whether the button has been pressed for over 50ms to prevent signal generated due to accidental touch.
  {
    if (reading != buttonState)      // If it’s over 50ms and reading does not equal to buttonState, it indicates the button state has changed.
    {
       buttonState = reading;        //Store the state of button in buttonState
       if (buttonState == HIGH)      // If buttonState is high level, it means the button has been pressed.
       {
         digitalWrite(ledPin, HIGH); //turn on the LED
         stat = stat + 1;
         if(stat >= 4)               //when stat>=4,set it as 0
         {
            stat = 0;
         }
       }
       else   //else, turn off the LED. When you press the button, the LED will light up and it goes out when you release the button.
        digitalWrite(ledPin, LOW);
    }
}

// The rotational speed is different when the button is pressed at different times.
  switch(stat)
  {
  case 1:
    clockwise(rank1);// When stat=1, set the rotate speed of the motor as rank1=150
    break;
  case 2:
    clockwise(rank2);// When stat=2, set the rotate speed of the motor as rank1=200
    break;
  case 3:
    clockwise(rank3);// When stat=3, set the rotate speed of the motor as rank1=250
    break;
  default:
    clockwise(0);
  }
  // save the reading.  Next time through the loop,
  // it'll be the lastButtonState:
  lastButtonState = reading;
Code Analysis 24-2 clockwise() function

This function is to set the rotational speed of the motor: write Speed to pin 9 and 0 to pin 10. The motor rotates towards a certain direction and the speed is the value of Speed.
Experiment Summary
In this experiment, you can also control the motor to rotate or not. Just connect pin 1, 2EN of the L293D to an I/O port of the control board. Set 1, 2EN as High level, and the motor will start rotating; set it as Low level, it will stop the rotating.
