Introduction
Servo is a type of geared motor that can only rotate 180 degrees. It is controlled by sending electrical pulses from your SunFounder Uno board. These pulses tell the servo what position it should move to.
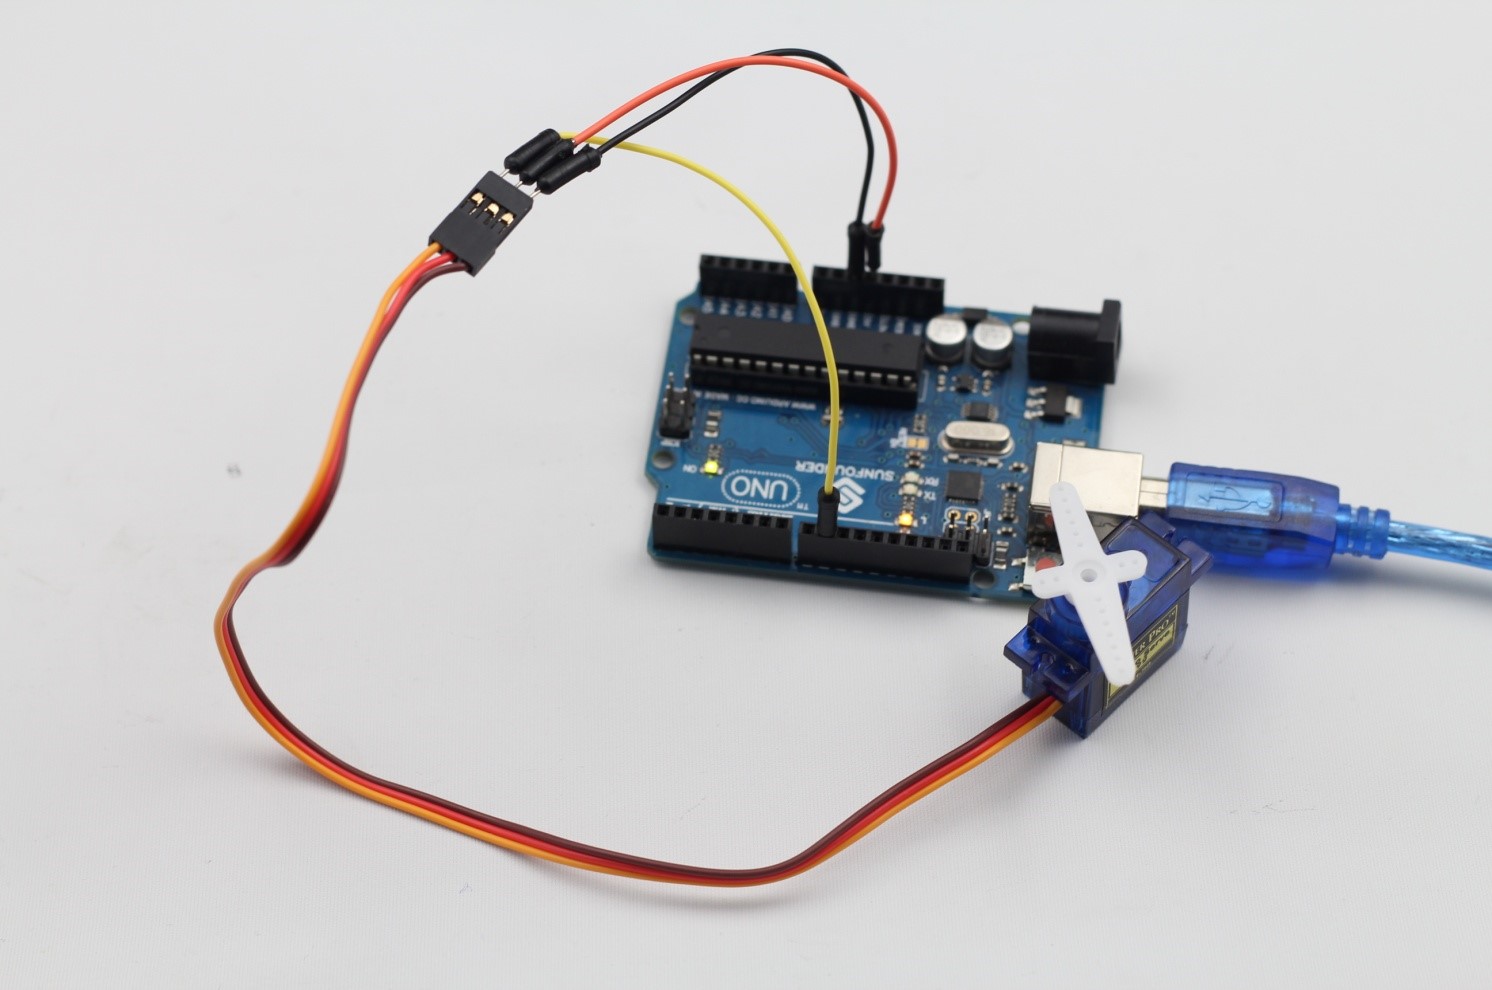
A servo has three wires, the brown wire is GND, the red one is VCC, and the orange one is signal line.
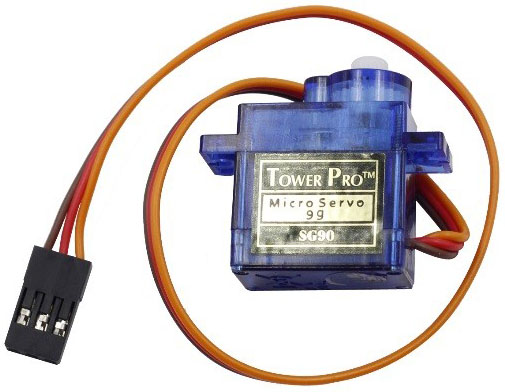
Components
– 1 * SunFounder Uno board
– 1 * USB data cable
– 1 * Servo
– Several jumper wires
Experimental Principle
Servo consists of shell, circuit board, non-core motor, gear and location detection. Its working principle is as follows: SunFounder Uno board sends PWM signal to servo motor, and then this signal is processed by IC on circuit board to calculate rotation direction to drive the motor, and then this driving power is transferred to swing arm by reduction gear. At the same time, position detector returns location signal to judge whether set location is reached or not.
Experimental Procedures
Step 1: Build the circuit
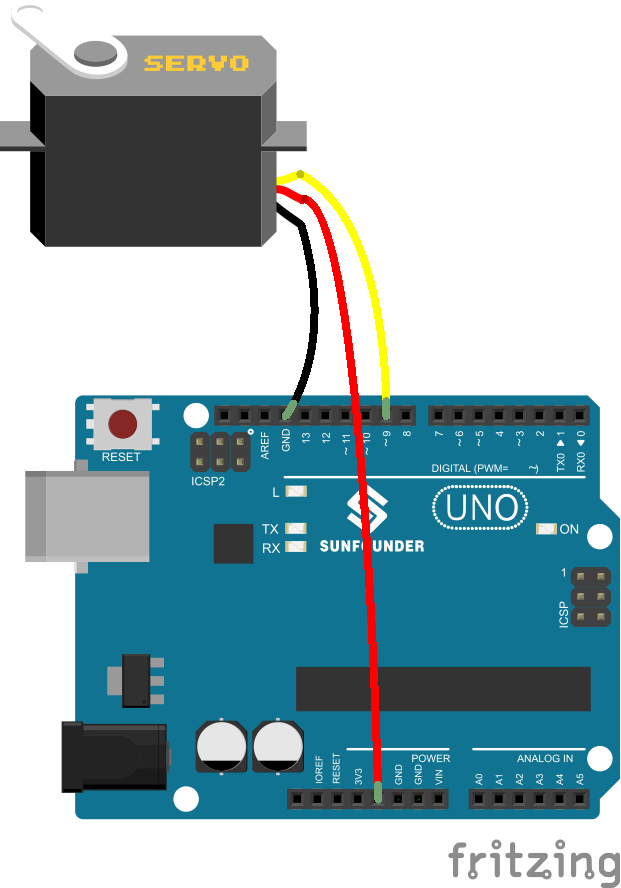
The schematic diagram
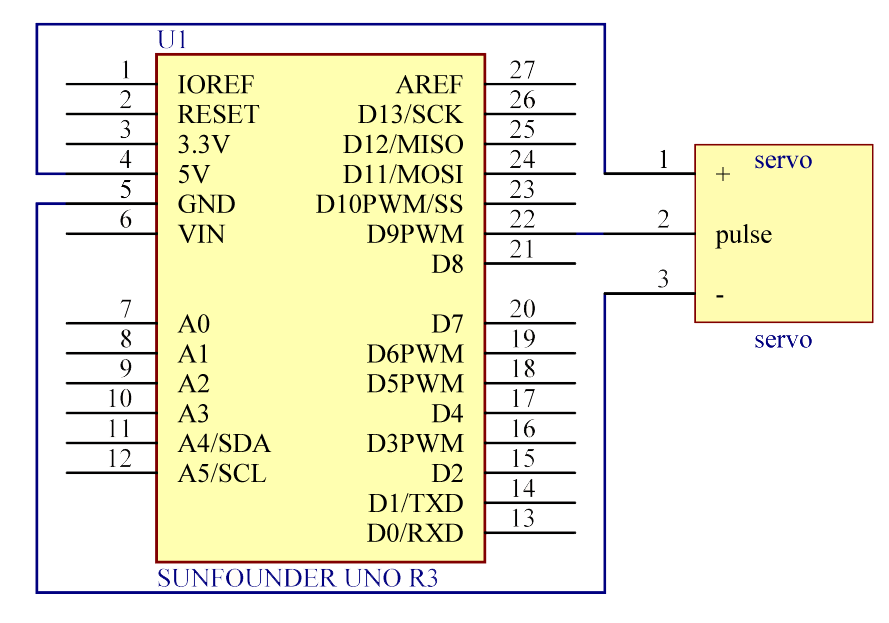
Step 2: Program (Please refer to the example code in LEARN -> Get Tutorials on our website)
Step 3: Unzip the downloaded file. Copy the folder under the Library folder to the libraries folder in Arduino (if you cannot find the path in Arduino, open Arduino IDE, click File ->Preferences, and you can see the path in the Browse box, as shown in the following diagram). Compile the program.
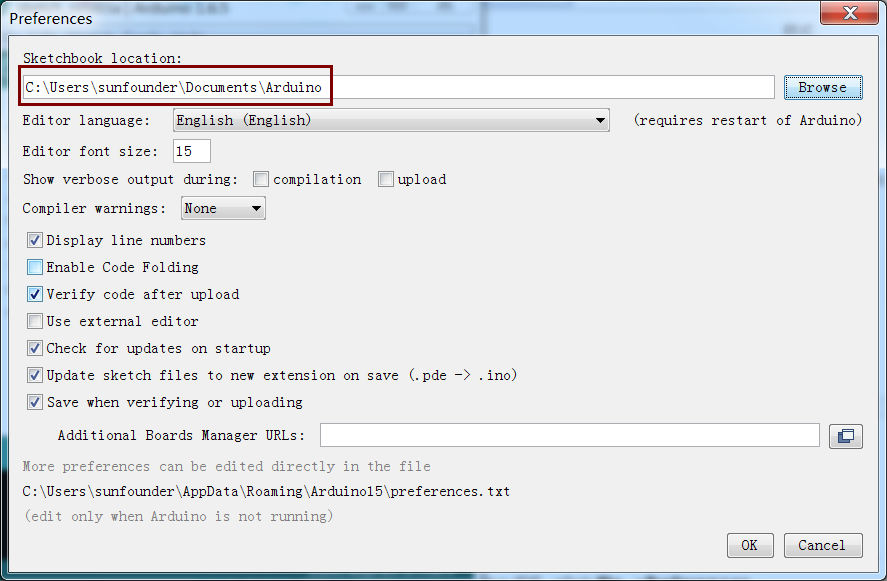
Step 4: Burn the program into the SunFounder Uno board
Now, you can see the servo motor rotate 90 degrees (rotate once every 15 degrees). And then rotate in the opposite direction.
Code
| /*********************************************** * name:Servo * function:you can see the servo motor rotate 90 degrees (rotate once every 15 degrees). * And then rotate in the opposite direction. ************************************************/ //Email: support@sunfounder.com //Website: www.sunfounder.com#include <Servo.h> /************************************************/ Servo myservo;//create servo object to control a servo /************************************************/ void setup() { myservo.attach(9);//attachs the servo on pin 9 to servo object myservo.write(0);//back to 0 degrees delay(1000);//wait for a second } /*************************************************/ void loop() { myservo.write(15);//goes to 15 degrees delay(1000);//wait for a second myservo.write(30);//goes to 30 degrees delay(1000);//wait for a second.33 myservo.write(45);//goes to 45 degrees delay(1000);//wait for a second.33 myservo.write(60);//goes to 60 degrees delay(1000);//wait for a second.33 myservo.write(75);//goes to 75 degrees delay(1000);//wait for a second.33 myservo.write(90);//goes to 90 degrees delay(1000);//wait for a second myservo.write(75);//back to 75 degrees delay(1000);//wait for a second.33 myservo.write(60);//back to 60 degrees delay(1000);//wait for a second.33 myservo.write(45);//back to 45 degrees delay(1000);//wait for a second.33 myservo.write(30);//back to 30 degrees delay(1000);//wait for a second.33 myservo.write(15);//back to 15 degrees delay(1000);//wait for a second myservo.write(0);//back to 0 degrees delay(1000);//wait for a second } /**************************************************/ |
Video
