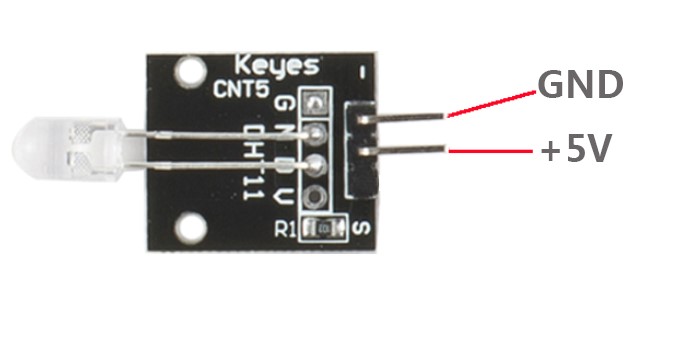
Introduction
On the 7-Color Auto-flash LED module, the LED can automatically flash built-in colors after power on. It can be used to make quite fascinating light effects.

Components
– 1 * Raspberry Pi
– 1 * Network cable (or USB wireless network adapter)
– 1 * 7-color auto-flash LED module
– Jumper wires
Experimental Principle
When it is power on, the 7-color auto-flash LED will flash built-in colors.
Experimental Procedures
Build the circuit
7-color auto-flash LED Module Raspberry Pi
S ———————————— 5V
– ———————————– GND
Note: Here just use the Raspberry Pi for power supply.
Now, you can see the 7-color auto-flash LED flashing seven colors.

C Code
#include <wiringPi.h>
#include <stdio.h>

#define LedPin    0


int main(void)
{
	if(wiringPiSetup() == -1){ //when initialize wiring failed,print messageto screen
		printf("setup wiringPi failed !");
		return 1;
	}
	//printf("linker LedPin : GPIO %d(wiringPi pin)\n",LedPin); //when initialize wiring successfully,print message to screen

	pinMode(LedPin, OUTPUT);

	while(1){
		digitalWrite(LedPin, 1);
	}

	return 0;
}
Python Code
#!/usr/bin/env python
import RPi.GPIO as GPIO
import time

LedPin = 11    # pin11

def setup():
	GPIO.setmode(GPIO.BOARD)       # Numbers GPIOs by physical location
	GPIO.setup(LedPin, GPIO.OUT)   # Set LedPin's mode is output
	GPIO.output(LedPin, GPIO.HIGH) # Set LedPin high(+3.3V) to off led

def loop():
	while True:
		GPIO.output(LedPin, GPIO.LOW)  # led on
		time.sleep(0.5)
		GPIO.output(LedPin, GPIO.HIGH) # led off
		time.sleep(0.5)

def destroy():
	GPIO.output(LedPin, GPIO.HIGH)     # led off
	GPIO.cleanup()                     # Release resource

if __name__ == '__main__':     # Program start from here
	setup()
	try:
		loop()
	except KeyboardInterrupt:  # When 'Ctrl+C' is pressed, the child program destroy() will be  executed.
		destroy()
