Introduction
In this lesson, we use the 2ch Line Follower module on the car to monitor the road condition. The edge of the table was used to simulate the cliff situation. When driving to the edge of the table, the infrared reflection received is 0 and the car stops.
Programming Steps
Step 1
Click Variables category, then click the Create Variable button so as to create four variables: leftVal, rightVal, reference, and speed.
Step 2
Click the Simulation icon on the left of the page to enter the Simulation page.

Step 3
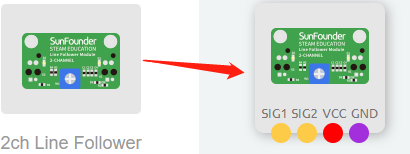
In the left module category, drag the 2ch Line Follower module to the right part.
Step 4
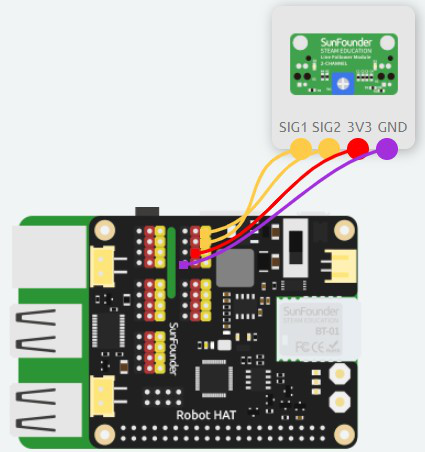
Connect SIG1 of 2ch Line Follower to A1 port, SIG2 to A0 port, and then connect 3V3 and GND to 3.3V and GND of Robot HAT.
Step 5
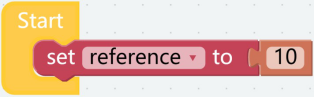
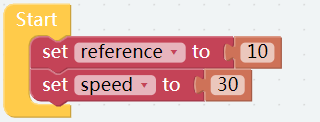
Click Variables category, then drag set leftVal to block into Start block. And click the middle drop-down box to change the leftVal to “ reference ”, followed by a number block (0 block).
Step 6
Similarly, initialize the speed to 30.
Step 7
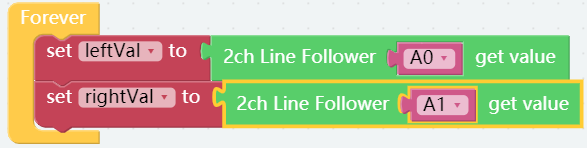
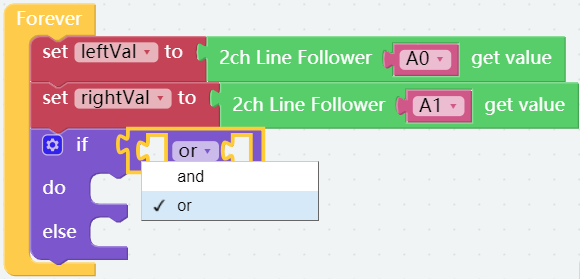
Click Variables category, then drag set leftVal to block into Forever block.

Step 8
Click Modules category and drag 2ch Line Follower A0 get value block to behind the set leftVal to block. Let the read value of the left line follower sensor be assigned to leftVal.

Step 9
Similarly, assign the read value of the right line follower sensor to the variable, rightVal.
Step 10
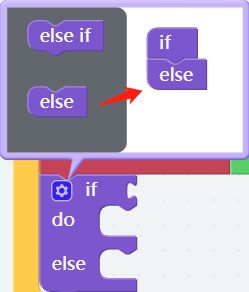
Click Logic category for dragging an if do block to below the set rightVal to block, and click setting icon to add an else block to the area below the if block, which is to change it into if else block.
Note: Click setting icon again to close the pop-up windows.
Step 11
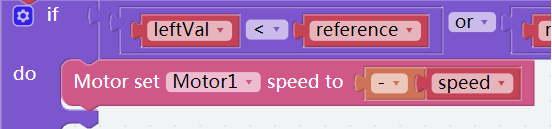
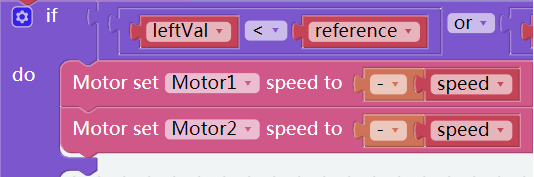
In the Logic category, drag out an and block to the area behind the if block, and click the drop-down box to select “or”.
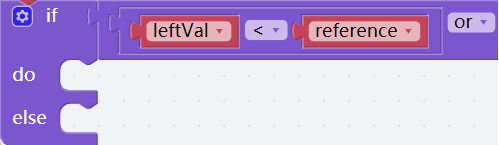
Step 12
Place a Comparison Operator ( = ) block on the left side of the or block; after that, change the value to <. Place a leftVal block under the Variables category on the left side of the or block and a reference block on the right.
Step 13
Similarly, on the right side of the or block, create a judgment condition: if rightVal is less than reference.

Step 14
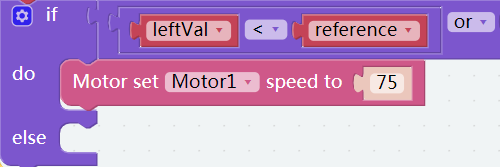
Click into the PiMobile category and drag the Motor set Motor1 speed to 75 block to the do block.
Step 15
Click on Math category, then drag a square root 9 block to the Motor set Motor1 speed to block, and click on the drop-down box and choose “–”.
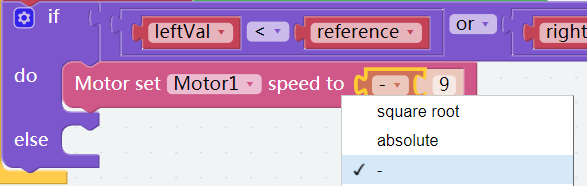
Step 16
Put a speed block after the Comparison Operator (-) block.
Step 17
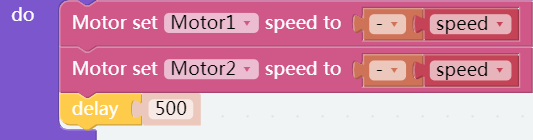
Set the speed of Motor2 to -speed as well.
Step 18
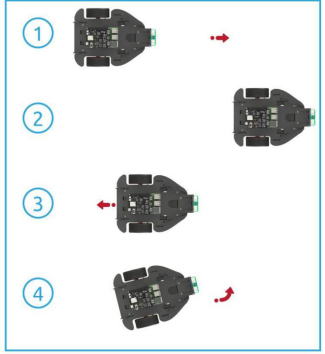
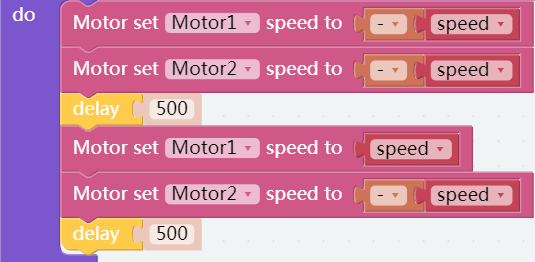
Click Basic category again so as to add a delay block, and change the value to 500. That is, when the front is a cliff, the car go backward for 500m at once.
Step 19
Likewise, after go backward 500 ms, then let the car to turn left.
Step 20
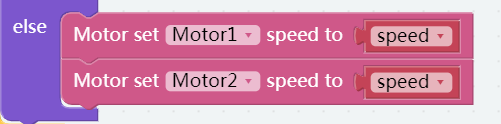
If no cliff is detected, let the car keeping moving forward.
Step 21
So that’s the end of our codes. Save the project and flash it into the Raspberry Pi (refer to lesson 0 for details).