Introduction
In the previous courses, we learned about remote control car and obstacle avoidance car. In this lesson, we will try to combine these two functions, so that we can control the car remotely by using Bluetooth when the sensor detects no obstacle on the road ahead; if the sensor detects obstacles, the car will get around obstacles instead.
Programming Steps
Step 1
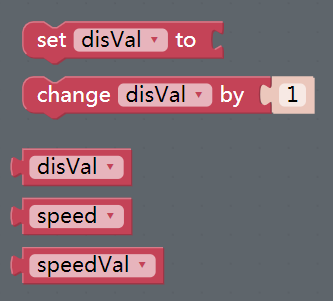
After create a new project, click Create variable button in Variables category to create 3 variables: speed, speedVal and disVal.
Step 2
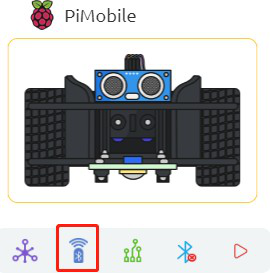
Click the Simulation icon on the left of the page to enter the Simulation page.

Step 3
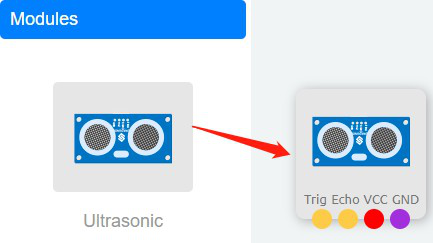
In Modules category on the left, drag Ultrasonic module to the right area.
Step 4
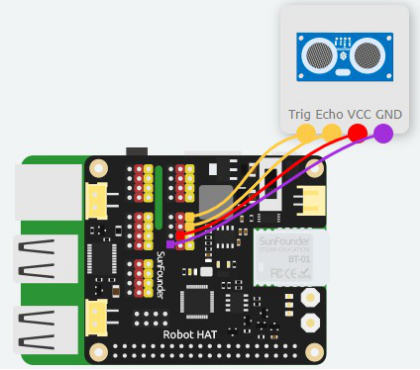
Connect Trig pin of Ultrasonic module to D0 port, Echo pin to D1 port, and connect VCC and GND to 3.3V and GND of Robot HAT respectively.
Step 5
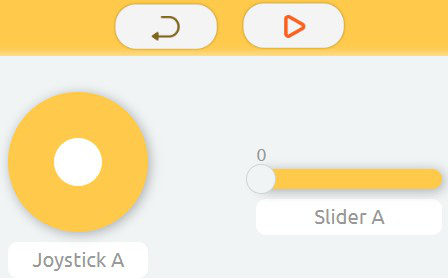
Back to Programming page, then click the Remote Control icon on the left side of the page. Enter the Remote Control page, and add virtual controllers to the car.
Step 6
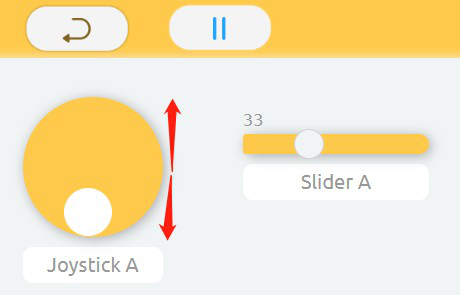
In the control category on the left, drag a Joystick and a Slider to the right area.
Step 7
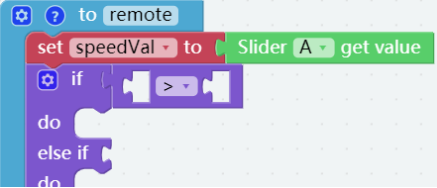
Return to Programming page, and create a function named remote to control the car.

Step 8
Assign the value of the Slider to the variable, speedVal.

Step 9
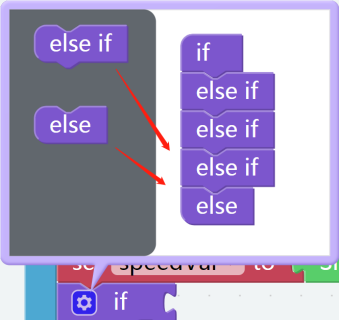
Place an if do block under set speedVal to block and add 3 else if blocks and 1 else block below the if block.
Step 10
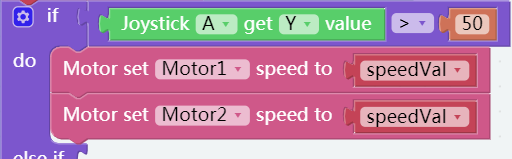
Put a Comparison Operator ( = ) block in the if block and change the equals sign to greater than sign.
Step 11
Use the Joystick block in the Remote category and a number 0 block to create a judgment condition whether the read value on the Joystick Y axis is greater than 50.
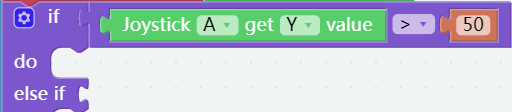
Step 12
If the conditions in if are met, let both Motor1 and Motor2 go forward at the speed that is set on Slider.
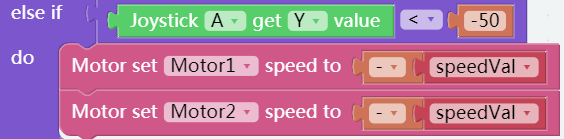
Step 13
In the first else if block, if the reading value on the Joystick Y axis <-50, let the car move back at the speed that is set on Slider.
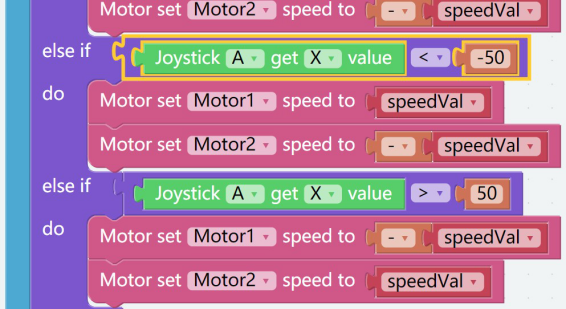
Step 14
In the second and third else if, the reading on the Joystick X axis is set to control the left and right turn of the car.
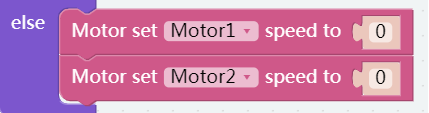
Step 15
Finally, stop the car in the else.
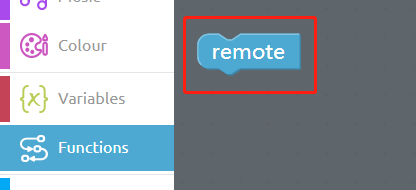
Step 16
So that’s the end of our remote function. In the Function category, you can find an extra remote block, with which you can get codes inside the Function category.
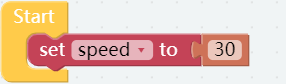
Step 17
Go back to Programming page, then assign the value of the speed to 30 in Start block.
Step 18
Click on Remote category, and drag a read from remote block into Forever block.

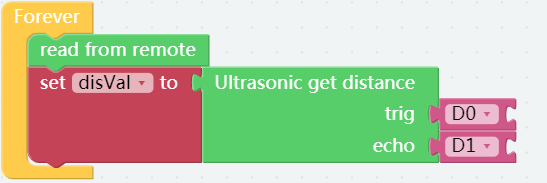
Step 19
Assign the read value of the ultrasonic sensor to the variable, disVal.
Step 20
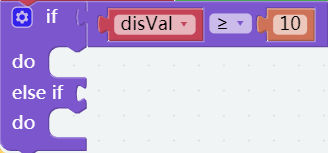
Place an if do block under the set disVal to block and add an else if block in Setting.

Step 21
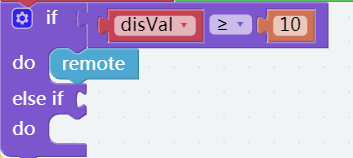
Build a block after if to judge whether disVal ≥ 10.
Step 22
Then put a remote block in do block. When no obstacle in front is found, let the car be in the remote control state.
Step 23
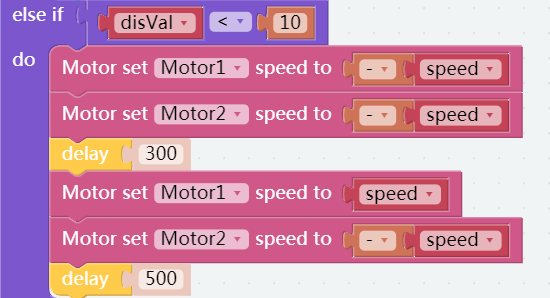
If disVal < 10, let the car perform obstacle avoidance function (Go backward firstly and then turn left).
Step 24
At this point, our codes are done, Save the project and flash it into the Raspberry Pi. Use Joystick to control the direction of the car. When the distance from the obstacle is less than 10cm, the car will perform the function of automatic obstacle avoidance.