Introduction
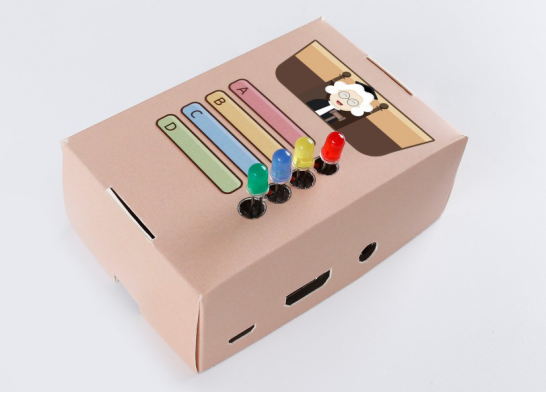
In this lesson, we will apply the remote control function we learned in the fifth lesson of the basics to create a four-person responder. You can write the name of you and your friends in the blank space of the cardboard to simulate the scene of quiz.
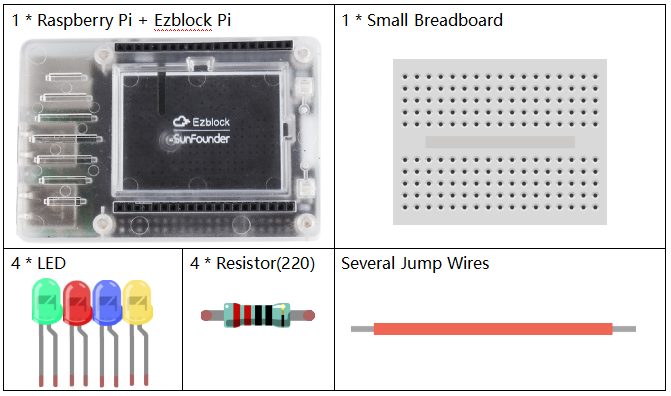
Components
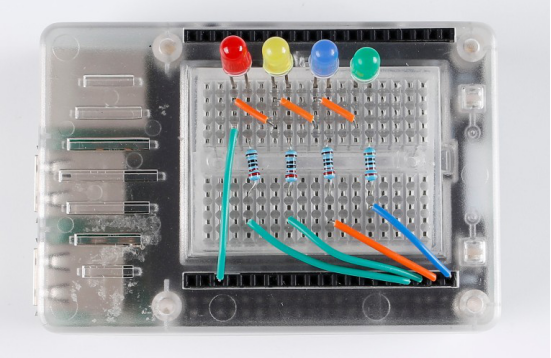
![]() Circuit
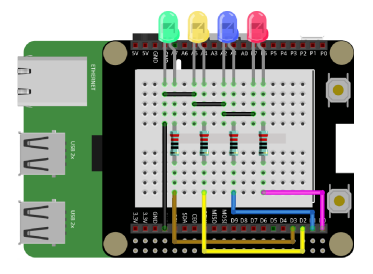
Circuit
Since we use the buttons on the APP, we only need to connect four LEDs and current- limiting resistors to D0~D3.
Programming Steps
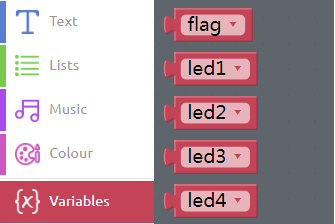
Step 1
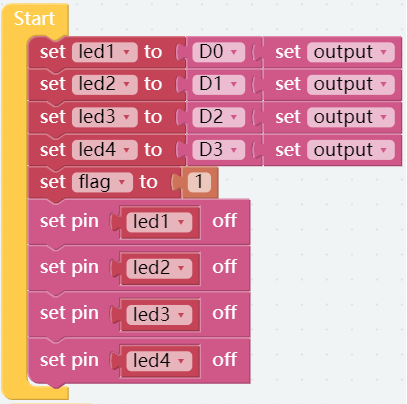
After creating the project, click Create variable button to create 5 variables: led1, led2, led3, led4 and flag.
Step 2
Initialize the LEDs to output. Then initialize flag to 1. Set the initial state of all lights to off.
Step 3
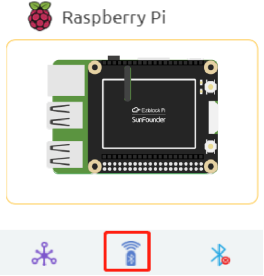
In this case, we use the buttons in the APP. Click the Remote Control button on the left panel to enter the Remote Control page.
Step 4
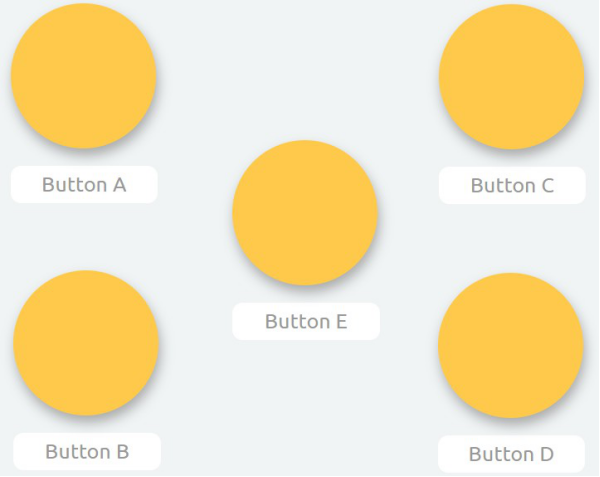
Drag 5 buttons from the left column to the right area.
Step 5
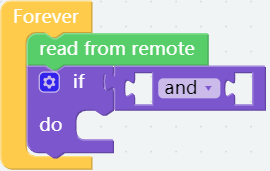
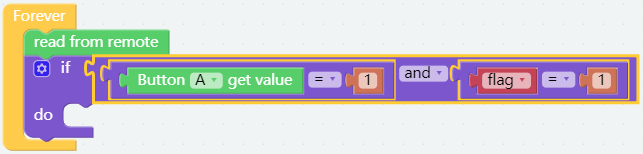
Drag the read from the remote block into the Forever block to continuously read the values of 5 buttons on the Remote Control page.

Step 6
Add an if do block and and block to Forever to create judgment conditions.
Step 7
Drag 2 Comparison Operator ( = ) blocks from the Logic category to the and block. Then create judgement conditions as follows.
Step 8
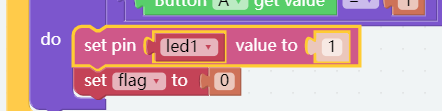
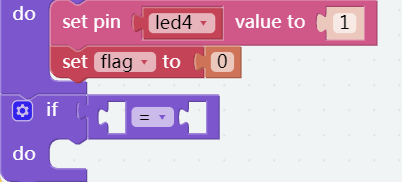
In do, set the value of led1 to 1, which represents the light is on. And assign the value of flag to 0 so that when other buttons are pressed, the corresponding lights will not light up again.
Step 9
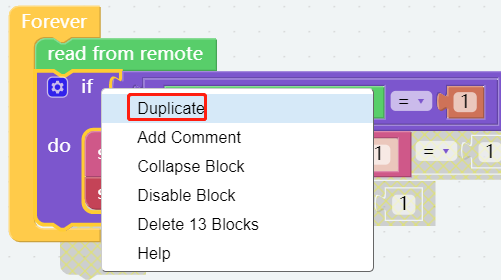
Long press the if do block then click the Duplicate button to copy 3 same combined blocks.
Step 10
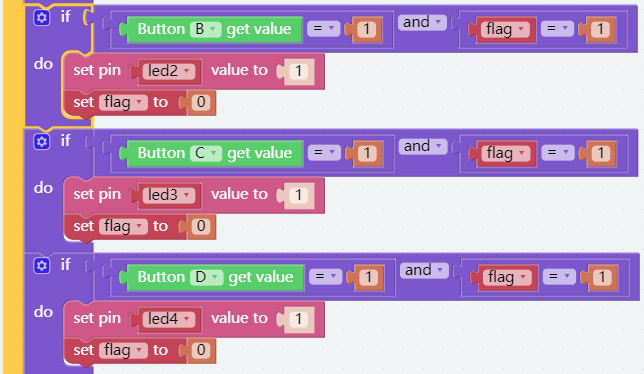
Change the Button A to B, C and D, then change the led1 to led2, led3 and led4.
Step 11
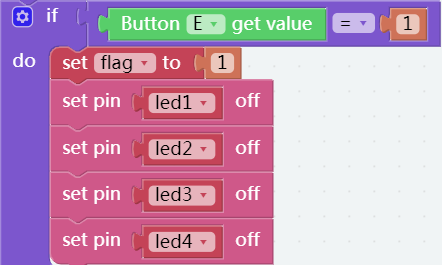
Add another if do block at the bottom followed by a Comparison Operator ( = ) block used to judge the state of the reset button( button E).
Step 12
In the Comparison Operator ( = ) block, the Button E get value block and the number 0 block are placed, which means that if the button E is equal to 1, the reset button is pressed.

Step 13
Place the set flag to block and set pin D0 off block in do. Assign the value of flag to 1 and turn off all lights.
Step 14
Save the project and flash it into the Raspberry Pi (refer to lesson 0 for details). Then you can simulate a nervous answering scene with your friends!
Fold Cardboard
Step 1
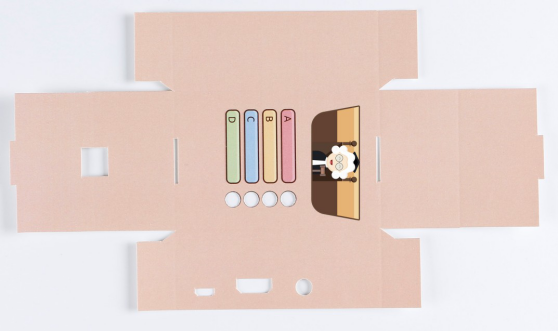
Get the matching cardboard of this lesson.
Step 2
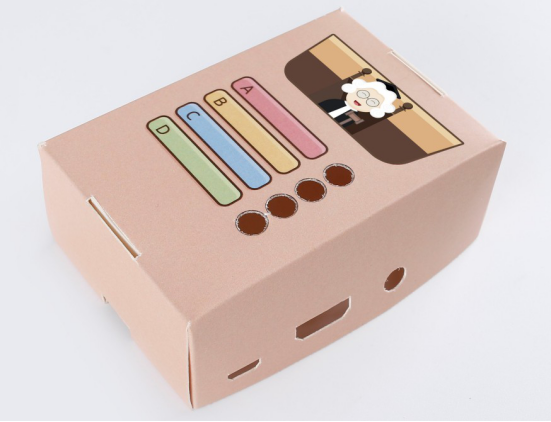
Based on the creases, fold the cardboard into the cube as shown.
Step 3
Build the circuit as follows. Please do NOT change the position of components optionally when building circuits, in case the card cannot be installed.
Step 4
Get the cube of cardboard mounted on the circuit as shown.