Introduction
In this lesson, we are going to make a music box to listen to for Elise.
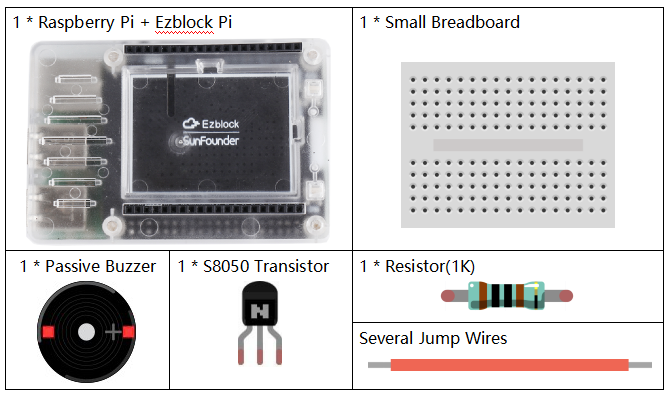
Components
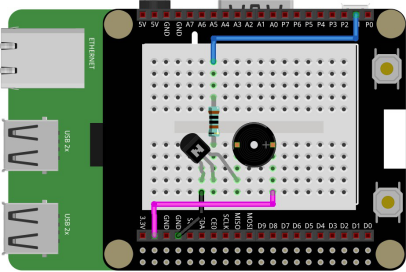
Circuit
Connect a buzzer to P1 by using a triansistor, and program the buzzer to play for Elise.
Programming Steps
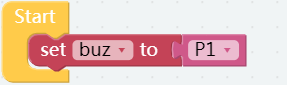
Step 1
After creating the project, click Variables category to create a variable, buz and then set buz to P1 that is changed from P0.
Step 2
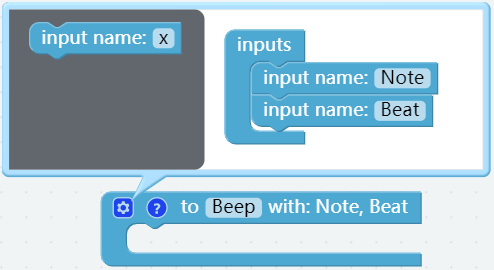
Drag a to do something block from the Functions category into the code area then add 2 input name x blocks. After that, name the function Beep and change the 2 x to Note and Beat respectively.
Step 3
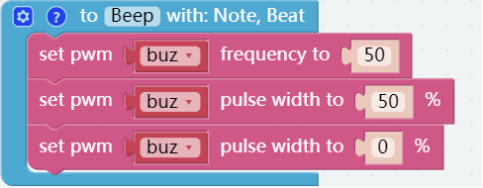
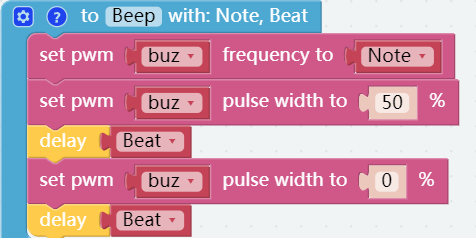
Under PWM subclass of Raspberry Pi, find a set pwm P0 frequency to block and 2 set pwm P0 pulse width to 0% block. Place them in the Beep function block and put the buz block into the the slot of pin.
Step 4
Place two delay blocks behind the two set pwm buz pulse width to 0% blocks. In Variables category, find Beat block and Note block. Put the Beat block on the right of the delay block and the Note in the set pwm buz frequency toblock.
Step 5
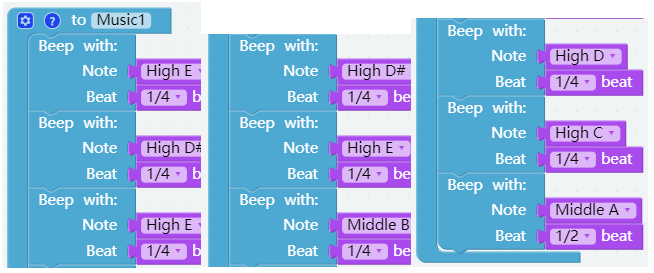
Since we have several repeated notes in the music, to keep the code as short as possible, we create two more functions to store the repeated notes. Create 2 functions and name them Music1 and Music2.

Step 6
Find some Beep blocks in Functions category and put them into Music1 as follows. Drag the blocks, Note and Beat to proper position and change their values as shown.
Step 7
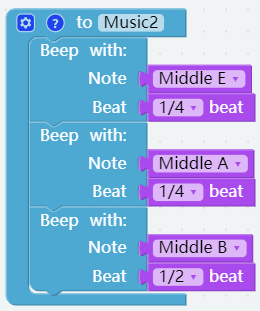
The contents of Music2 are as follows:
Step 8
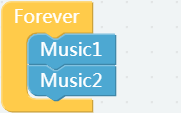
Find two Music functions you just created in the Functions category and place them in the Forever block.
Step 9
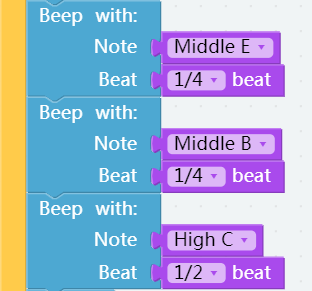
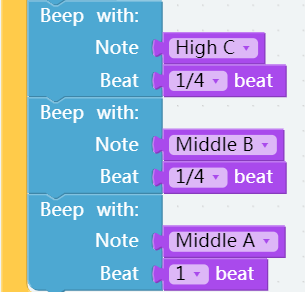
Place 3 Beep blocks below Music2 to write music for non-repeating sections.
Step 10
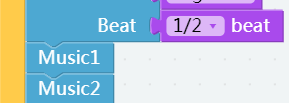
Place the blocks, Music1 and Music2 repeatedly.
Step 11
Put three Beep blocks below Music2 and write the rest notes of the music.
Step 12
Save the project and flash it into the Raspberry Pi (refer to lesson 0 for details). Now listen to the music, for Elise.
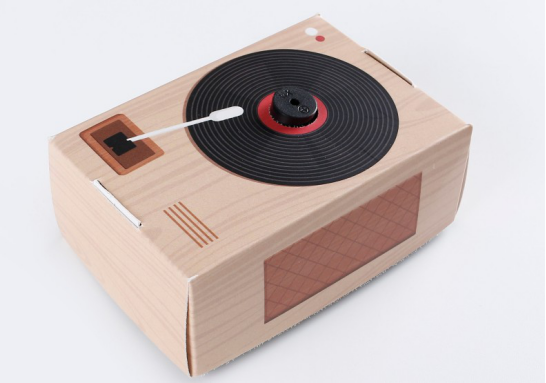
Fold Cardboard
Step 1
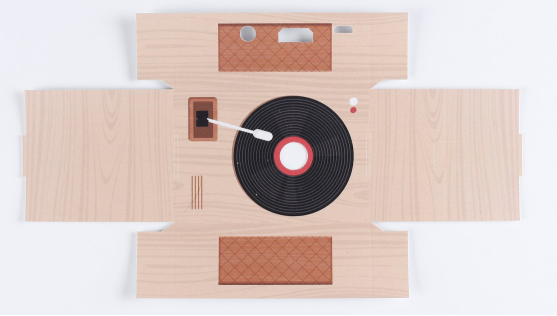
Get the matching cardboard of this lesson.
Step 2
Refer to the creases and fold the cardboard into the cube as shown.
Step 3
Build the circuit as shown in the picture below. Please do NOT change the position of components optionally when building circuits, in case the card cannot be installed.

Step 4
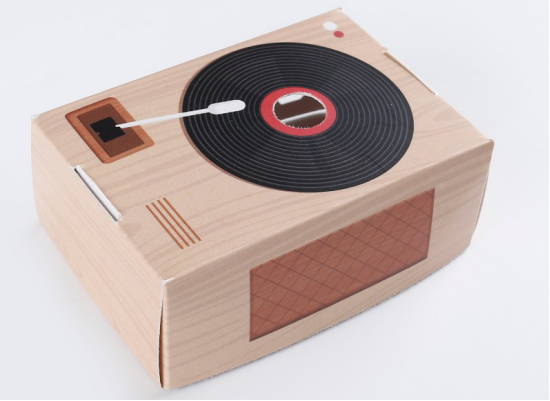
Get the cube of cardboard mounted on the circuit as shown.