Introduction
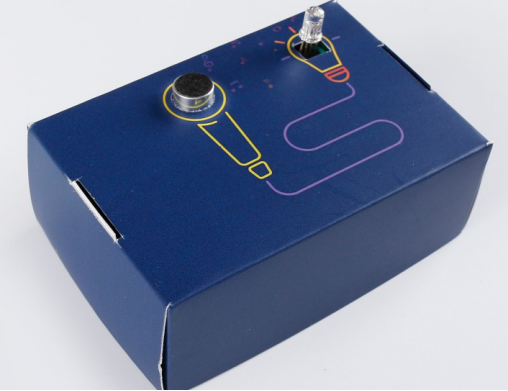
In this lesson, we will learn how to make a sound control lamp. The changing colors of RGB LED are controlled by the volume and pitch of the sound.
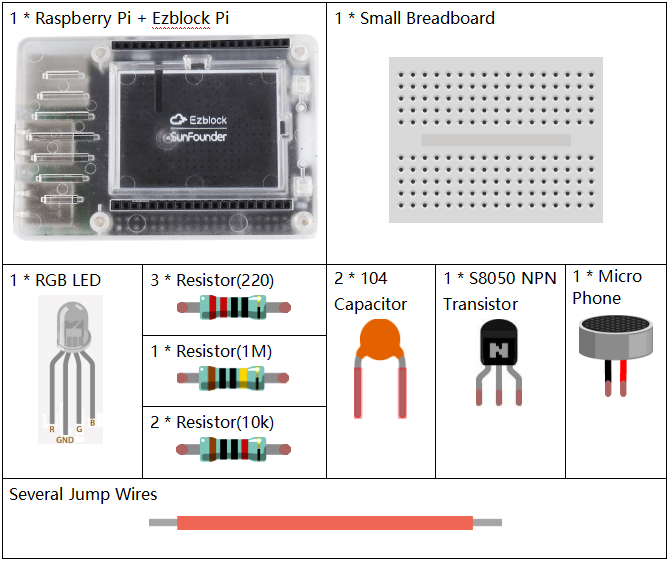
Components
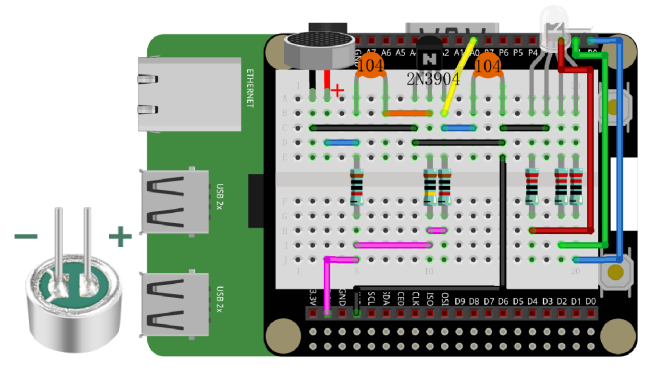
![]() Circuit
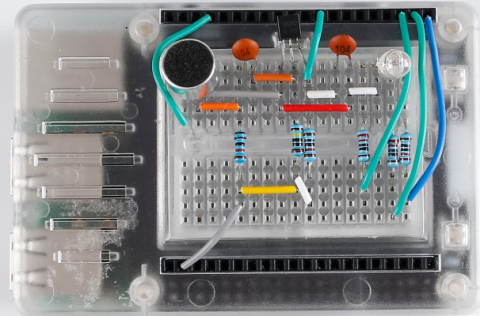
Circuit
In this lesson, the color of the light needs to change with sound, so we use a RGB light that has been used in the previous lesson and a new component, microphone sensor to build our circuit.
Note: Turn over the microphone. By the way, the pin whose end is connected to the housing is cathode.
Programming Steps
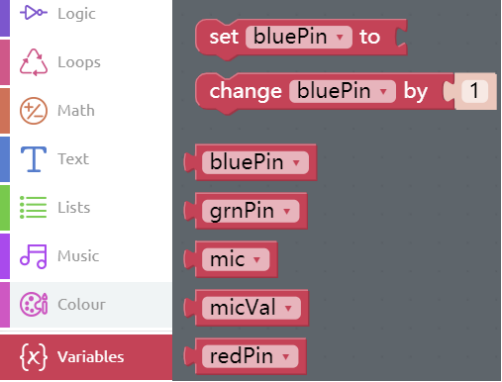
Step 1
After creating the project, click Create variable button to create 5 variables, bluePin, grnPin, redPin, mic and micVal.
Step 2
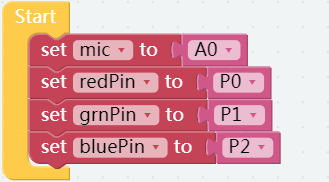
Initialize the pins in Start as shown below.
Step 3
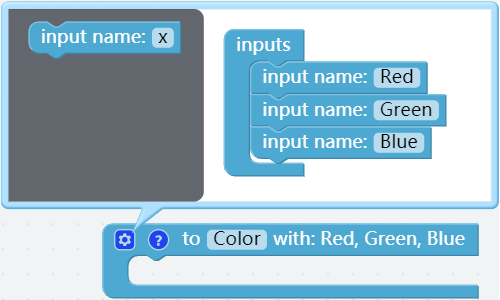
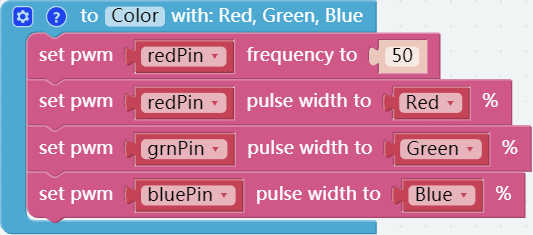
Create a Color function block to control the color of the RGB light and add three input name blocks; after that, input Red, Green, and Blue respectively.
Step 4
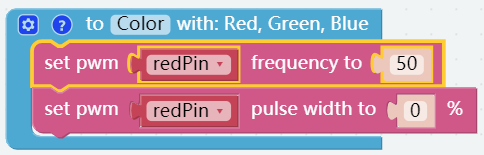
In Raspberry Pi category, put set pwm P0 frequency to block and set pwm P0 pulse width to 0% block into Color block. Drag the redPin block from Variables category into the position as follows.
Step 5
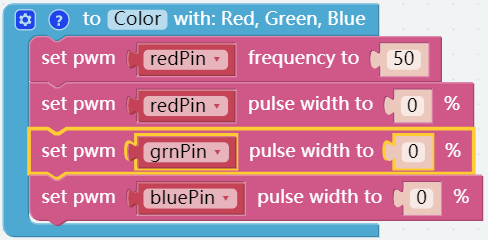
Get other two set pwm P0 pulse width to 0 % blocks and put them into the Color block. In addition, place grnPin block and bluePin block into proper position.
Step 6
Find the Red, Green and Blue blocks from Variables category and put them into the set pwm P0 pulse width to 0 % blocks.
Step 7
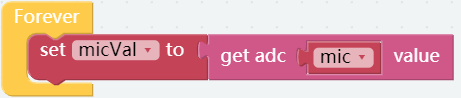
Read the value of microphone and assign it to the variable, micVal.
Step 8
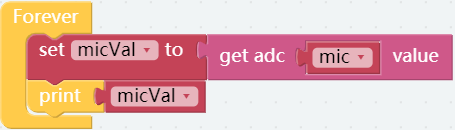
Print the value of microphone on the debug monitor.
Step 9
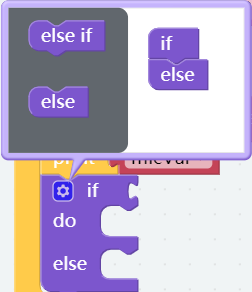
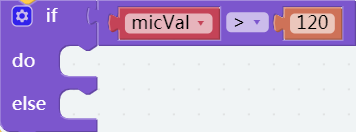
Place an if do block under the print block, and click the setting button to add an else block below the if block as shown.
Step 10
Put a Comparison Operator ( = ) block behind the if block and change “=” to “>”. Create a judgment condition by using micVal block and number ( 0 ) (change 0 to 120) block; if the value of microphone is greater than 120, execute the code in do.
Step 11
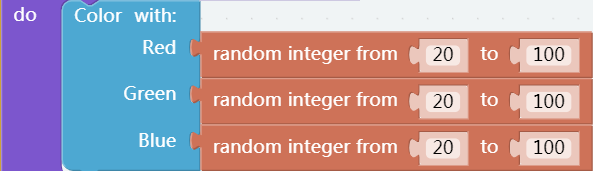
Place a Color function block in do block, and find 3 random integer from 0 to 100 blocks in Math category then put them into the Color block. Accordingly, change the values as shown below.
Step 12
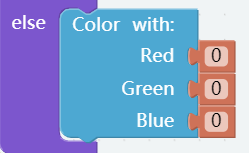
Put another Color block in else block and set the three values to 0 to turn off the RGB LED.
![]() Step 13
Step 13
Save the project and flash it into the Raspberry Pi (refer to lesson 0 for details). Now, the color of the RGB light will change with the rhythm of the music.
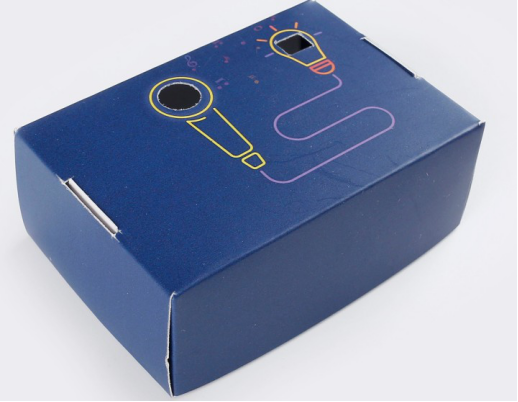
Fold Cardboard
Step 1
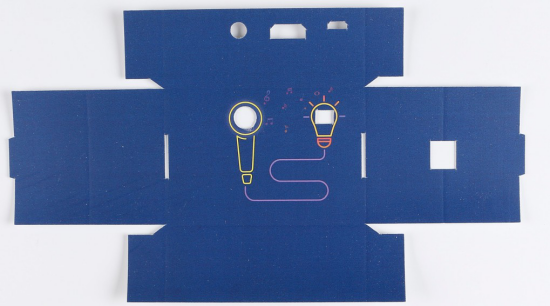
Find the matching cardboard of this lesson.
Step 2
Fold flat cardboard into a cube according to the creases.
Step 3
In the guidance of the tutorial, build the circuit as follows. Please do NOT change the position of components optionally when building circuits, in case the card cannot be installed.
Step 4
Get the tube of cardboard mounted on the circuit, and the effect picture is as follows.