Introduction
In this lesson, we will use RGB LED to achieve the object that a light can flash in different colors. The three letters of RGB represent red, green and blue respectively. The red, green and blue LEDs are packaged into a transparent LED lampshade. By changing the input voltage of the three pins, we can get the colors of the RGB LED changed.
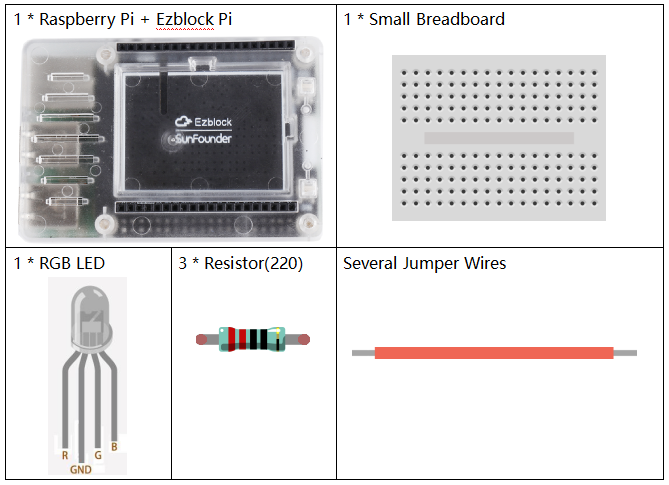
Components
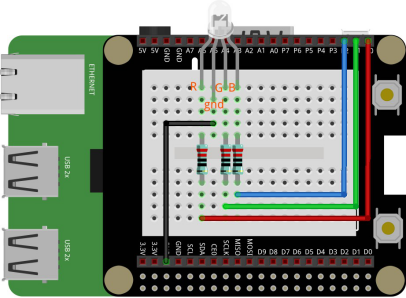
Circuit
We have already known that the P0-P7 ports can output PWM signals. Now we use P0-P2 to control the colors of the RGB LED. Connect the R, G, B and GND pins of the RGB LED to P0, P1, P2 and GND respectively.
Programming Steps
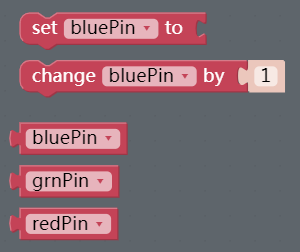
Step 1
Press Create variable button to create three variables to define the three pins of RGB LED.
![]() Step 2
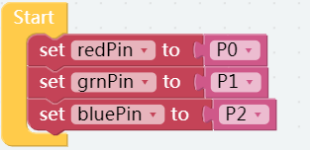
Step 2
Insert set redPin/ grnPin/ bluePin to blocks into the Start block and then assign the three variables to P0, P1 and P2.
Step 3
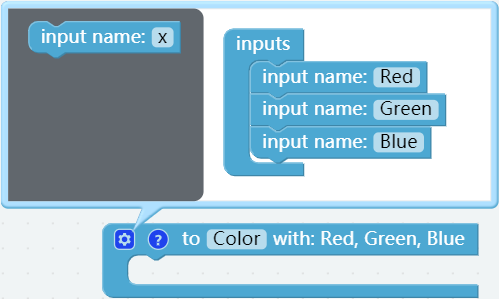
Find the to do something block under the Function category and drag it to the right area, then change the do something to Color. And click the setting icon to drag the input name block into the inputs block three times,as shown below.
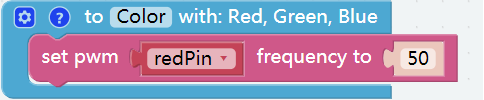
Step 4
Click the Raspberry Pi category to find the set pwm P0 frequency to block and drag it into Color block. Then put a redPin block that is from the Variables category to the the slot of pin.
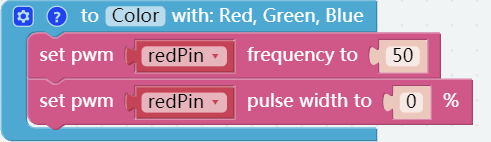
Step 5
Get the set pwm P0 pulse width to 0% block under PWM subclass then put it into Color, and place a redPin block in the the slot of pin.
Step 6
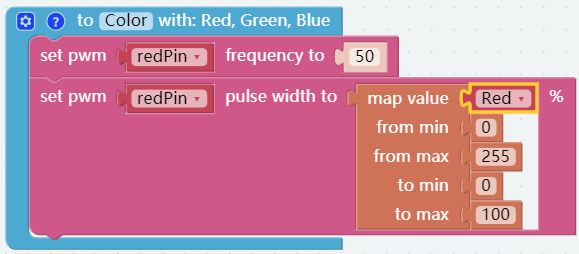
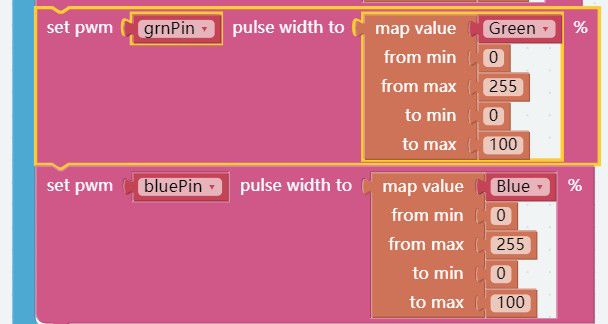
Since the pulse width ranges from 0 to 100, and our well-known RGB values range from 0 to 255, a map block is needed. Under Math category, get the map block then put it into Color block followed by a Red block; next, change the value as shown below.
Step 7
Repeat the operation of step 6-7 to conduct the mapping of variables, grnPin and bluePin.
Step 8
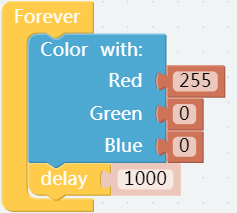
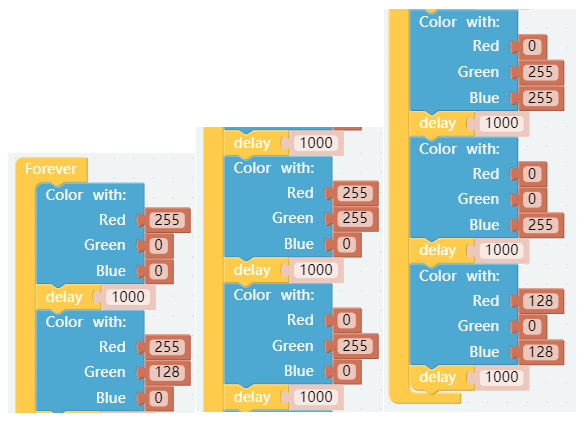
Click the Functions category, find the Color block we just created and drag it into the Forever block. Then drag 3 number 0 blocks to Color block and change the value into 255, 0, 0 respectively. Add a delay block to let RGB display red for 1000ms.
Step 9
In the same way, we can add more Color blocks to create different colors.
Note: You can use the paint tool on your computer to get the value of R, G and B.
Step 10
Save the project, then flash it to the Raspberry Pi (refer to the lesson 0 for details). Now we can get a colorful lantern that flashes different colors we set!