Introduction
The APP, Ezblock integrates joysticks, sliders, handles, buttons and switch control blocks that you can use directly in your lesson. In this lesson we will use a slider to control the brightness of a LED.
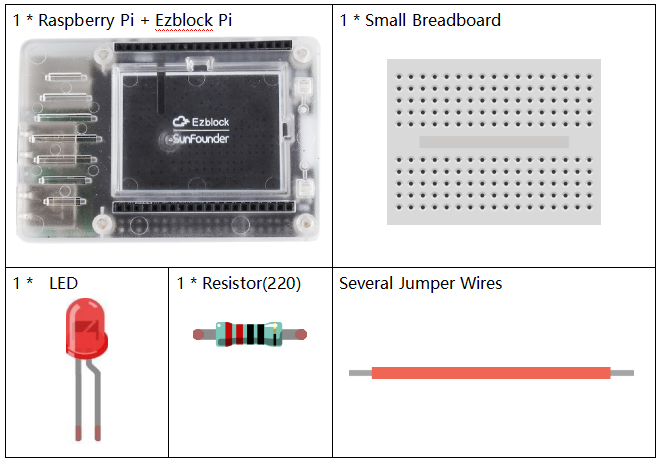
Components
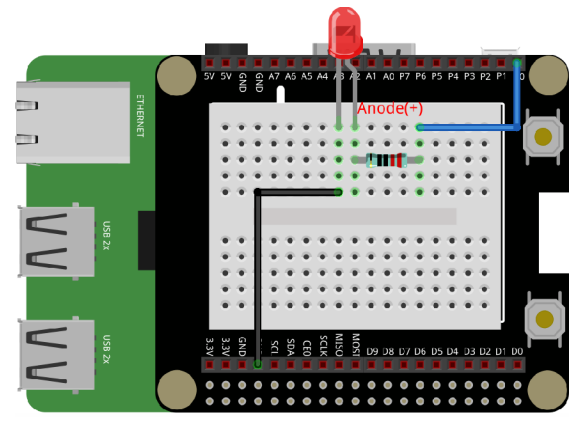
Circuit
In this lesson, we use the controller on APP to control the light on or off, so we only need to build a LED and a resistor in the circuit.
Programming Steps
Step 1
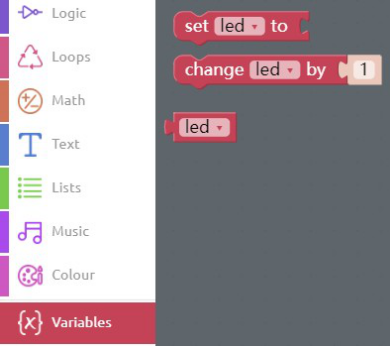
Click Create variable button and create a variable named led to define the pin wiring of a LED.
Step 2
Click the Bluetooth Control icon in the tool bar to enter the Remote Control page.

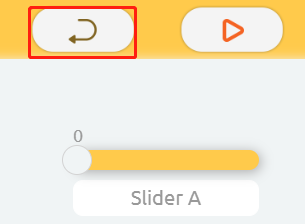
![]() Step 3
Step 3
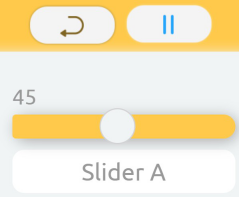
Drag Slider A from the controller area to the right area and click the back button to return to the Programming page.
Step 4
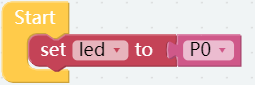
Place the set led to block into Start block and add a P0 that is from the Raspberry Pi category.
Step 5
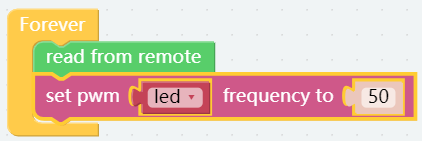
Drag the read from remote block from the Remote category into Forever block to read the values of the wireless control continuously.

Step 6
Under PWM subclass of Raspberry Pi category, we can find the set pwm P0 frequency to block, and drag it into the Forever block then put a led block into the the slot of pin.
Step 7
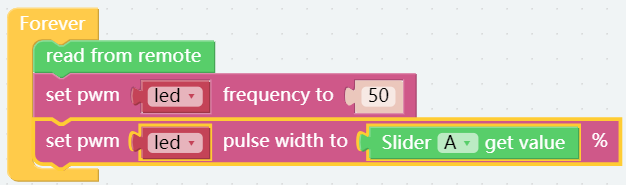
Add the set pwm P0 pulse width to 0% block into the Forever block, then put a led block into the the slot of pin. In addition, drag the Slider A get value block from the Remote category to the area as shown.
Step 8
Save the project and flash it into the Raspberry Pi. Click into the Remote Control page again, after pressing the Run button, drag the slider A, and you can find that the brightness of the light will change with the variable value of the slider.