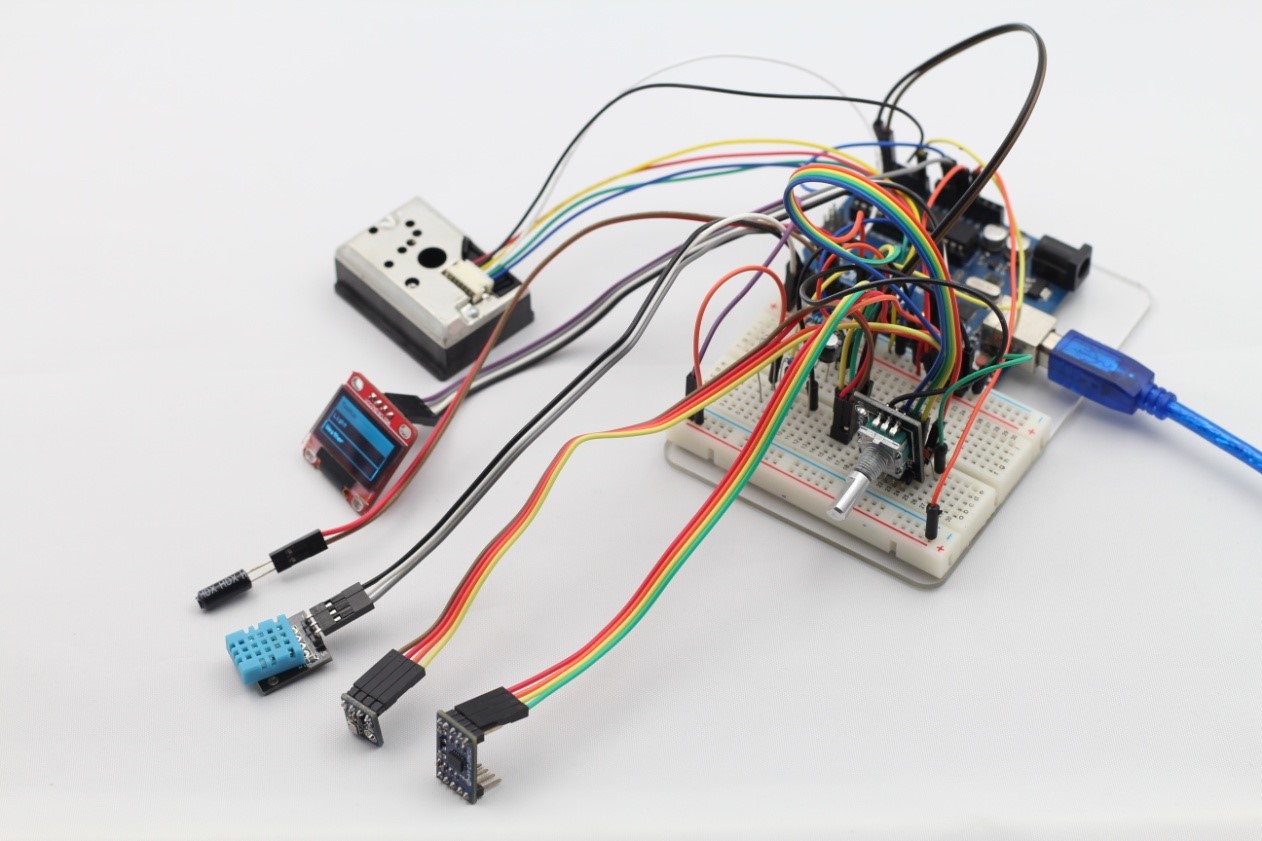
Description: In this routine, we will use all the above sensors with OLED to joint test. The OLED uses menu to manage, so you can easily see the sensor values you have selected by menu options. And rotary encoder comes in handy here. By rotating the handle of rotary encoder, you can choose the sensor you want. By pressing the switch, you can enter into the selected sensor interface.
Components:
SunFounder Uno R3 * 1
0.96 Inch OLED * 1
Photoresistor * 1
10K Ohm Resistor * 1
Tilt Switch* 1
DHT11 * 1
ADXL345 * 1
GP2Y1010AU0F * 1
150 Ohm Resistor * 1
220 UF Capacitor * 1
BMP180 * 1
USB Cable * 1
Jumper Wires
Steps:
First, connect the circuit
SunFounder Uno                  BMP180

 D4 ----------------------------------- S

 5V ----------------------------------- +

GND --------------------------------- -


SunFounder Uno                  DHT11

  D4 ---------------------------------- S

  5V ---------------------------------- +

 GND ------------------------------- -


SunFounder Uno                 ADXL345

  SCL --------------------------------- SCL

  SDA -------------------------------- SDA

 5V ----------------------------------- +

GND --------------------------------- -


SunFounder Uno                  GP2Y1010AU0F

                  5V -------------------------------Vled(150 Ohm resistor)

      GND  ------------------------------- LED-GND

    D3 ------------------------------------- LED

     GND --------------------------------- S-GND

    A1 -------------------------------------- Vo

     5V -------------------------------------- Vcc


SunFounder Uno                   BMP180

   SDA -------------------------------- SDA

   SCL --------------------------------- SCL

   5V ---------------------------------- VIN

    GND -------------------------------- GND


SunFounder Uno                   OLED

  SCL --------------------------------- SCL

  SDA -------------------------------- SDA

  3.3V--------------------------------- VCC

   GND -------------------------------- GND


SunFounder Uno                  ENCODER

 5V ------------------------------------ +

  GND --------------------------------- GND

   8 ------------------------------------- CLK

  9 ------------------------------------- DT

  10 ------------------------------------ SW
(Connect a 104 ceramic capacitor between pin CLK of ENCODER and GND and pin DT of ENCODER and GND, and the connection between SunFounder Uno and photoresistor and the connection between SunFounder Uno and the tilt switch is shown as figure 29)
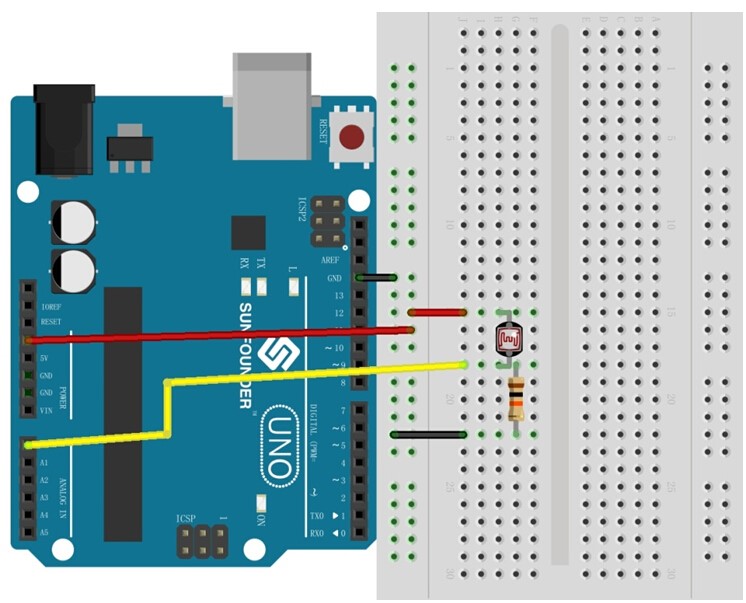
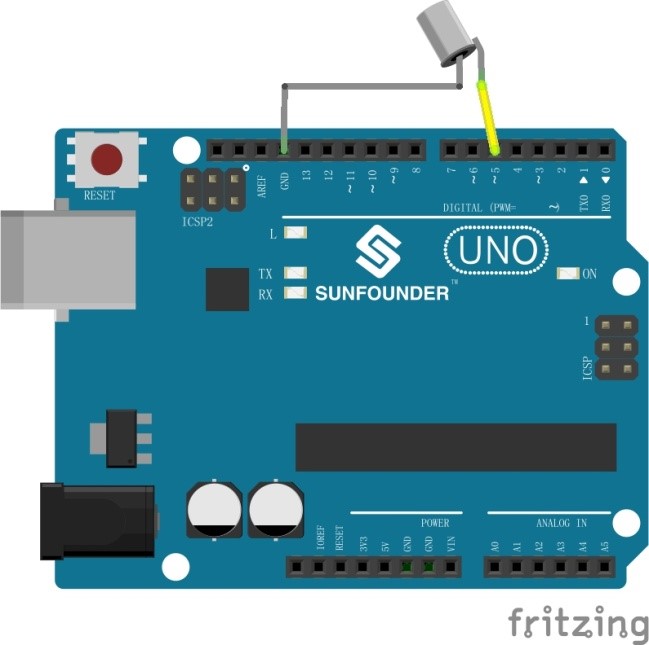
Figure 29
Second, program (please go to our official website www.sunfounder.com to download the example code by clicking LEARN -> Get Tutorials)
Third, compile the program
Fourth, burn the program into SunFounder Uno R3 board
After you have finished all the above steps, rotate the rotary encoder to select the sensor you want to know and press the switch on the rotary encoder, then you can enter into the corresponding sensor interface to see related information. The physical diagram is as shown in figure 30: