Preparation
- Prepare a MicroSD/TF card of no less than 8GB, a 5V 2A DC power adapter with a MicroUSB port, and a network cable (to connect your router and Raspberry Pi, or plug in the USB Wi-Fi adapter directly if you have one).
- Download the image for the Raspbian system onto your computer. Refer to instructions through DOWNLOADS->RASPBIAN on the official website raspberrypi.org: https://www.raspberrypi.org/documentation/installation/installing-images/README.md. Write the image into the microSD/TF card, and then plug the card into the slot on your Raspberry Pi.
Note: For 2016-11-25 release or above, SSH (a protocol securing remote login session and other network service) is Disabled by default. Therefore, when you need to log in remotely, you need to create a file named “ssh” under /boot/ to enable it.

Access to Raspberry Pi’s Console
In the subsequent tutorials, the console will be used from time to time. It is platform for interactions in Linux. Therefore, before starting the lessons, you may need to know how to access to Raspberry Pi’s console.
Using Console in GUI (terminal, recommended for beginners)
Using console in GUI is of great help for the beginners. You can not only compile and run the code in terminal, but also be able to do some simple file operating, code-downloading, etc. cooperating with GUI.
- Preparations: a screen monitor, an HDMI cable (if your monitor only support VGA, use a VGA-HDMI converter), a USB mouse, a USB keyboard and a network cable or a USB Wi-Fi dongle.
- Connect the monitor to power. Then connect it with the Raspberry Pi via the converter cable (HDMI cable). Connect the Ethernet cable or the USB Wi-Fi dongle, and the mouse and keyboard to USB ports. At last, connect a 5V 2A DC power to the RPi. Power on the screen if needed. Then you can see the display showing the Raspberry Pi icon as shown below.
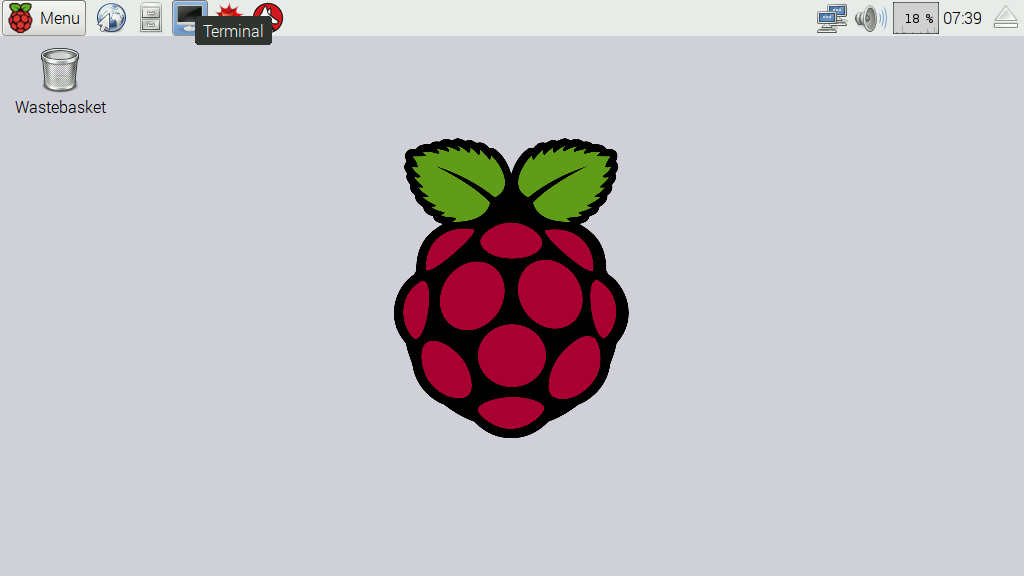
If the monitor displays colored texts with a black background after booting, and that is in console. You can just use this as a terminal (but not recommend for beginners), or change the option for automatically loading a graphic user interface (GUI). To activate GUI, you can type in startx with the keyboard and press Enter, and to always boot up to GUI, type in sudo raspi-config and go through Boot Options > Desktop/Desk Autologin, and reboot. Wait for a while and the GUI display will show up as below.
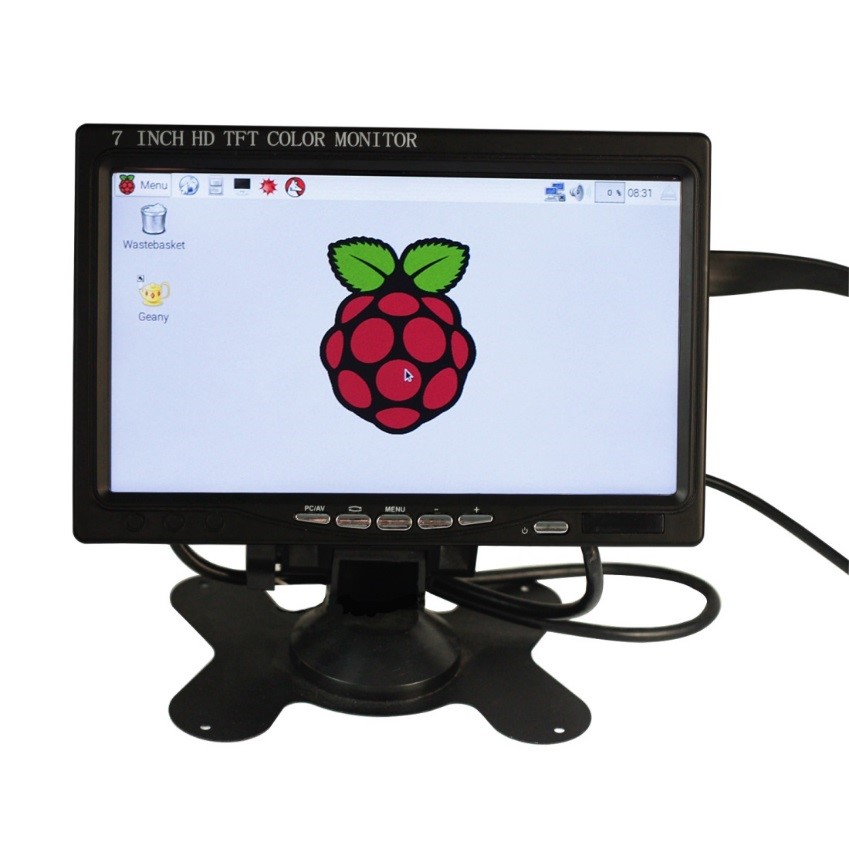
Note:The screen monitor shown above is the 7 inch one we’re using, available on our website www.sunfounder.com and our Amazon store. Check out now and use your Raspberry Pi in a most convenient way.
3. Now click the icon of Terminal on the screen, or press CTRL+ALT+T simultaneously.
4. Then a terminal will pop up as follows:
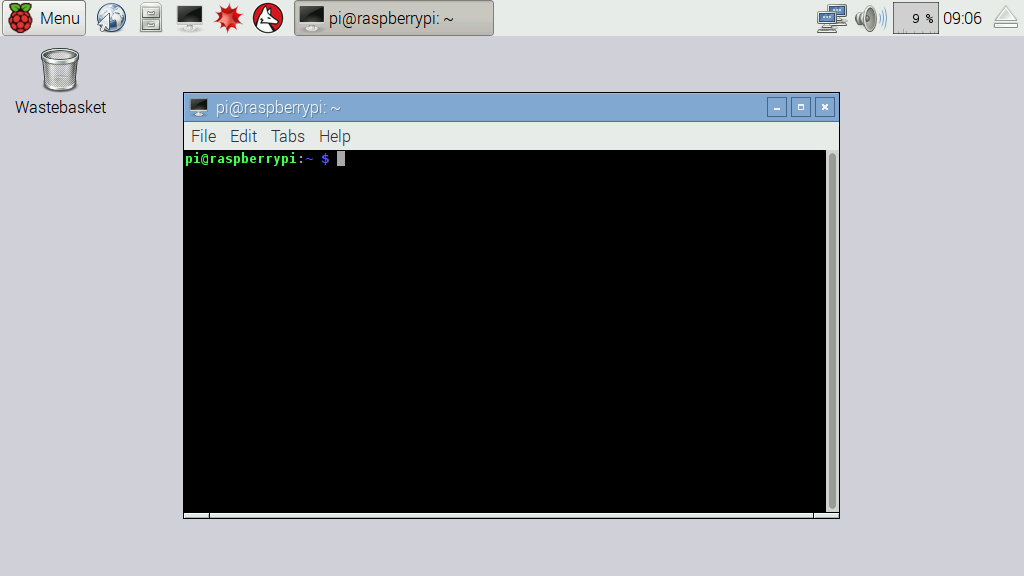
Here’s the console we talk about before.
Using Console Only
There are several ways to use the console only and they can be divided into mainly two ways: using directly and remotely.
A. Directly
A screen is needed when you use the console directly.
- Preparations: a screen monitor, an HDMI cable (if your monitor only support VGA, use a VGA-HDMI converter), a USB keyboard and a network cable or a USB Wi-Fi dongle. Yes, you don’t need a mouse, or you cannot use mouse.
- Connect the monitor to power. Then connect it with the Raspberry Pi via the converter cable. Connect the Ethernet cable or the USB Wi-Fi dongle, and keyboard. At last, connect a 5V 2A DC power to the RPi. Power on the screen if needed. Then you can see the console full screen. If you boot into GUI instead, Open a terminal, type in sudo raspi-config and press enter, go through Boot Options > Console/Console Autologin, and reboot.
B. Remotely
For three platforms: Windows, Mac and Linux, it might be a little bit different to do this.
Linux and Mac users can easily log into the Raspberry Pi via ssh.
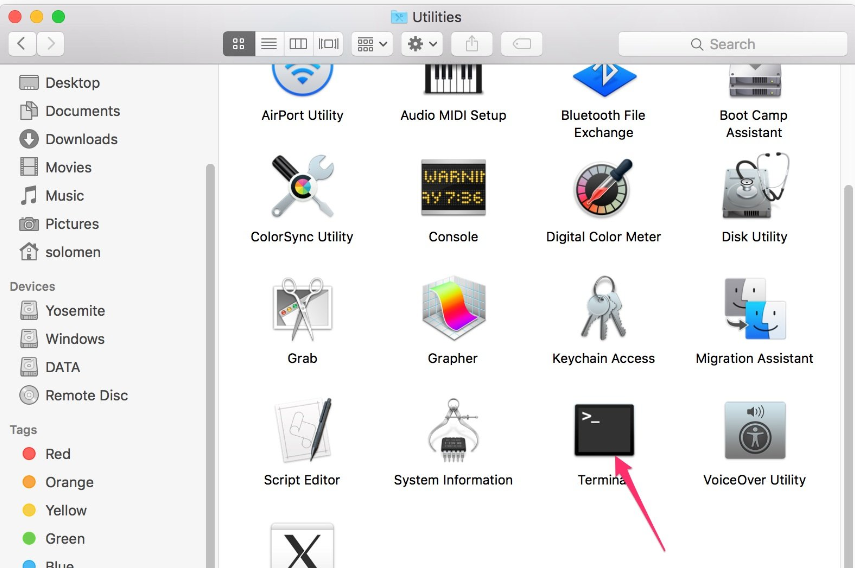
On Linux or Mac, find Terminal and open it.
Type in ssh pi@<ip_address>
– ssh is the tool for remote login; pi, the user name, and <ip_address> as the name suggests, your RPi’s IP address. For example:
ssh pi@192.168.0.1
Press Enter to confirm.
If you get a prompt that no ssh is found, you need to install a ssh tool like Ubuntu and Debian by yourself:
sudo apt-get install ssh
For other platforms, please contact your supplier.
For Windows users, you may use a ssh tool to log into Raspberry Pi remotely, like PuTTY.
- Similarly plug the TF card into the Raspberry Pi (RPi), power the RPi with a 5V 2A DC power and connect the Ethernet cable (Better not a USB Wi-Fi dongle). Now). Now the Raspberry Pi is ready.
- Then you need to know the IP address of the RPi. You can find it on the settings interface of your router. For more details, please refer to your router provider’s page.
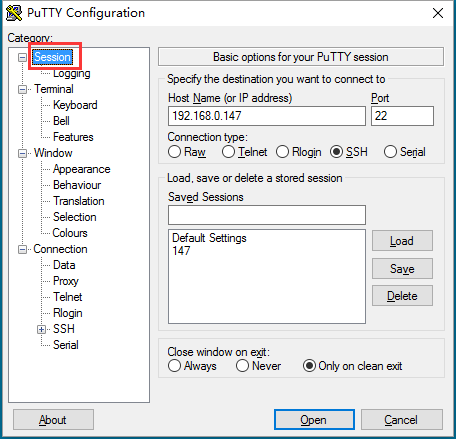
- Open PuTTY and click Session on the left tree-alike structure (generally it’s collapsed upon PuTTY startup):
4. Enter the IP address of the RPi you just got in the textbox under Host Name (or IP address) and 22 under Port (by default it is 22)
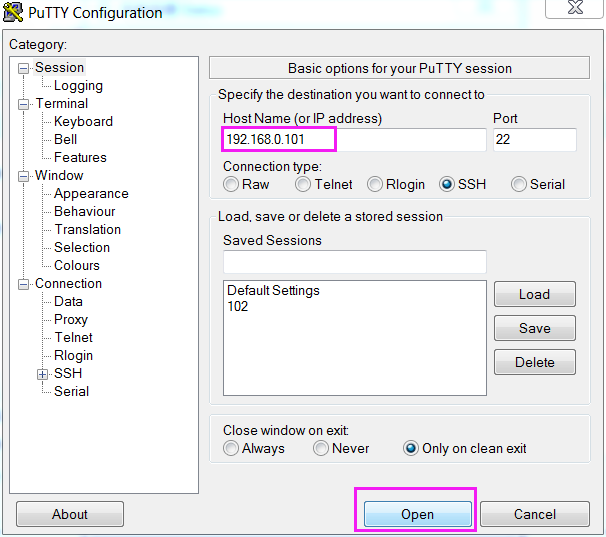
5. Click Open. Note that when you first log in to the Raspberry Pi with the IP address, you’ll be prompted with a security reminder. Just click Yes. When the PuTTY window prompts login as: type in the user name of the RPi: pi, and password: raspberry (the default one, if you haven’t changed it).
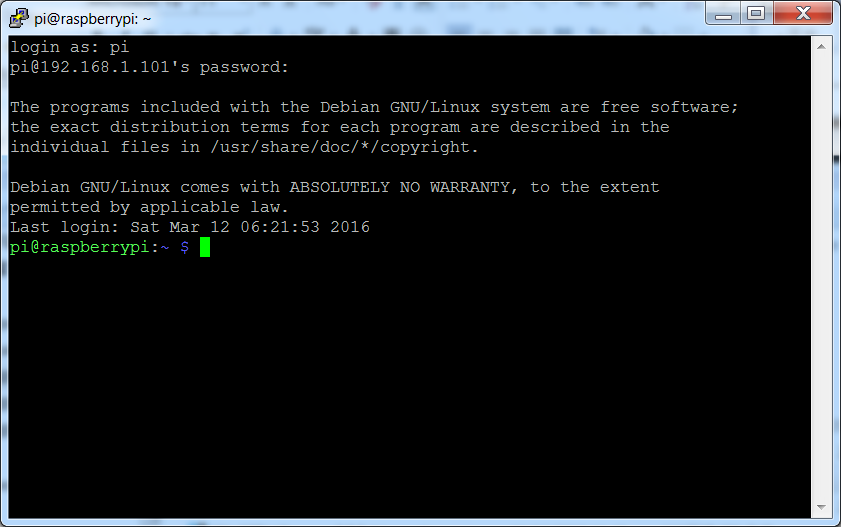
Note: when you’re typing the password in, the window shows nothing just null, but you’re in fact is typing things in. So just focus on typing it right and press Enter. After you log in the RPi successfully, the window will display as follows.
Now, no matter what method you take, you can get in the console of your Raspberry Pi.