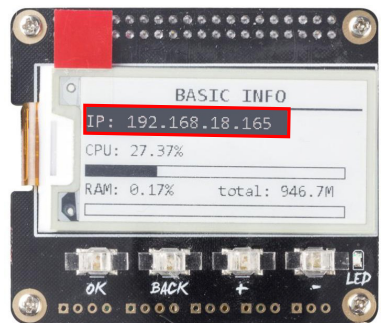
Get IP address
Here, Sunfounder has installed the OMV system on TF card. We insert the card into the slot of Raspberry Pi 4, and then connect the power and net- work cables. When the system starts up and displays the “BASIC INFO” page, we record the IP address.
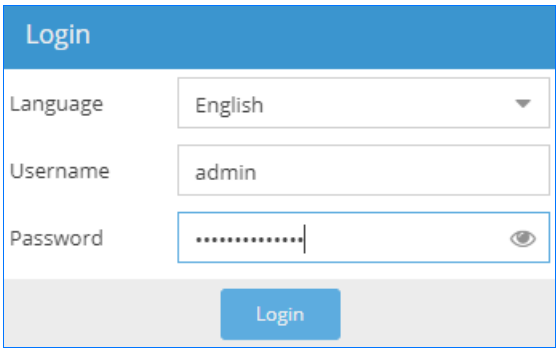
Log in OMV
Open a browser on your computer, type in the IP address of NAS server, and then type in the username and password to enter the backstage management system.

The default username and password are as follows
Username: admin
Password: openmediavault
Click Storage >Disks to check the current device information. If you find that there is no hard disk information, please check the wiring condition again.
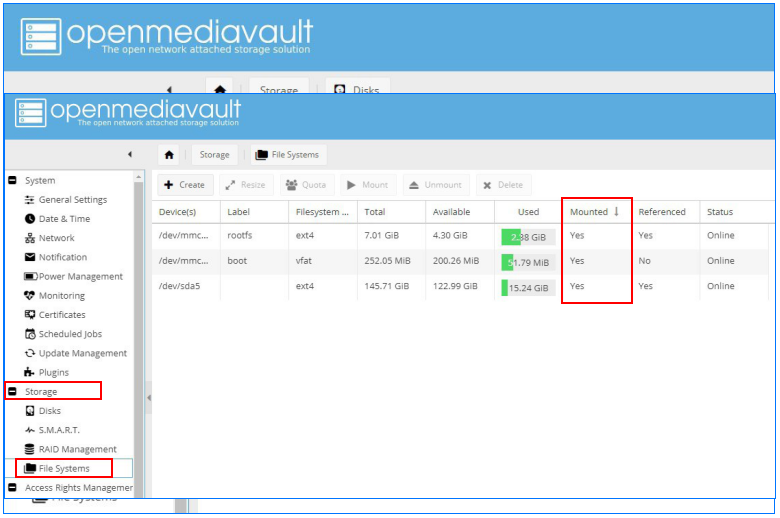
Click Storage > File Systems to check whether the hard disk is in the process of mounting. If not, please select the current hard drive and then click the mount but- ton at the top of the page.
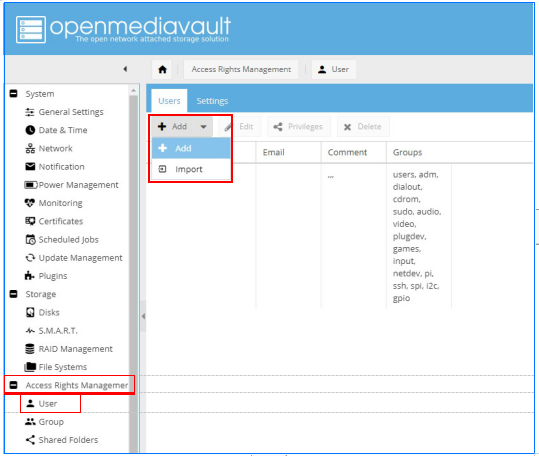
Create an Username
Click Access Rights Managemer-User and then click Add to create a new user.
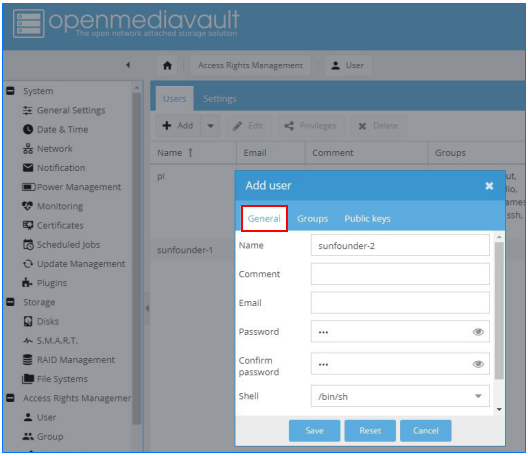
After clicking General, type in Name and Password. Here, we can create two users: sunfounder-1 and sunfounder-2 and then we save them.
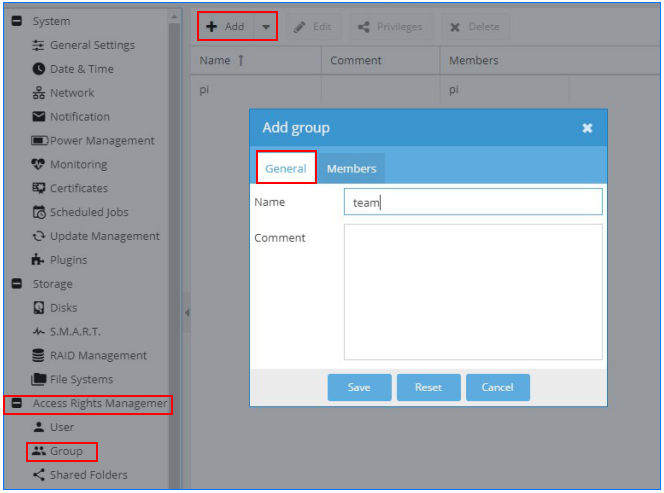
Click Access Rights Managemer-Group, click Add -> General and then Name and Comment. Here we create an user group team.
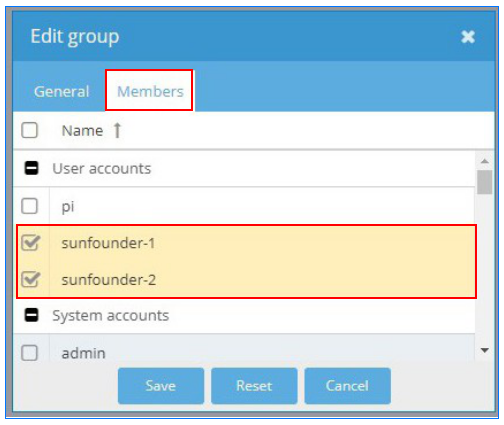
Select the two users, sunfoudner-1 and sunfounder-2 we just created in Members interfaces, then click save so as to add two members sunfounder-1 and sunfound- er-2 into the user group.
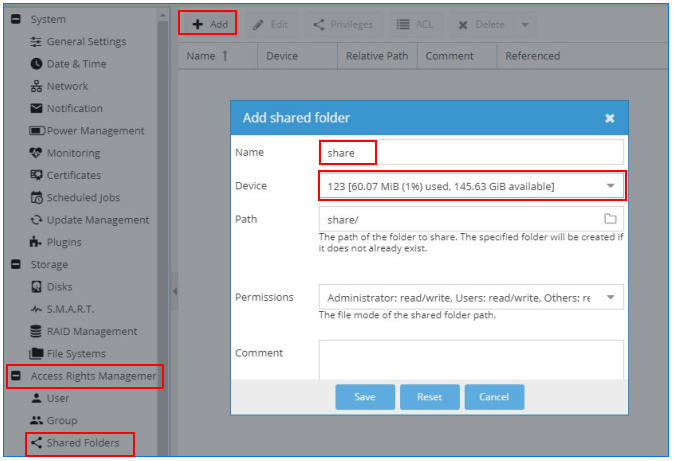
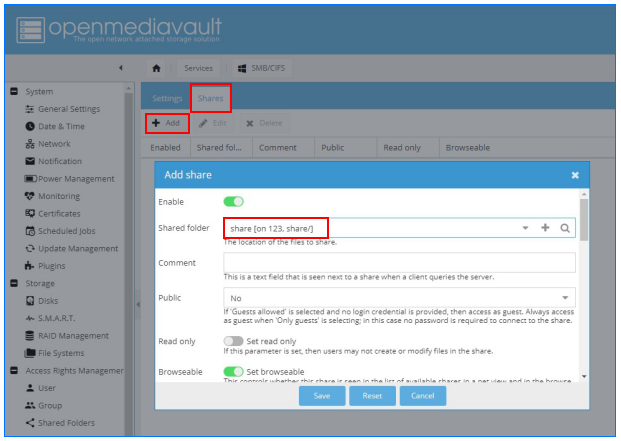
Add a Shared Folder
Click Access Rights Managemer ->Shared Folders, then click Add button and type in the name. After that, we choose hard disk devices. The path will be automatically generated by the system. You need to click save after we finish the configuration.
At this point, we can create a shared folder called share on hard disk 123.

During the installation, there pops up a prompt at the top of the browser:
The configuration has been changed. You must apply the changes for them to take effect.

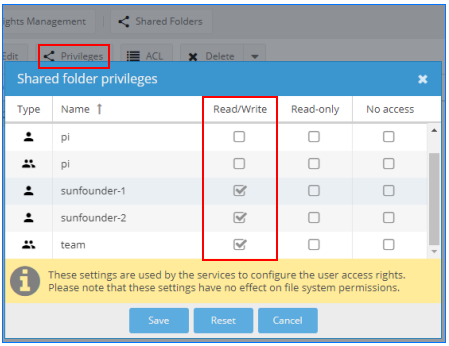
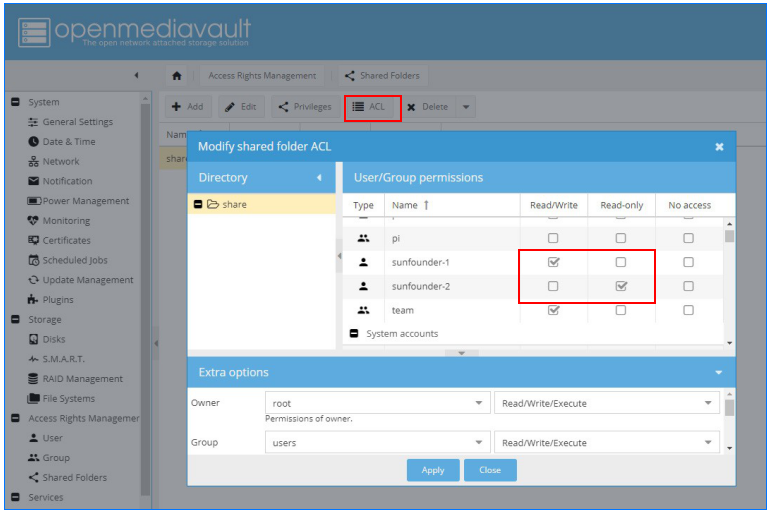
Select the Shared folder, click the ACL above, and set user permissions on the inter- face.
Here, we set the read-write access permission for sunfouder-1 and the read-only permission for sunfounder-2.
The users who has the permission to Read/Write the files can add or download the files.
The user who has the Read-only permission can only download the shared files.
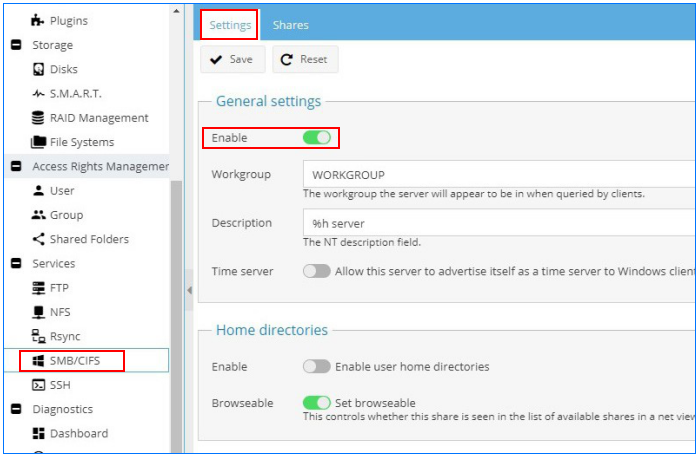
Activate the SMB service
Click service-SMB/CIFS, and then choose enable among the settings.
Among the shares options, click add and then select the files that needs sharing. After that, click the save button.
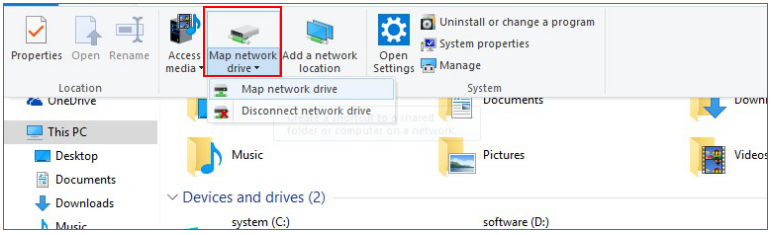
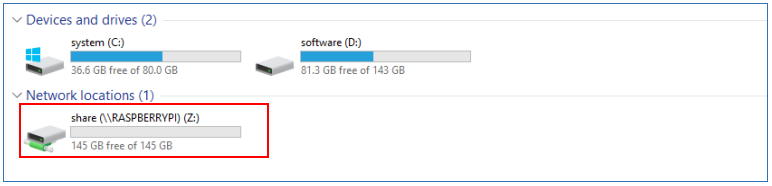
Mount NAS Storage to Windows
Under This PC, click Map network drive.
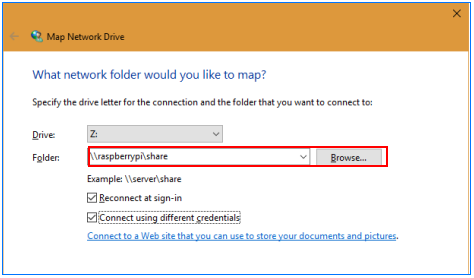
Type “\\hostname or IP ad- dress\the name of the shared files” in the path bar.
The hostname is raspberrypi and the name of the shared file is share, and then click done.
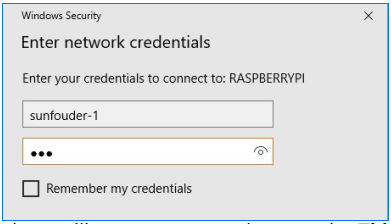
Type in the username and the pass- word. Click OK button, and you can ac- cess the shared files.
There will appear a new volume under This PC.
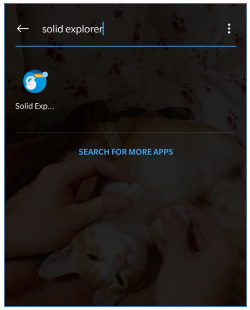
Mount NAS Storage to Android
There are many kinds of File Manager APPs in the Google Play that apply to your NAS access via SMB, such as Solid Explorer, ASTRO, ES File Explorer. Here, we take Solid Explorer as example to illustrate.
1. Open Solid Explorer.
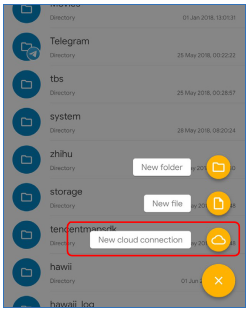
2. Tap 「+」to create a New cloud connection.
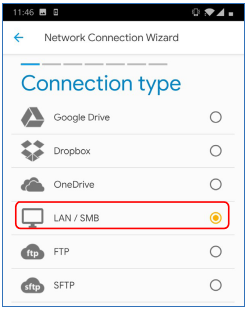
3. Select SMB in Connec- tion type.
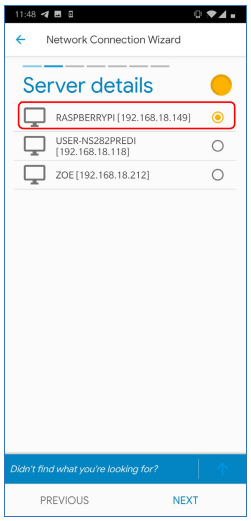
4. Select your NAS device. Some APPs need your manual address typing.
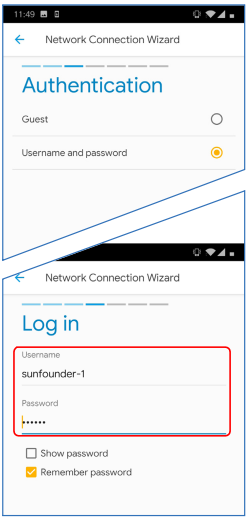
5. Select corresponding Authentication and Log in.
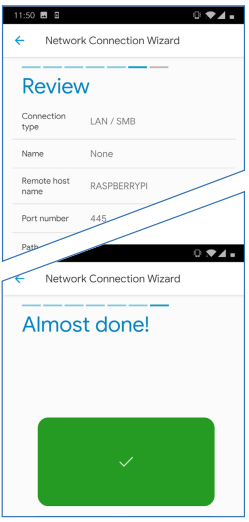
6. Review your configura- tion, if there is no wrong, Finish.
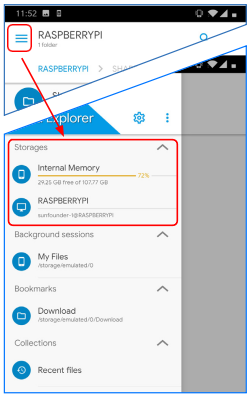
7. Now, you can access your NAS Storages in the same way as you do when access Internal Memory.
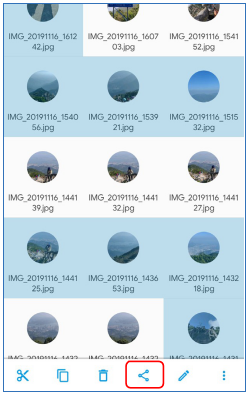
Example For Transfer Files Between Phone & NAS→
Select the file and tap「Share」.
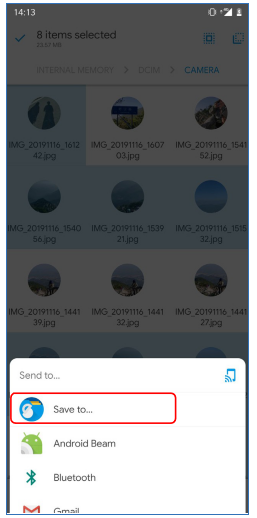
There appears an option「Save to」to be selected.
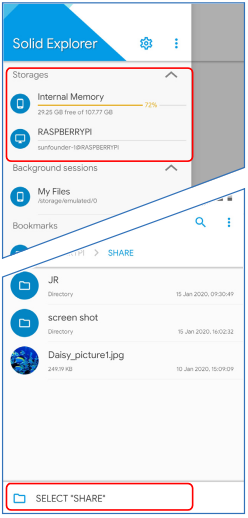
Enter the target directory and tap「SELECT」.
The device will show you some information in noti- fication.

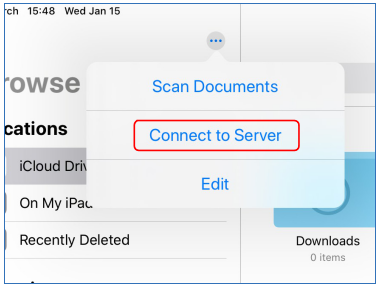
Mount NAS Storage to iOS
The system newer than iOS 13.0 can directly mount NAS storage in Files. The older versions of iOS can use APPs like DS File.
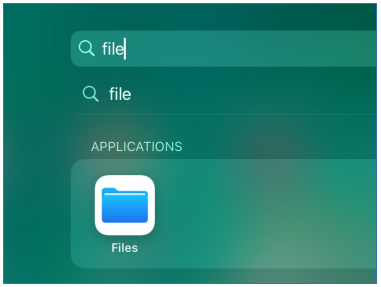
1. Open Files.
2. Tap ConnecttoServerin 「Menu」.
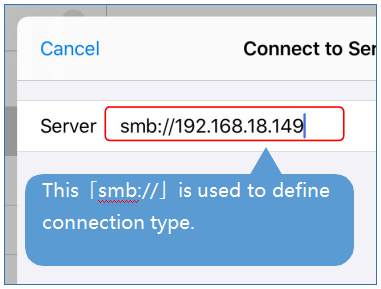
3. Enter your NAS server’s IP address.
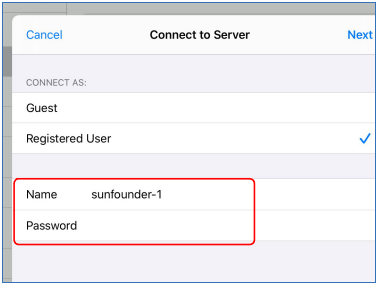
4. Select Authentication and Log in.
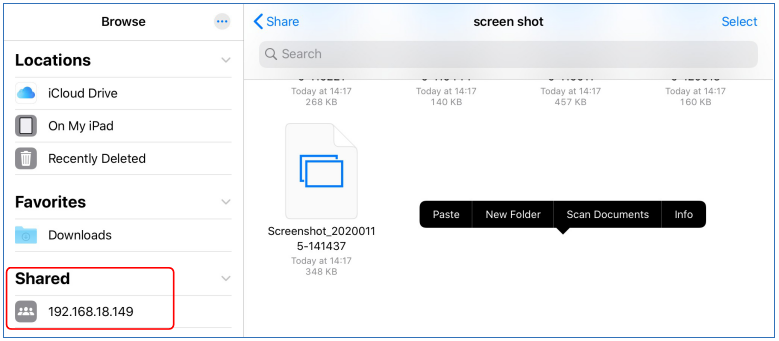
5. Now, you can directly access NAS Storages in File.
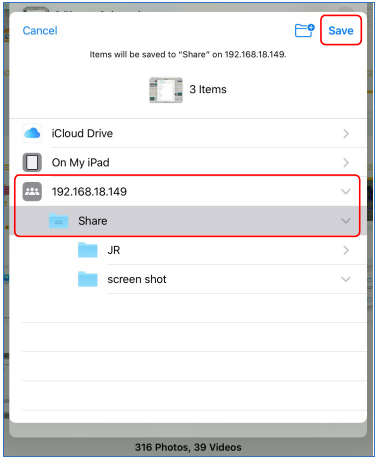
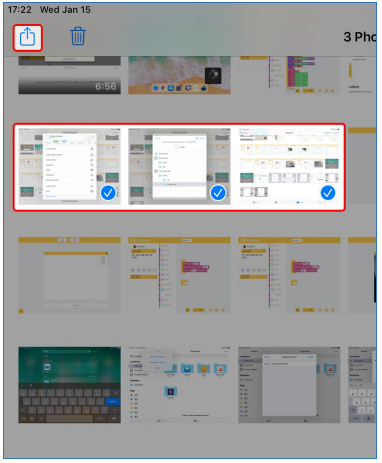
Example For Transfer Files Between Phone & NAS→
Select the picture and tap the icon「Share」.
Find「Save to Files」in options.
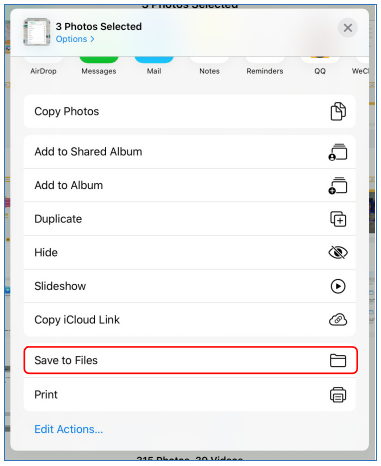
Select the directory you need to save files in and then tap 「SAVE」.