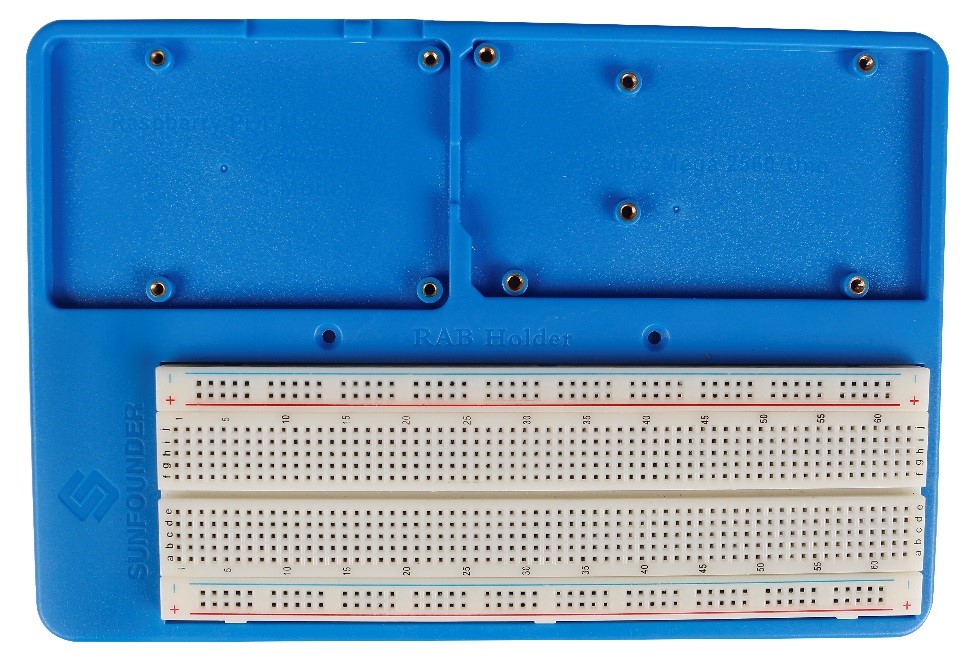
RAB Holder
RAB Holder is a basic but indispensable component for your experiment. It makes your experiment easier and can be used for fixing a bread board, an Arduino board like Uno board or Mega2560, or a Raspberry Pi board.
Before starting the experiment, you need to fix the Raspberry Pi and the breadboard on the RAB Holder first.
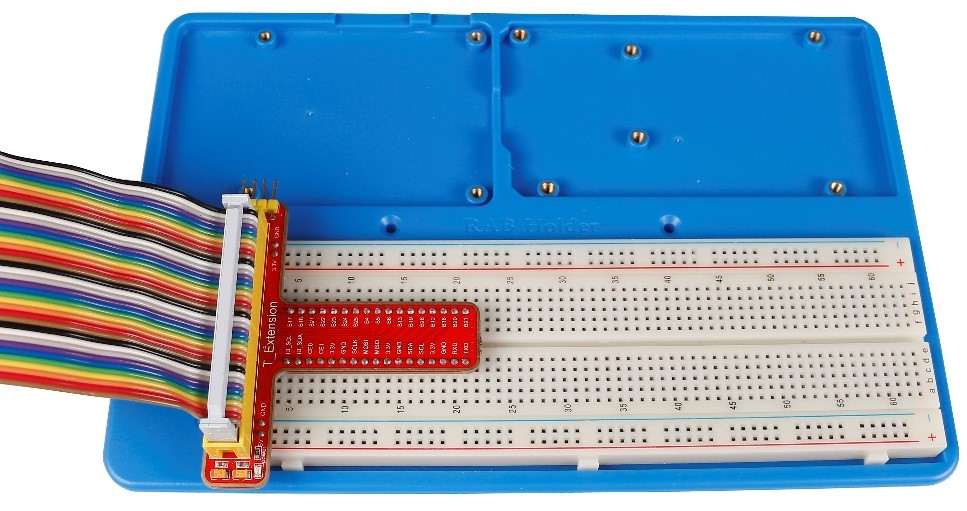
Remove the sticker from the back of the breadboard first, and fix the breadboard on the RAB Holder. Pay attention to place it in such a position as shown in the figure below, so that the 3.3V pin and 5V pin on the T-Extension Board align with the bus strips besides the two red lines when we insert the T-Extension Board later.
Then insert the T-Extension Board into the Breadboard, and insert the 40-pin GPIO Cable into the board.
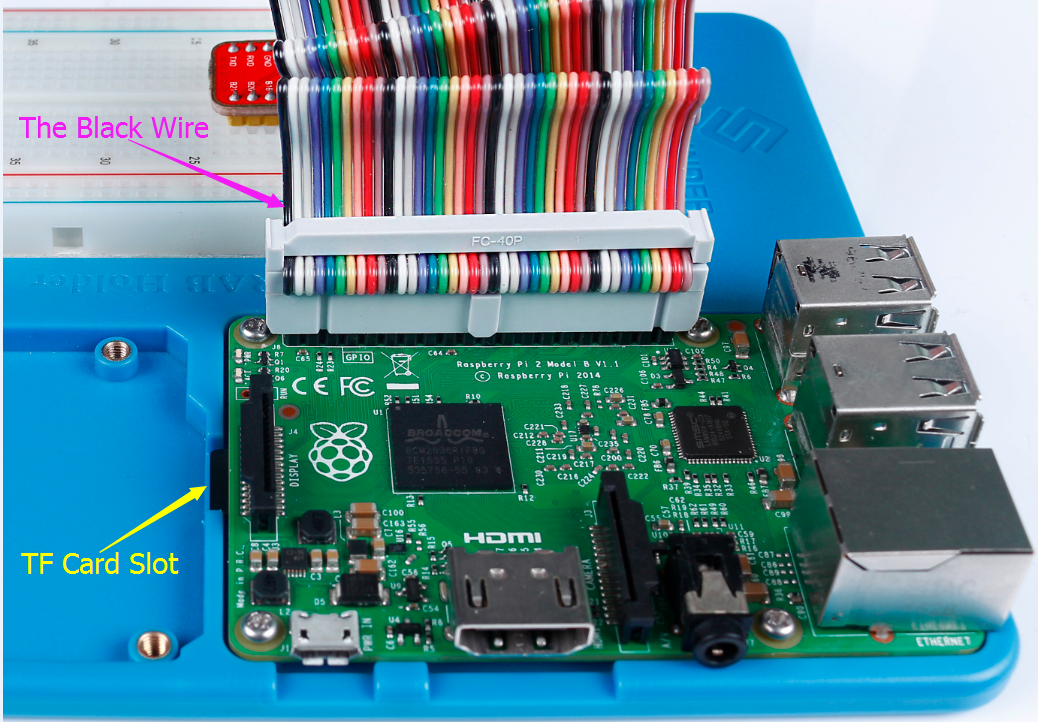
Then place the Raspberry Pi in the holder, fasten it with M2.5×5 screws. Since it may be a little difficult to fasten it, be careful to operate.
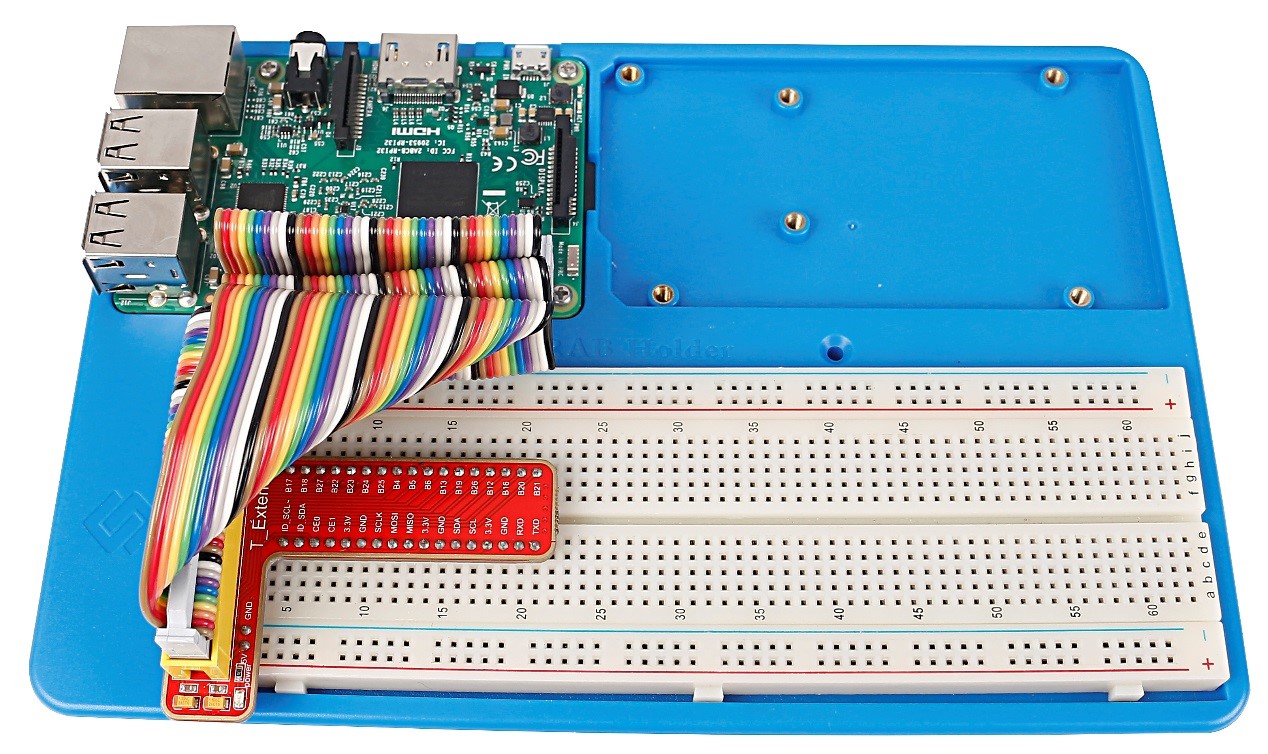
Pay attention to the direction when plugging in the 40-pin GPIO Cable into the Raspberry Pi pins. The black wire at the edge should be close to the TF card slot. DO NOT connect them inversely, or the Raspberry Pi will be short cut!
Raspberry Pi
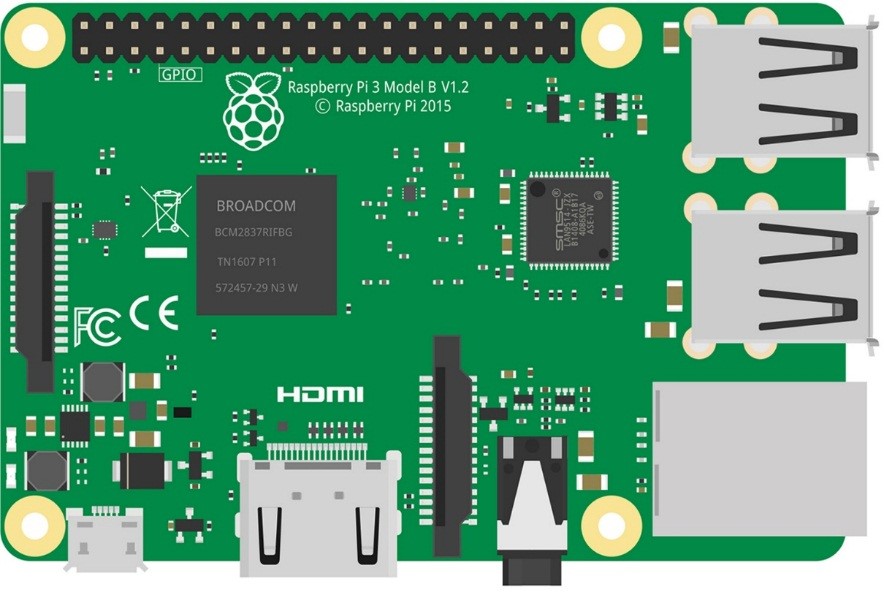
A Raspberry Pi is an indispensable component for the kit, the control device. But it is not included in the kit and you need to prepare one yourself.
The Raspberry Pi is a kind of minicomputer for users like amateurs, teachers, students and small businesses, etc. With a pre-installed Linux system, it is credit card-sized and equipped with an ARM architecture processor, whose operational performance is similar to that of smart phone. As for ports, the Raspberry Pi provides USB ports for mouse and keyboard. In addition, there are also ports for the Fast Ethernet, SD card and HDMI display or TV’s connection. Being low cost and low consumption, the Raspberry Pi is very suitable for embedded projects. Many people have been able to apply the Pi to a variety of projects including some simple ones for children and complex ones with more advanced functions. You can apply it like a PC for spreadsheets-making, word-processing and games, or to play HD videos of up to 1080p.
It can’t be better describing the Raspberry Pi as “though small, perfectly formed”. It has the same ability compared with the PC and carries ports for the USB, Ethernet, HDMI, RCA, and 3.5mm stereo jack. Moreover, it can control GPIOs, while the PC cannot. Through this kit, you will learn how to use the GPIOs to make simple experiments and how to program.
The Raspberry Pi evolves through many versions including the latest (so far) Raspberry Pi 3 Model B, 2 model B, 1 Model B+, Zero, and 1 Model A+. Certainly, the newer, the more powerful. The 3 model B now even supports Bluetooth and Wi-Fi. You can choose according to actual needs.
Raspberry Pi Pin Name
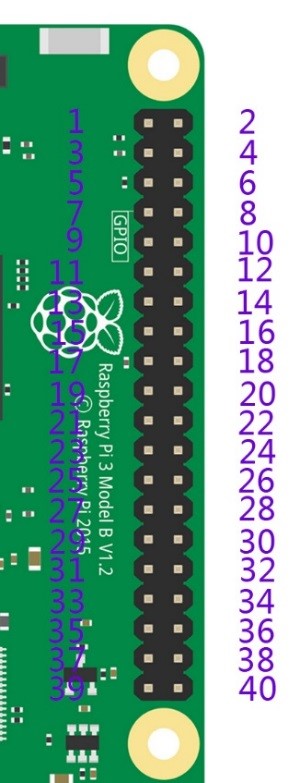
There are no pins printed on the latest Raspberry Pi, which may bring various troubles to new users. The following is the actual pins definition and form definition of the Raspberry Pi. The actual pins are corresponding to the Physical on the right. There are 40 pins in total from left to right. The columns near Physical are the V (voltage), Mode (Input or Output), Name (original name), wPi (wiringPi, C language based on), BCM (Python based on) of the pins.
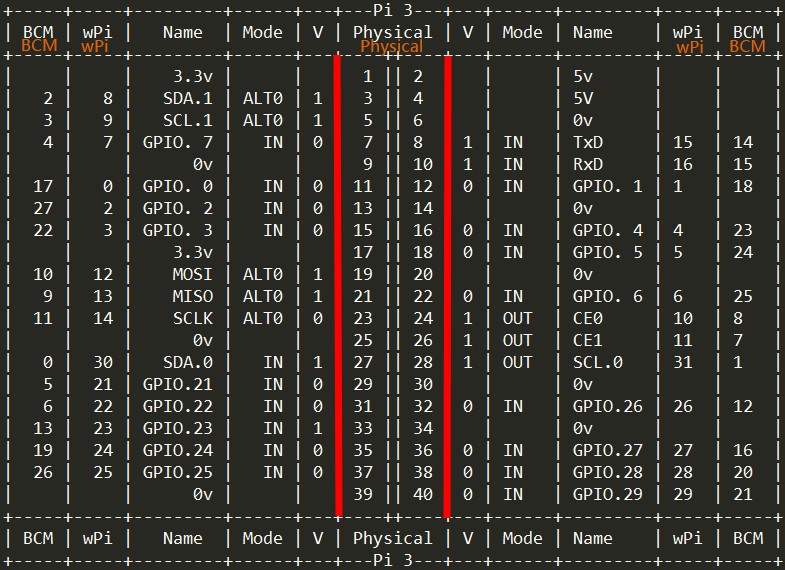
Besides the original name of the pins, there are other three ways of naming including physical, wiringPi and BCM. If you see a pin being defined as 0 in the C language, its original name is GPIO 0. In Python code, it’s 17 (BCM) or 11(physical). So you need to know the name, physical, wiringPi and BCM of a pin.
Extension Board
The function of the extension board is to lead out pins of the Raspberry Pi to breadboard by GPIO Extension Board to avoid GPIO damage caused by frequent plugging in or out. For plugging convenience, we designed it in T-shape and name it T-Shape Extension Board.
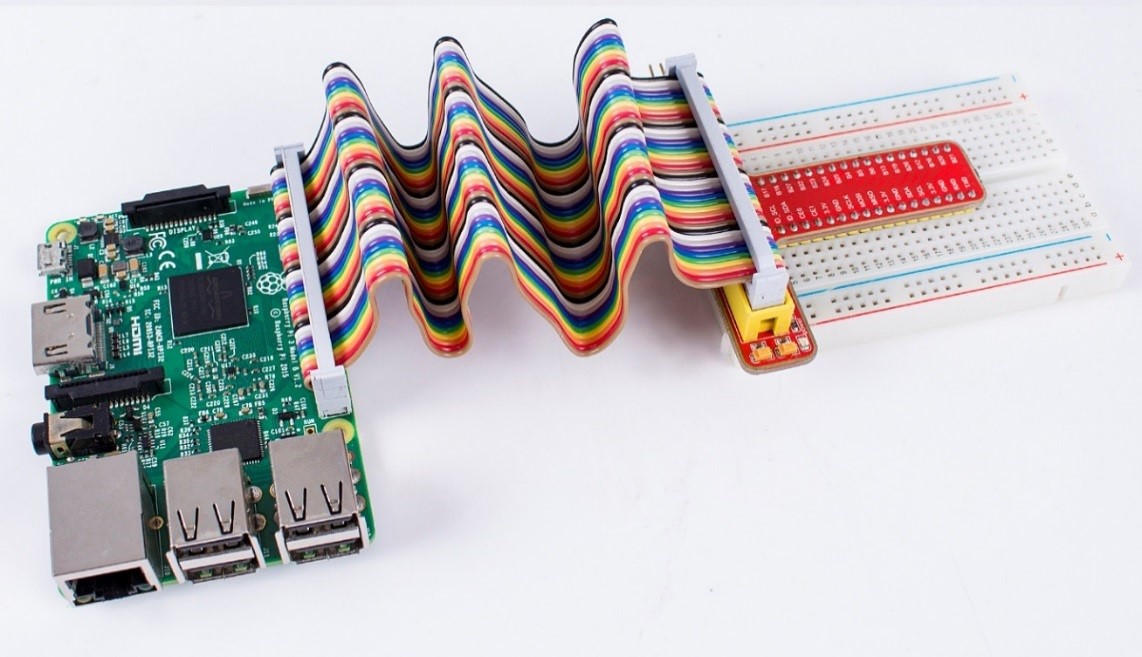
40-pin GPIO Extension Board
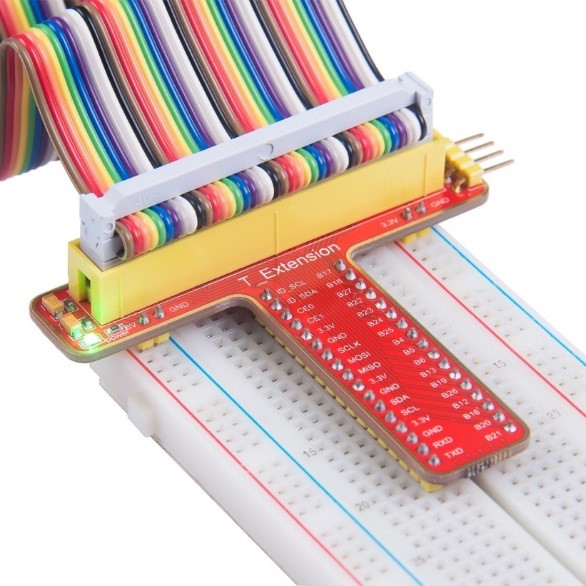
This is our 40-pin GPIO Extension Board and GPIO cable for Raspberry Pi model B+, 2 model B and 3 model.
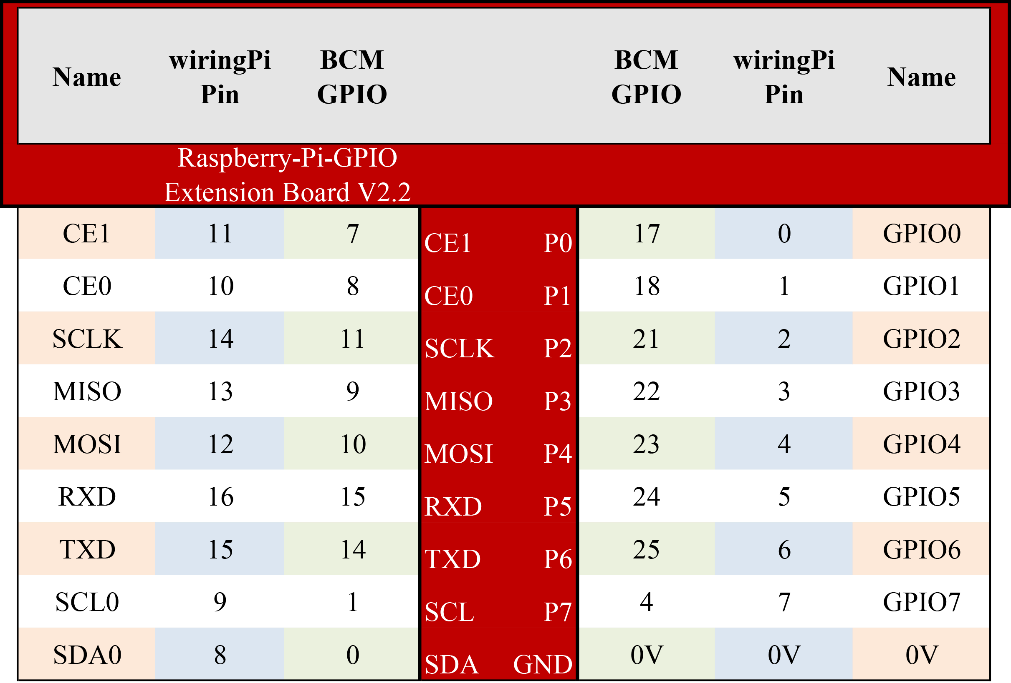
For your better understanding of every pins, we have drawn a table for you to know theName, BCM and wiring pi of each pin.

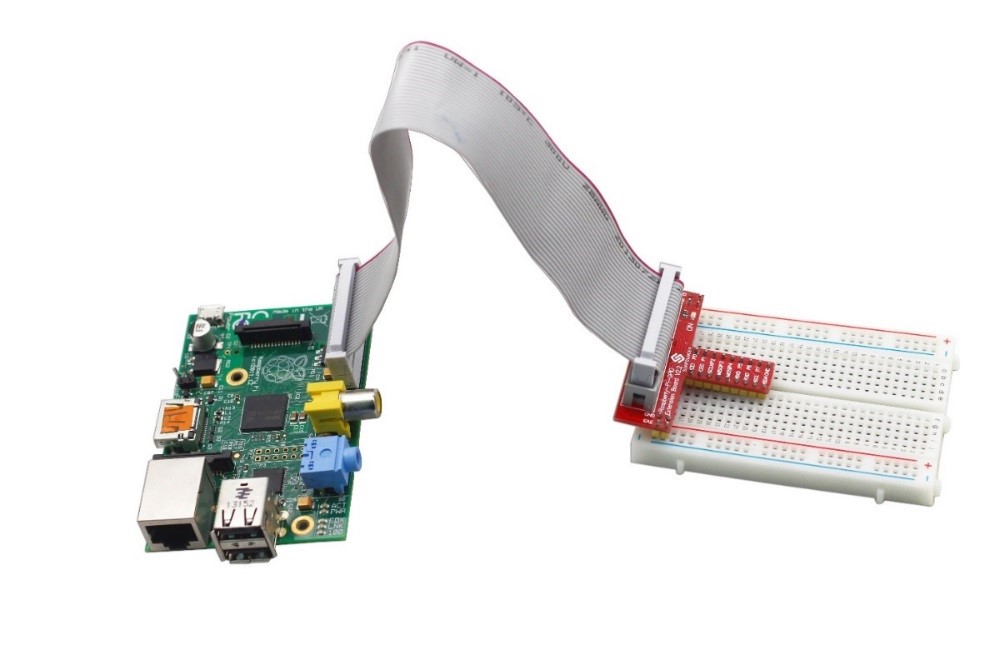
26-pin GPIO Extension Board
26-pin GPIO Extension Board and GPIO cable for Raspberry Pi model B and Raspberry Pi model A.
Also, we have drawn a table of the corresponding BCM, wiringPi and Name of each pins.