Introduction
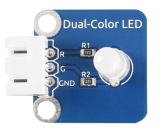
A dual-color light emitting diode (LED) is capable of emitting two different colors of light, typically red and green, rather than only one color. It is housed in a 3mm or 5mm epoxy package. It has 3 leads; common cathode or common anode is available. A dual-color LED features two LED terminals, or pins, arranged in the circuit in anti-parallel and connected by a cathode/anode. Positive voltage can be directed towards one of the LED terminals, causing that terminal to emit light of the corresponding color; when the direction of the voltage is reversed, the light of the other color is emitted. In a dual-color LED, only one of the pins can receive voltage at a time. As a result, this type of LED frequently functions as indicator lights for a variety of devices, including televisions, digital cameras, and remote controls.

Required Components
– 1 * Raspberry Pi
– 1 * Breadboard
– Several Jumper wires
– 1 * Dual-color LED module
– 1 * 3-Pin anti-reverse cable
Experimental Principle
Connect pin R and G to GPIOs of Raspberry Pi, program the Raspberry Pi to change the color of the LED from red to green, and then use PWM to mix into other colors.
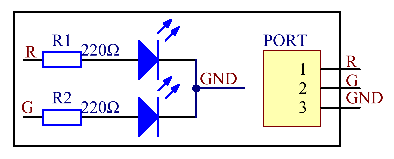
The schematic diagram of the module is as shown below:

Experimental Procedures
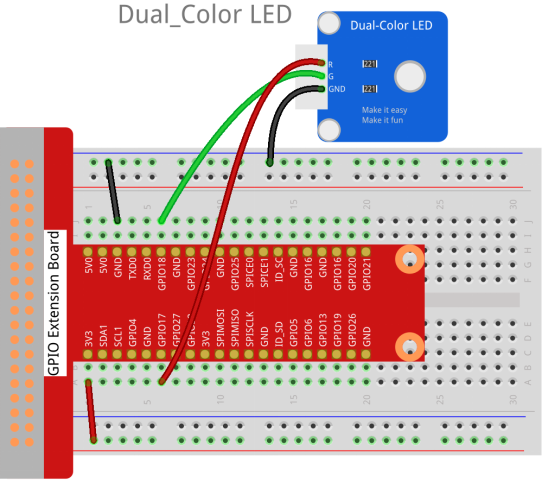
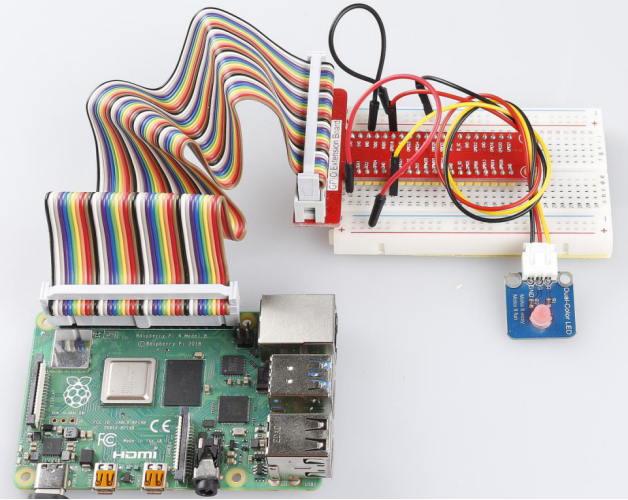
Step 1: Build the circuit.
| Raspberry Pi | GPIO Extension Board | Dual-Color LED Module |
| GPIO0 | GPIO17 | R |
| GND | GND | GND |
| GPIO1 | GPIO18 | G |

For C Users:
Step 2: Change directory.
cd /home/pi/SunFounder_SensorKit_for_RPi2/C/01_dule_color_led/Step 3: Compile.
gcc dule_color_led.c -lwiringPi -lpthreadStep 4: Run.
sudo ./a.outFor Python Users:
Step 2: Change directory.
cd /home/pi/SunFounder_SensorKit_for_RPi2/Python/Step 3: Run.
sudo python3 01_dule_color_led.pyYou can see the dual-color LED render green, red, and mixed colors.

