Introduction
In this lesson, we will use digital pins to light up/off the LED module and learn how to wire on the Simulation page.
There are three common types of pins on the Ezblock Pi, and A0-A7 are the analog pins that provide the analog signal (0~4095).
D0-D9 are the digital pins that provide the digital signals (0 or 1), and P0-P7 are the PWM pins that output the PWM signals. Here we use the digital pins.
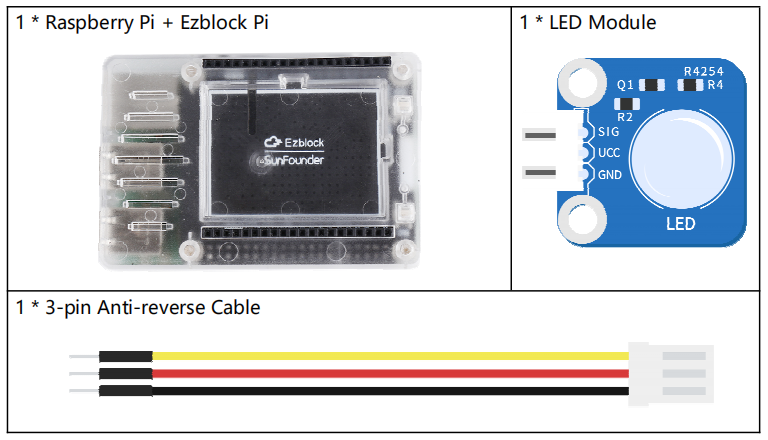
![]() Components
Components
![]() Programming Steps
Programming Steps
Step 1
After creating a new project, click on the Simulation icon on the left side of the page to enter the Simulation page.

Step 2
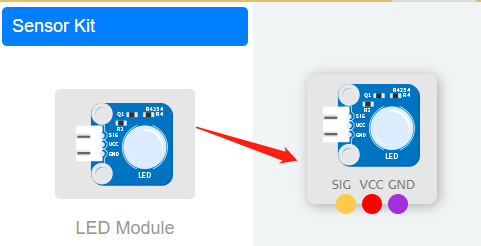
Drag the LED module to the right area.
Note: You can click the plus icon to fold the Sensor Kit category.
Step 3
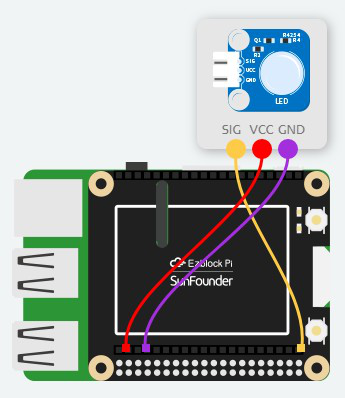
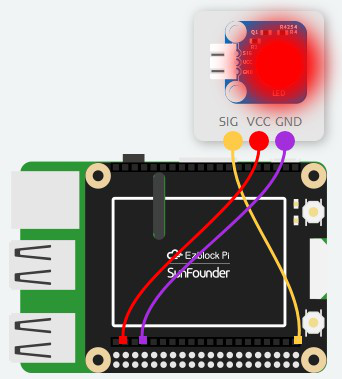
Connect the colored dots to the pins of Ezblock Pi that are in the same color. Here we connect the SIG to D0, and setting D0 to 1 can light up the LED. Next, connect the VCC and GND to 3.3V and GND respectively.
Step 4
Click the back button to return to the Programming page.

Step 5
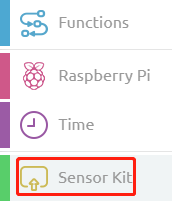
You can find an additional Sensor Kit category. Inside it, you can find the corresponding block of the module you just added.
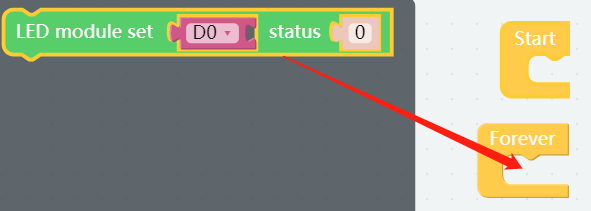
Step 6
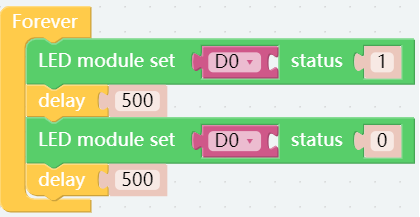
Drag a LED module block into Forever block, change 0 to 1.
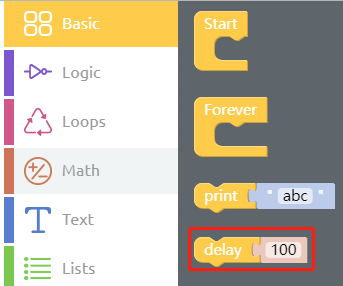
Step 7
Click the Basic category to find the Delay block, then put it to the bottom of LED module block. Change the value to 500 which means that letting the LED illuminate for 500ms.
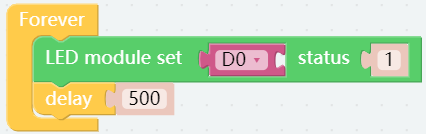
The combined block is shown below.
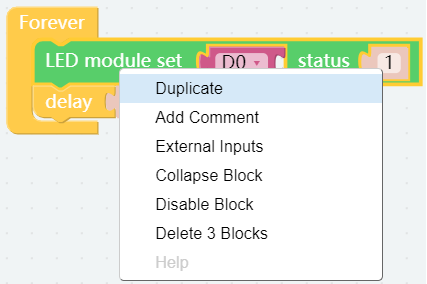
Step 8
Long press the LED module block and then click Duplicate to copy a same block, then change 1 to 0 to turn off the LED.
Step 9
Then, add another delay block to keep the led off for 500ms, like this:
Step 10
Our code is done here. Go to the Simulation page and click on the Run button at the top of the page to see the phenomenon.
Note: If you successfully see the LED module flashing, there is no problem with the code.
Step 11
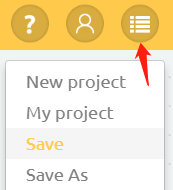
Once you’ve written the code, click the menu button in the top right corner and click Save to save the project.
Step 12
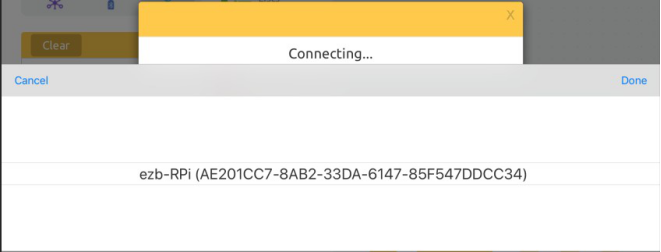
Click the Bluetooth connection button, then click on Done; Waiting for “Connected Successfully ” to appear. During this time, the Raspberry Pi should be as close as possible to the device, so as to help them be connected.
Step 13
Now, save your project, connect the Bluetooth and click Flash to download the code.