Introduction
In this lesson, we will use an ultrasonic sensor to simulate the reversing device of a car.
Components
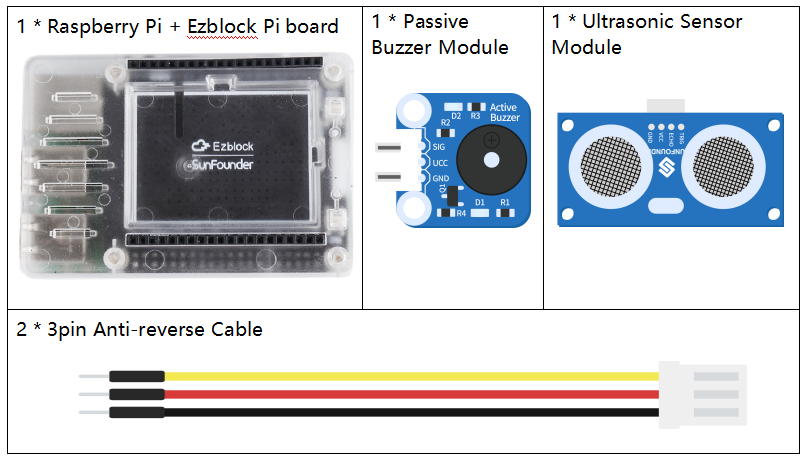
Programming Steps
Step 1
After creating a new project, click on the Simulation icon on the left side of the page to enter the Simulation page.

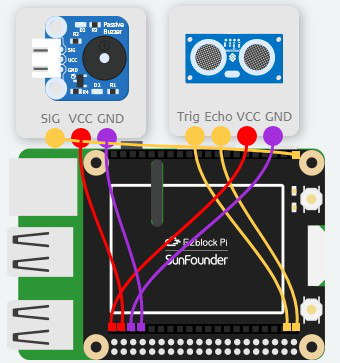
Step 2
Connect the Buzzer module to P0 of the Ezblock, Trig of ultrasonic sensor to D1, Echo to D0. Then connect the VCC and GND to 3.3V and GNDrespectively.
Step 3
Under the Variables category, click Create variable to create a variable, distance.

Step 4
Read the value of the ultrasonic sensor, and assign it to the variable distance. Moreover, print it on Debug Monitor by using print block.

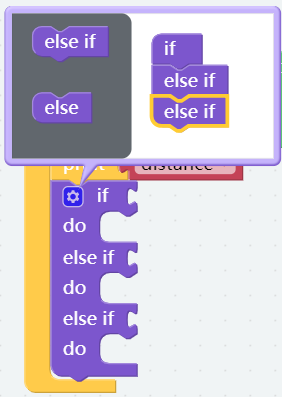
Step 5
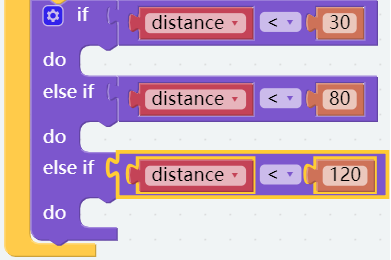
Place an if do block under the print block, then click the Settings button in the top left corner, and drag two else if blocks from the if block to create multiple judgment branches.
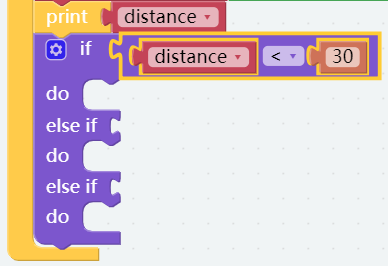
Step 6
Drag a Comparison Operator ( = ) block after the if, then change the equals sign to the less than sign; in addition, put an distance block on the left; a number block on the right, and change the value to 30.
Step 7
Long press the Comparison Operator ( = ) block and choose duplicate to copy 2 more combine blocks and change the number to 80 and 120.
Step 8
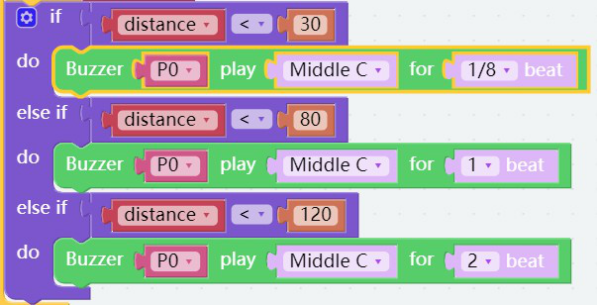
Add three Buzzer blocks into do block, then change the values of beat to 2, 1 and 1/8 respectively, which helps to simulate the reversing scene of a car. And the closer the car move to the obstacle, the rapider the buzzer may sound.
Step 9
Drag the slider to simulate the read value of sensor. The higher the value, the slower the buzzer sounds, which indicates that the codes are correct. Now save your project, connect the Bluetooth and click Flash to compile and download the code.
