Introduction
There are five operation directions for joystick PS2: up, down, left, right and press-down.
Required Components
– 1 * Raspberry Pi
– 1 * Breadboard
– 1 * PCF8591
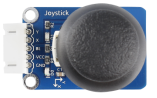
– 1 * Joystick PS2 module
– 1 * 5-Pin anti-reverse cable
– Several Jumper wires
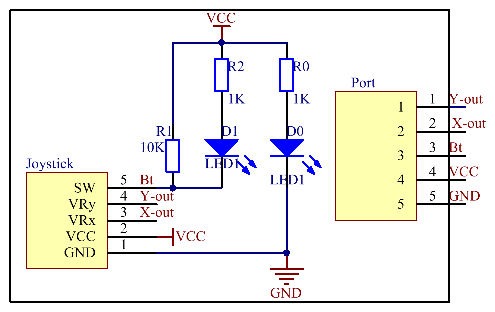
Experimental Principle
This module has two analog outputs (corresponding to X and Y coordinates) and one digital output representing whether it is pressed on Z axis.
In this experiment, we connect pin X and Y to the analog input ports of the A/D convertor so as to convert analog quantities into digital ones. Then program on Raspberry Pi to detect the moving direction of the Joystick. The schematic diagram:
Experimental Procedures
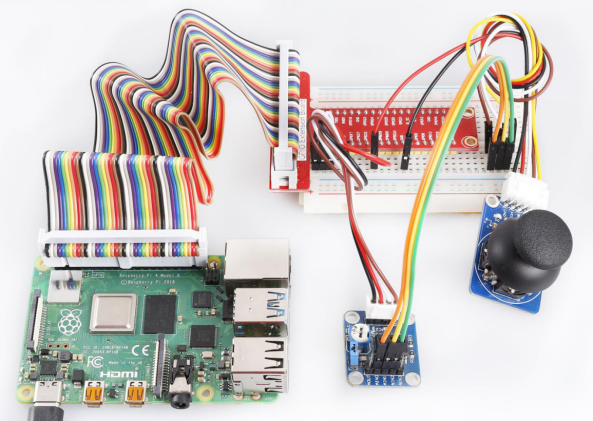
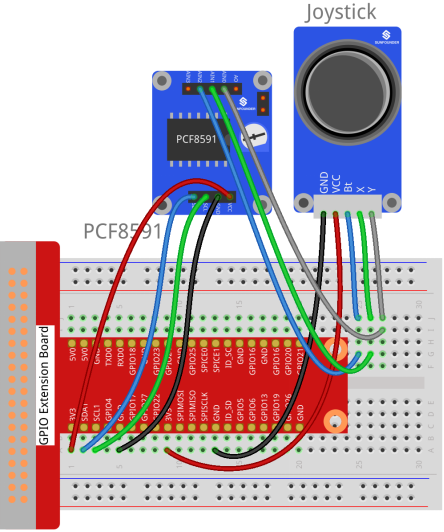
Step 1: Build the circuit.
| Raspberry Pi | GPIO Extension Board | PCF8591 Module |
| SDA | SDA1 | SDA |
| SCL | SCL1 | SCL |
| 3.3V | 3V3 | VCC |
| GND | GND | GND |
| Joystick PS2 | GPIO Extension Board | PCF8591 Module |
| Y | * | AIN0 |
| X | * | AIN1 |
| Bt | * | AIN2 |
| VCC | 3V3 | VCC |
| GND | GND | GND |
For C Users:
Step 2: Change directory.
cd /home/pi/SunFounder_SensorKit_for_RPi2/C/15_joystick_PS2/Step 3: Compile.
gcc joystick_PS2.c -lwiringPiStep 4: Run.
sudo ./a.outFor Python Users:
Step 2: Change directory.
cd /home/pi/SunFounder_SensorKit_for_RPi2/Python/Step 3: Run.
sudo python3 15_joystick_PS2.pyNow push the rocker upwards, and a string “up” will be printed on the screen; push it downwards, and “down” will be printed; if you push it left, “Left” will be printed on; If you push it right, and “Right” will be printed; If you press down the cap, “Button Pressed” will be printed on the screen.