Introduction
In this lesson, DS18B20 is used to monitor the temperature at home so as to turn on the air conditioner in advance.
![]()
![]() Components
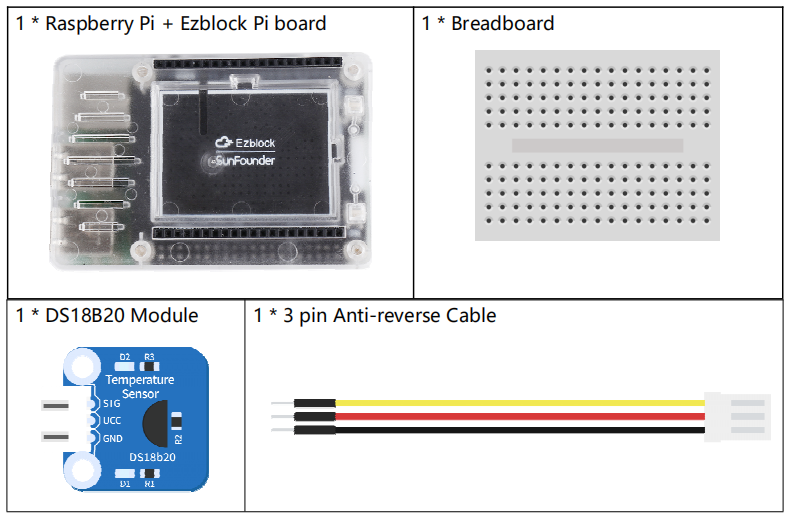
Components
![]()
![]() Programming Steps
Programming Steps
Step 1
After creating a new project, click on the Simulation icon on the left side of the page to enter the Simulation page.

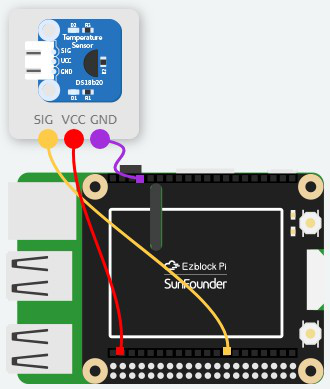
Step 2
Enter the Simulation page and connect the SIG of DS18B20 Module to D7; VCC and GND to 3.3v and GND respectively.
Step 3
Return to the Programming page, and click the IoT Control icon to enter the IoT Control page.

Step 4
Click the ‘+’ button to add function blocks.

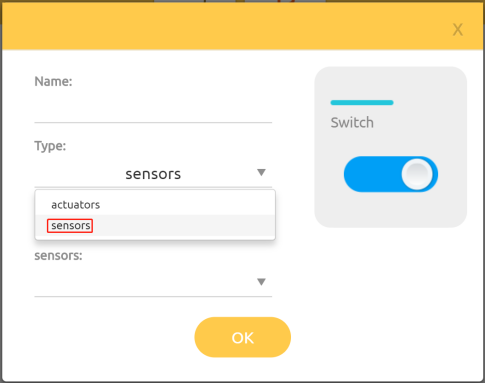
Step 5
Click on the blank line of type, there appear actuators(for control) and sensors (for reading values). Here, we select sensors.
Step 6
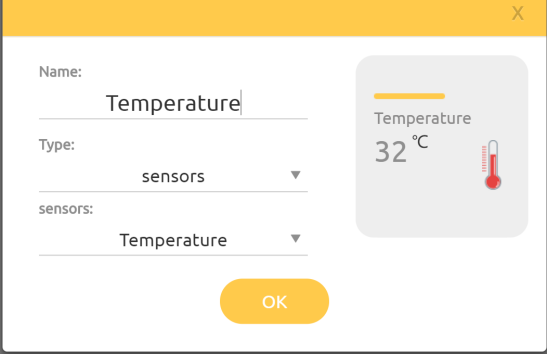
Choose Temperature.
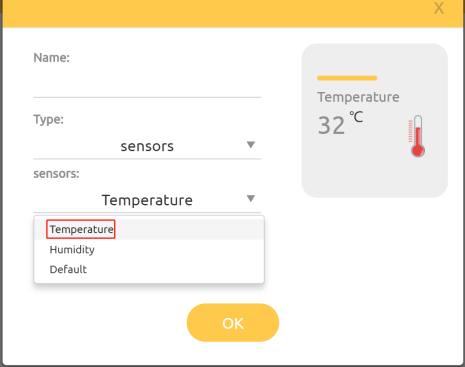
Step 7
Type in the name, Temperature and click OK.
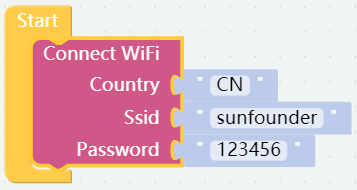
Step 8
Go back to the Programming page, then drag a Connect WiFi block from the Raspberry Pi category to Start block.
Step 9
Back to Programming page, drag out the post Temperature-1 block in the IoT category and place it in the Forever block, and select the DS18B20 block from the Sensor Kit category and put it in the back.

Step 10
Connect to the main control board, then disconnect the Bluetooth connection after uploading the code to let the IoT transfer faster.

Step 11
After entering the IoT Control page, click the run icon and you will see the temperature change.
