Introduction
In this lesson, we can make the RGB LEDs light up the colors we want and even make color loops.
![]()
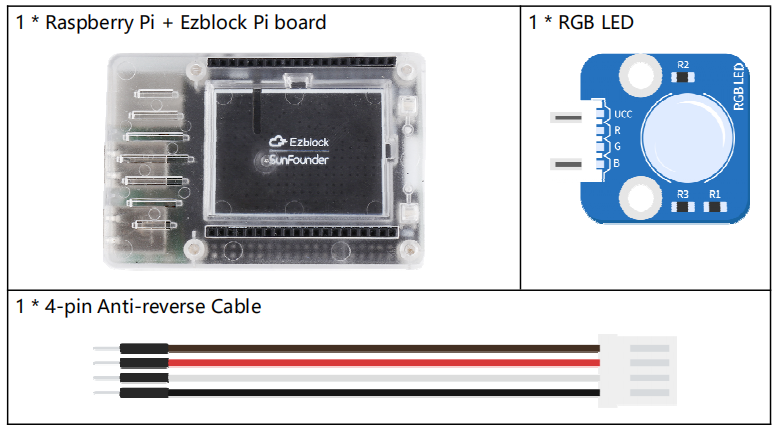
![]() Components
Components
Programming Steps
Step 1
Create a new project, then click on the Simulation icon on the left side of the page to enter the Simulation page.

Step 2
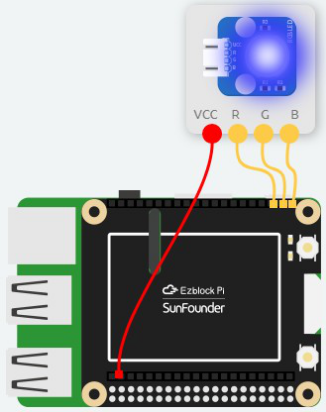
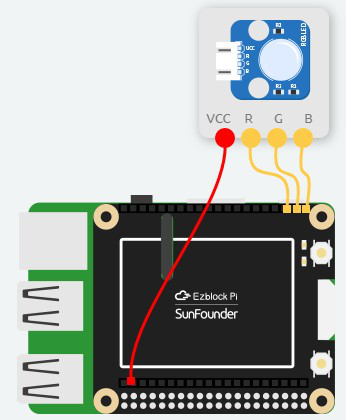
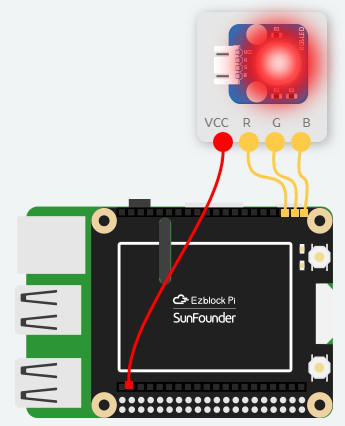
Drag the RGB LED module to the Simulation area, then connect the R, G and B pins to P2, P1 and P0 respectively in Ezblock Pi. And connect the VCC to 3.3v.
Step 3
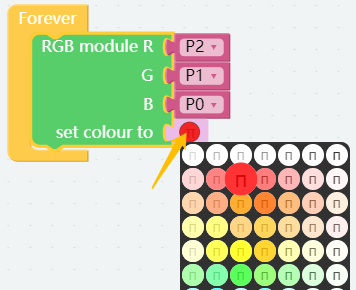
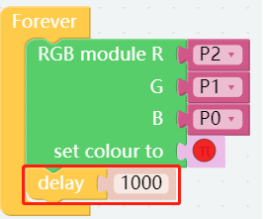
Go back to the Programming page, then drag out the RGB module block under the Sensor Kit category, and put it into the Forever block select the color we want.
Step 4
Then go to the Simulation page again; click on the run icon, and we can see the RGB LED module showing the corresponding colors.
Step 5
Use the delay block from Basic category to keep RGB LED module in this color for 1000 milliseconds (1second).
Step 6
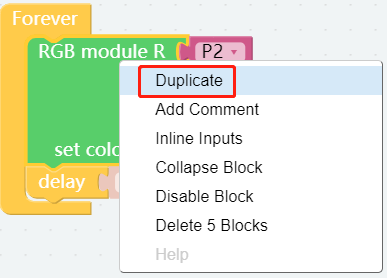
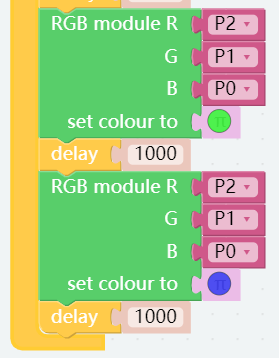
Long press RGB module block and then click Duplicate to copy 2 identical RGB blocks.
Step 7
Choose the color we want. Now we can make the RGB LED module blink different colors.
Step 8
Enter the Simulation page again to see the effect. Now save your project, connect the Bluetooth and click Flash to compile and download the code.