Introduction
In this lesson, we will monitor the soil moisture of the potted plants and light in real time, so that we can know when to water and turn on the light.
Components
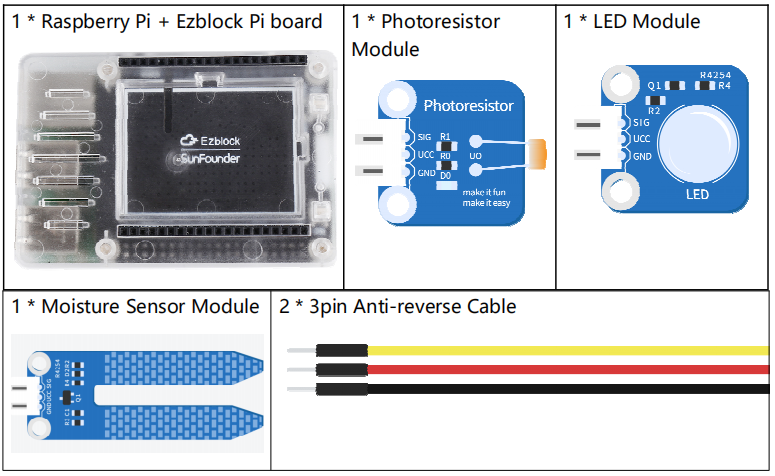
Programming Steps
Step 1
After creating a new project, click on the Simulation icon on the left side of the page to enter the Simulation page.

Step 2
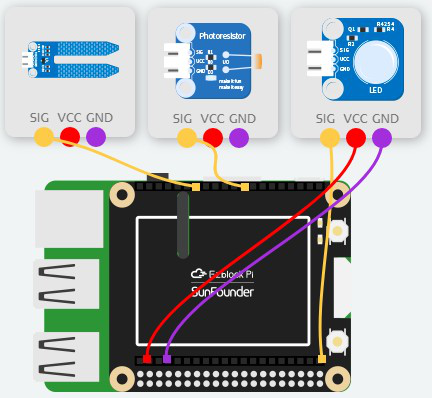
Connect the moisture sensor to A5, the photoresistor to A0, and the LED to D0. Note: The VCC and GND of the modules on the left are not connected, but they need to be connected to 3.3.V and GND respectively. You can use the breadboard to expand the pins.
Step 3
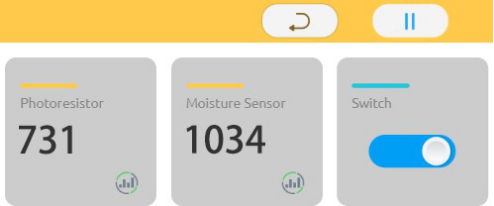
Enter the IoT Control page to create 2 sensors, called Photoresistor and Moisture sensor, and 1 actuator named Switch.

Step 4
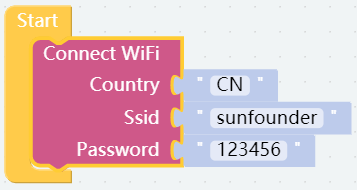
Go back to the Programming page, then get a Connect WiFi block from the Raspberry Pi category and put it into the Start block.
Step 5
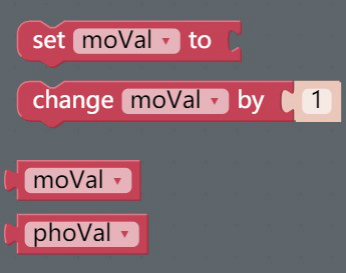
Click the Variables category to create two variables: moVal and phoVal.
Step 6
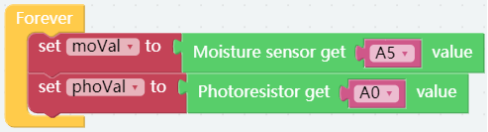
Read the value of moisture sensor and assign it to the variable moVal. Read the value of the photoresistor and assign it to the variable, phoVal.
Step 7
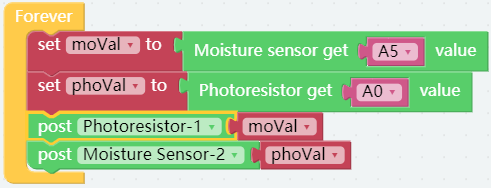
Get the post Photoresistor-1 block and post Moisture Sensor-2 block from the IoT category and place them below the set phoVal to block. Drag a moVal block and a phoVal block from the Variables category to the areas as shown.
Step 8
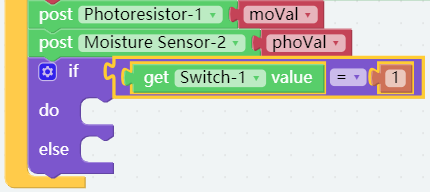
A judgment condition is set by using the if do block and the Comparison Operator ( = ) block to judge if the Switch is ON.
Step 9
When the switch of the IoT Control page is ON, the LED lights up, otherwise it will be out.

Step 10
After click the Flash button, go to the IoT Control page, then click run and wait for a while till you see the changing of values of photoresistor and moisture sensor. When the value of the photoresistor is less than the expected value, press the Switch to light up the LED.