Introduction
In previous experiments, we learned how to use a 7-segment display and control LEDs by a button. In this lesson, we will use a 7-segment display and a button together to create a simple digital dice.
Components
– 1 * SunFounder Uno board
– 1 * Breadboard
– 1 * USB cable
– 1 * Button
– 1 * Resistor (10KΩ)
– 8 * Resistor (220Ω)
– 1 * 7-segment display
– 1 * 104 ceramic capacitor
– 1 * 74HC595
– Jumper wires
Principle
The idea behind a digital dice is very simple: a 7-segment display circularly jumps from 1 to 7 rapidly. When the button is pressed, the jumping will slow down until it stops on a number. When the button is pressed again, the process will repeat.
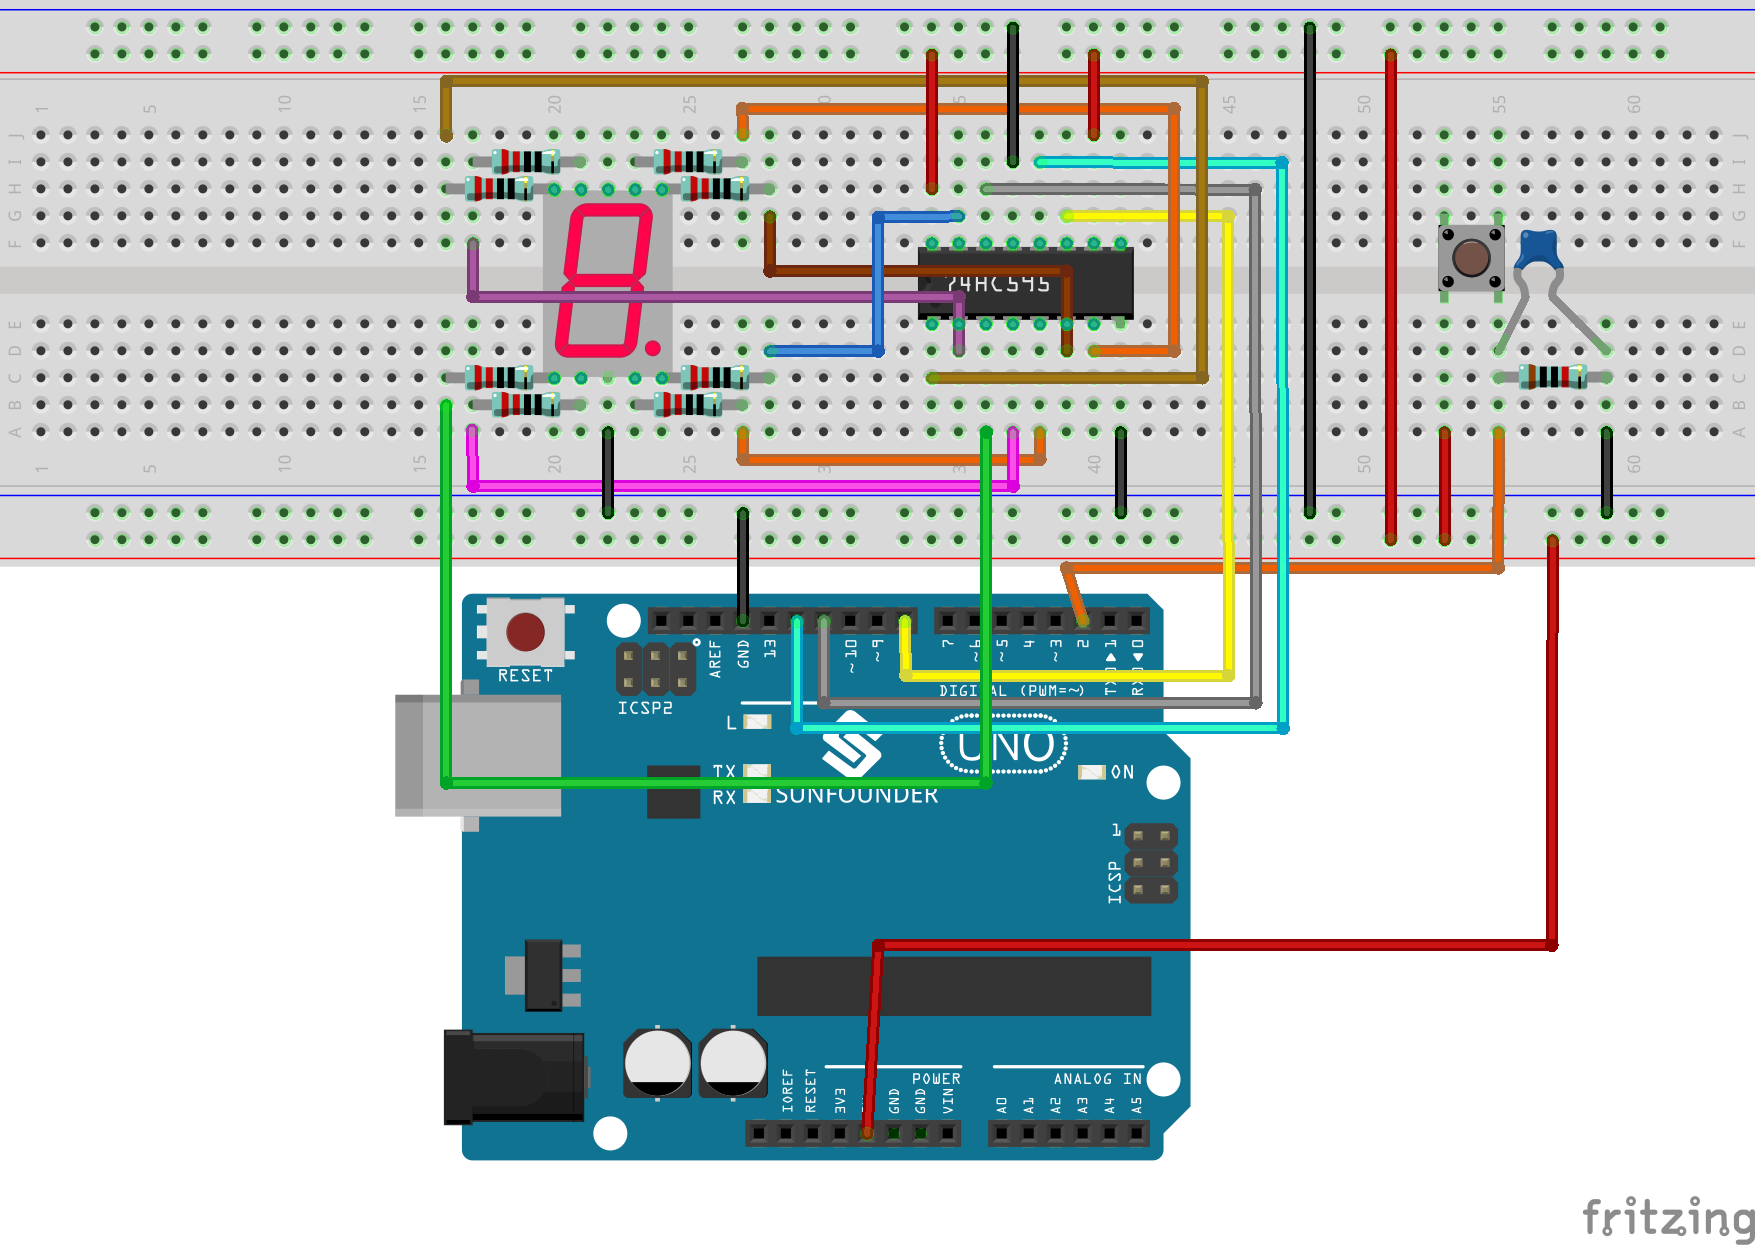
The schematic diagram

Experimental Procedures
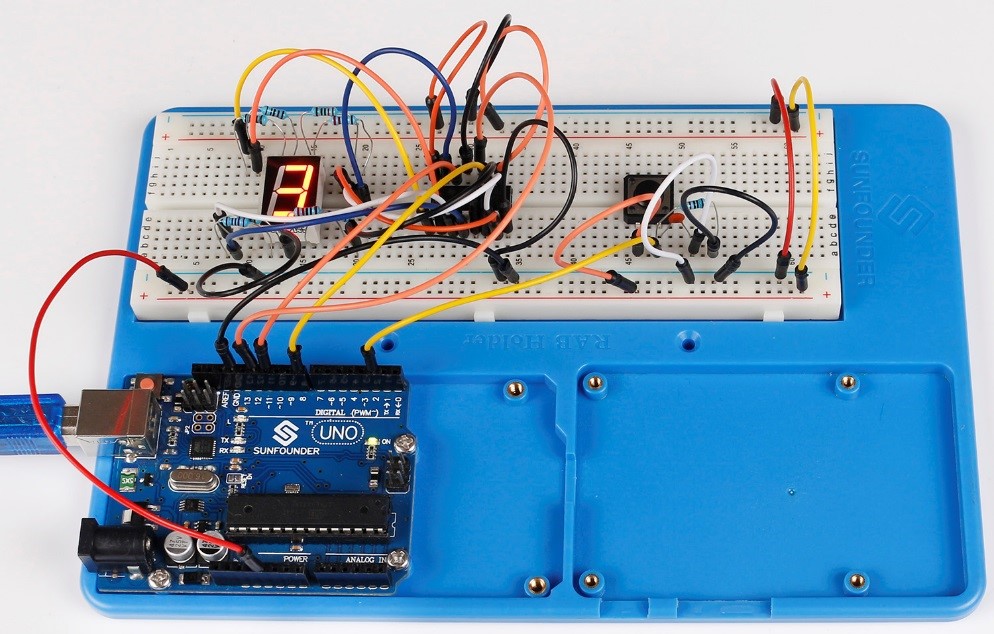
Step 1: Build the circuit
Step 2: Open the code file
Step 3: Select correct Board and Port
Step 4: Upload the sketch to the SunFounder Uno board
You can now see the 7-segment display jump between numbers from 1 to 6. Press the button, and the jumping will slow down until it stops three seconds later. Press the button again, and the process will repeat.
Code
| //Digital Dice /************************************************* * You can now see the single 7-segment display jump between numbers from 1 to 6. * When the button is pressed, the jumping will slow down until it stops three seconds later. * If the button is pressed again, the process will repeat. *************************************************/ //Email:support@sunfounder.com //Website:www.sunfounder.com //2015.5.7 /*********************************************************/ const int latchPin = 12;//Pin connected to ST_CP of 74HC595 const int clockPin = 8;//Pin connected to SH_CP of 74HC595 const int dataPin = 11; //Pin connected to DS of 74HC595 const int ledPin = 13; //ledPin attach to const int keyIn = 2; //keyIn attach to int num = 0; //display 0,1,2,3,4,5,6,7,8,9,A,b,C,d,E,F int datArray[16] = { 252, 96, 218, 242, 102, 182, 190, 224, 254, 246, 238, 62, 156, 122, 158, 142}; long randNumber; /***********************************************/ void setup() { pinMode(latchPin,OUTPUT); //set the latchPin as an output pinMode(clockPin,OUTPUT); //set the clockPin as an output pinMode(dataPin,OUTPUT); //set the dataPin as an output pinMode(ledPin,OUTPUT); //set the ledPin as an output pinMode(keyIn,INPUT); //set the keyIn as an input Serial.begin(9600); // start serial port at 9600 bps: //initialize the random number generator with a fairly random input A0 randomSeed(analogRead(0)); } /************************************************/ void loop() { int stat = digitalRead(keyIn); //store value read from keyIn if(stat == HIGH) // check if the pushbutton is pressed { num ++; if(num > 1) { num = 0; } } Serial.println(num); // print the num on serial monitor if(num == 1) //when pushbutton is pressed { randNumber = random(1,7); //Generate a random number in 1-7 showNum(randNumber); //show the randNumber on 7-segment delay(1000); //wait for 1 second while(!digitalRead(keyIn)); //When not press button,program stop here int stat = digitalRead(keyIn); if(stat == HIGH) // check if the pushbutton is pressed { num ++; digitalWrite(ledPin,HIGH); //turn on the led delay(100); digitalWrite(ledPin,LOW); //turn off the led delay(100); if(num >= 1) { num = 0; } } } //show random numbers at 100 microseconds intervals // If the button has not been pressed randNumber = random(1,7); showNum(randNumber); delay(100); } /************************************************/ //the function to drive 7-segment show numbers void showNum(int num) { digitalWrite(latchPin,LOW); //ground latchPin and hold low for transmitting shiftOut(dataPin,clockPin,MSBFIRST,datArray[num]); //return the latch pin high to signal chip that it //no longer needs to listen for information digitalWrite(latchPin,HIGH); //pull the latchPin to save the data } /************************************************/ |