Introduction
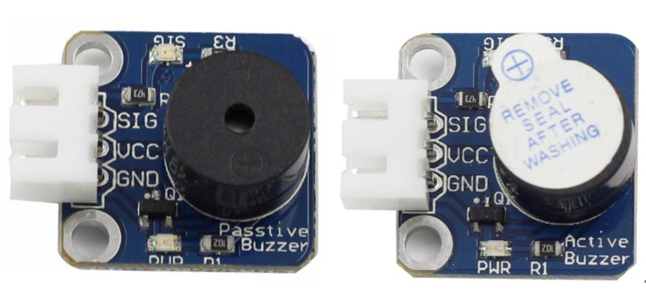
A buzzer is an audio signaling device. Buzzers can be categorized into active and passive ones (see as below).
Components
– 1 * SunFounder Uno board
– 1 * USB data cable
– 1 * Active buzzer
– 1 * Passive buzzer
– 2 * 3-Pin anti-reverse cable
Experimental Principle
Place the pins of two buzzers face up and you can see the one with a green circuit board is a passive buzzer, while the other with a black tape, instead of a board, is an active buzzer, as shown below.
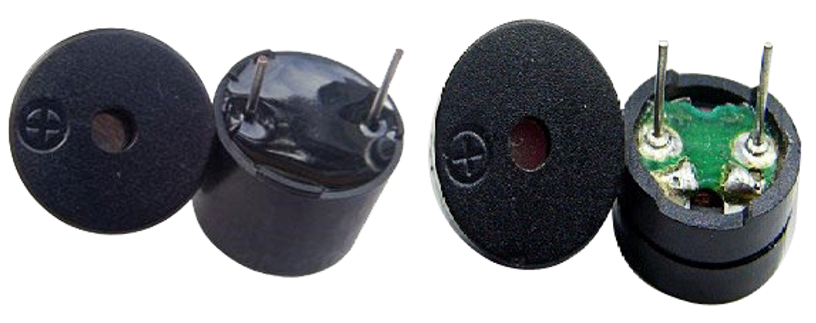
An active buzzer has a built-in oscillating source, so it will make sounds when electrified. But a passive buzzer does not have such source, so it will not beep if DC signals are used; instead, you need to use square waves whose frequency is between 2K and 5K to drive it. The active buzzer is often more expensive than the passive one because of multiple built-in oscillating circuits.
Experimental Procedures
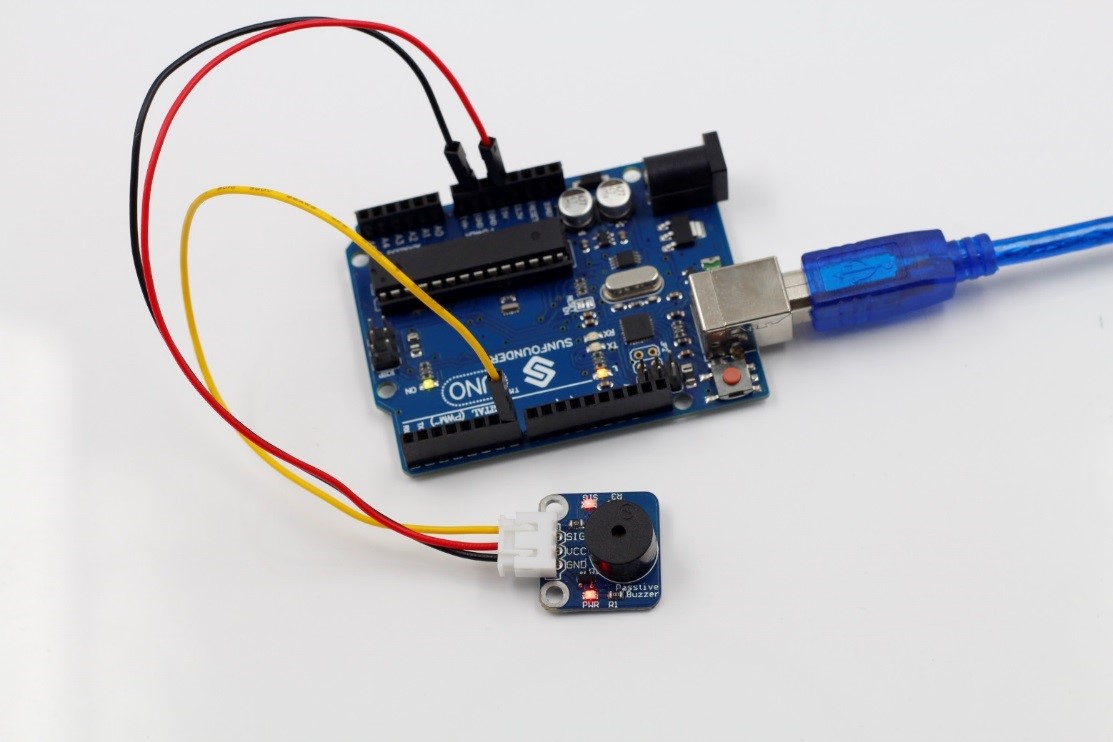
Step 1: Build the circuit
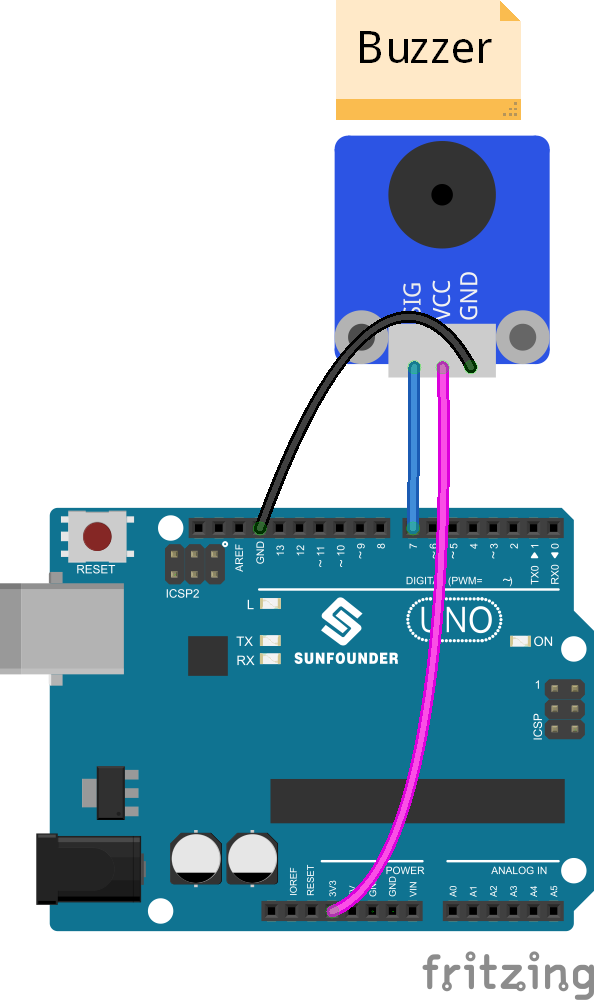
Passive Buzzer
Step 2: Program (see the file Passive.ino under Lesson 22 Buzzer/code/Passive in the package downloaded from the page through LEARN -> Get Tutorial -> Sensor Kit on our website)
Step 3: Compile
Step 4: Upload the sketch to SunFounder Uno board
Now, you can hear the passive buzzer beeping. It also works in the same way if you use an active one here.
Passive.ino
| //function:buzzer beeping in different frequence/*******************************************/ const int buzzerPin = 7;//the buzzer pin attach to int fre;//set the variable to store the frequence value /*******************************************/ void setup() { pinMode(buzzerPin,OUTPUT);//set buzzerPin as OUTPUT } /*******************************************/ void loop() { for(int i = 200;i <= 800;i++) //frequence loop from 200 to 800 { tone(7,i); //in pin7 generate a tone,it frequence is i delay(5); //wait for 5 milliseconds } delay(4000); //wait for 4 seconds on highest frequence for(int i = 800;i >= 200;i–) //frequence loop from 800 downto 200 { tone(7,i); //in pin7 generate a tone,it frequence is i delay(10); //delay 10ms } } |
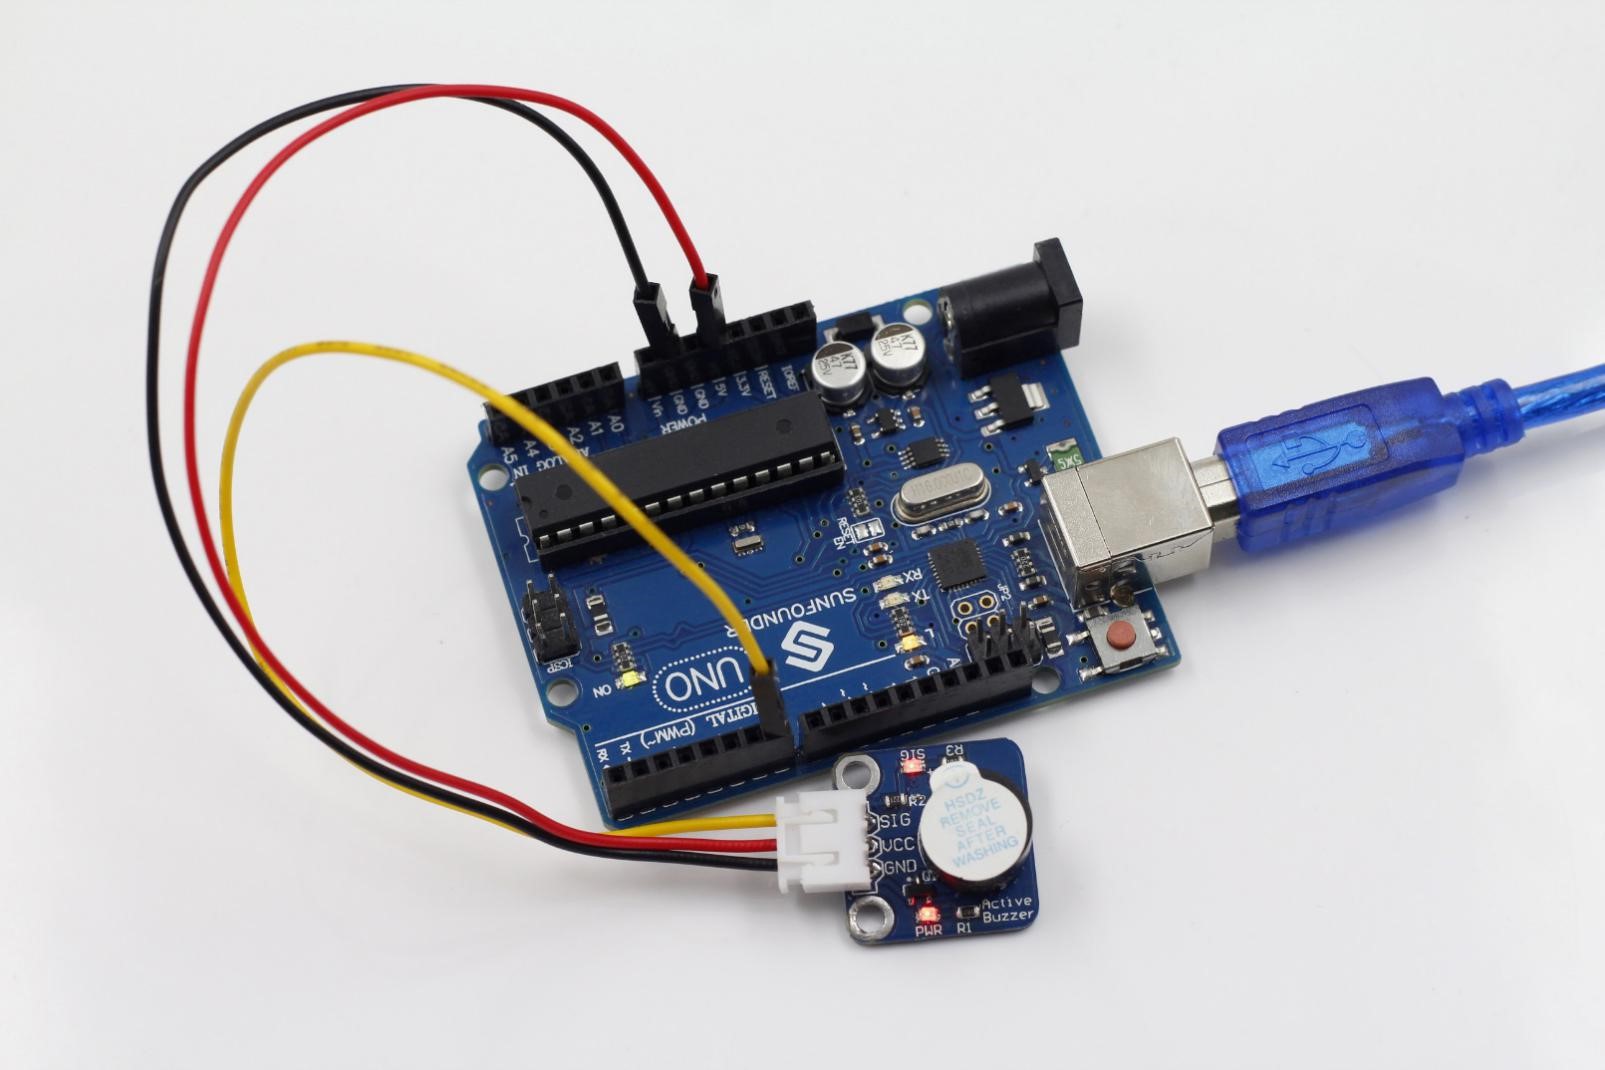
Active Buzzer
Note: The active buzzer has a built-in oscillating source, so it will beep as long as it is wired up.
Step 2: Program (see the file Active.ino under Lesson 22 Buzzer/code/Active in the package downloaded)
Step 3: Compile
Step 4: Upload the sketch to SunFounder Uno board
Now, you can hear the active buzzer beeping. But it won’t work if you use a passive one here.
Active.ino
| /************************************************ * function:you can hear the active buzzer beeping. * But it won’t work if you use a passive one here. *************************************************/int buzzerPin = 7;//the pin of the active buzzer attach to pin7 void setup() { pinMode(buzzerPin,OUTPUT);//set the buzzer as as OUTPUT digitalWrite(buzzerPin,LOW);//initialize the buzzerPin as LOW level } void loop() {} |