Introduction
In this lesson, we will use a 4-digit 7-segment display to make a stopwatch.
Components
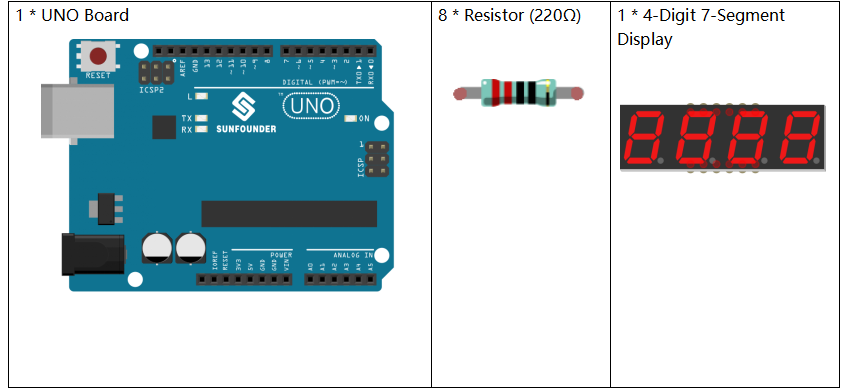
Components Introduction
When a 7-segment display is used, if it is a common anode display, connect the anode pin to power source; if it is a common cathode one, connect the cathode pin to GND. When a 4-digit 7-segment display is used, the common anode or common cathode pin is to control the digit displayed. There is only one digit working. However, based on the principle of Persistence of Vision, we can see four 7-segment displays all displaying numbers. This is because the electronic scanning speed is too fast for us to notice interval.
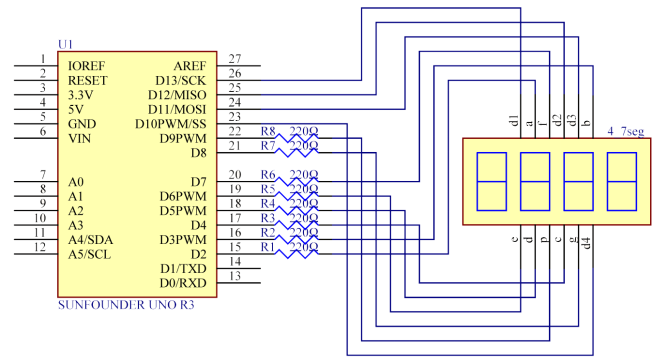
The schematic diagram of the 4-digit 7-segment display is as shown below:

Schematic Diagram
Experimental Procedures
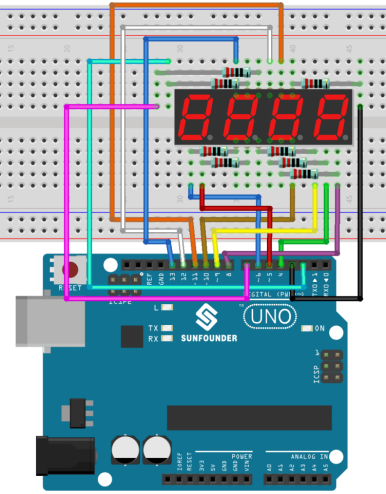
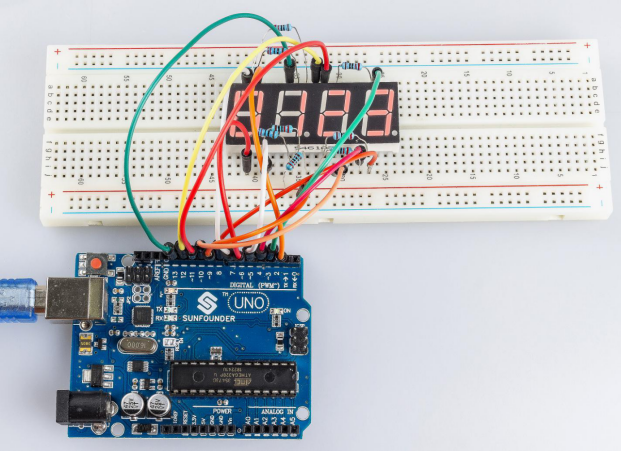
Step 1: Build the circuit.
| 4-Digit 7-Segment Display | Uno Board |
| a | 2 |
| b | 3 |
| c | 4 |
| d | 5 |
| e | 6 |
| f | 7 |
| g | 8 |
| p | 9 |
| D1 | 13 |
| D2 | 12 |
| D3 | 11 |
| D4 | 10 |
Step 2: Open the code file.
Step 3: Select the Board and Port.
Step 4: Upload the sketch to the board.
Now, you can see the number increases by one per second on the 4-digit 7-segment display.
Code Analysis
That’s all for the code. It is long enough, so let me sum it up.
Setup: Set all the pins of the LED display as output. Set Timer1 as 0.1 second. Run the following functions. So add() will be called when it’s 0.1 second; but before 0.1 second passes, add() is not called yet. Then use a loop() function. The 4 LEDs are displayed as 0000. Wait for a while. 0.1 second later, indicating count=10, call the function add(). then n++=1; because 1<10000, it will not restore to 0. Run loop() and the LEDs will be displayed as 0001. 0.1 second later, n increases by 1, n++=2, and the display will become 0002, and then 0003, and on and on, till 9999. n increases by 1 every second, and the number displayed increases accordingly, until n=10000 and n is 0 again. Then the counting starts from 0.
Code Analysis 22-1 Initialize the timer
Timer1.initialize(100000); // set a timer of length 100000 microseconds (or 0.1 sec – or 10Hz => the led will blink 5 times, 5 cycles of on-and-off, per second)
Timer1.attachInterrupt( add ); // attach the service routine here
The sentence attachInterrupt(ISR) is to attach an ISR function to call when there is an interrupt. ISR stands for interrupt service routine. Here we use an add routine.
Code Analysis 22-2 Loop function
void loop()
{
clearLEDs();//clear the 7-segment display screen
pickDigit(0);//Light up 7-segment display d1
pickNumber((n/1000));// get the value of thousand
delay(del);//delay 5ms
clearLEDs();//clear the 7-segment display screen
pickDigit(1);//Light up 7-segment display d2
pickNumber((n%1000)/100);// get the value of hundred
delay(del);//delay 5ms
clearLEDs();//clear the 7-segment display screen
pickDigit(2);//Light up 7-segment display d3
pickNumber(n%100/10);//get the value of ten
delay(del);//delay 5ms
clearLEDs();//clear the 7-segment display screen
pickDigit(3);//Light up 7-segment display d4
pickNumber(n%10);//Get the value of single digit
delay(del);//delay 5ms
}
The loop function is used to let four segment display to display the single digit, ten, one hundred and thousand of a value.
Such as n=1345, (1345/1000)=1, (1345%1000)/100)=3, ((1345%100)/10)=4, (n%10)=5.
Code Analysis 22-3 pickDigit(int x) function
void pickDigit(int x) //light up a 7-segment display
{
//The 7-segment LED display is a common-cathode one. So also use digitalWrite to set d1 as high and the LED will go out
digitalWrite(d1, HIGH);
digitalWrite(d2, HIGH);
digitalWrite(d3, HIGH);
digitalWrite(d4, HIGH);
switch(x)
{
case 0:
digitalWrite(d1, LOW);//Light d1 up
break;
case 1:
digitalWrite(d2, LOW); //Light d2 up
break;
case 2:
digitalWrite(d3, LOW); //Light d3 up
break;
default:
digitalWrite(d4, LOW); //Light d4 up
break;
}
}
The 4 digital 7 segment is a common cathode one, set all the d1,d2,d3,d4 to HIGH to let them go out.
If x is equals to 0, then run case0 let d1 to LOW level to light first 7 segment up.
switch…case: Like if statements, switch case controls the flow of programs by allowing programmers to specify different code that should be executed in various conditions. In particular, a switch statement compares the value of a variable to the values specified in case statements. When a case statement is found whose value matches that of the variable, the code in that case statement is run.
The break keyword exits the switch statement, and is typically used at the end of each case. Without a break statement, the switch statement will continue executing the following expressions (“falling-through”) until a break, or the end of the switch statement is reached.
Code Analysis 22-4 pickNumber(int x) function
switch(x)
{
default:
zero();
break;
case 1:
one();
break;
case 2:
two();
break;
case 3:
three();
…….
The function is to control the LED to display numbers. Call zero(), one() until the nine() function to display 0-9 numbers.
Use zero() as an example:
The function void zero is to control the high/low level of LED. Use digitalWrite to set a to f as high, g as low. Based on the pin diagram just mentioned, when a to f is high and g is low, the number 0 will be displayed.
void zero() //the 7-segment led display 0
{
digitalWrite(a, HIGH);
digitalWrite(b, HIGH);
digitalWrite(c, HIGH);
digitalWrite(d, HIGH);
digitalWrite(e, HIGH);
digitalWrite(f, HIGH);
digitalWrite(g, LOW);
}
Code Analysis 23-5 clearLEDs() function
void clearLEDs() //clear the 7-segment display screen
{
digitalWrite(a, LOW);
digitalWrite(b, LOW);
digitalWrite(c, LOW);
digitalWrite(d, LOW);
digitalWrite(e, LOW);
digitalWrite(f, LOW);
digitalWrite(g, LOW);
}
Write all pins a-p to LOW level, let the 7-segment digital display go out.
Code Analysis 22-6 add() function
void add()
{
// Toggle LED
count ++; //The original value of count is 0. count++=1; keep the counting till 10, because one LED can display a maximum of 9.
if(count == 10) // If count=10, which is 1 second, the following statement will be run.
{
count = 0; //which means count from 0
n ++; //then n++=1
if(n == 10000) //When n=10000,
{
n = 0; //n restores to 0.
}
}
}