Introduction
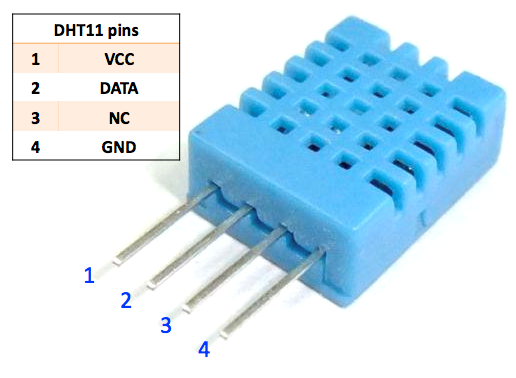
The digital temperature and humidity sensor DHT11 is a composite sensor that contains a calibrated digital signal output of temperature and humidity. The technology of a dedicated digital modules collection and the temperature and humidity sensing technology are applied to ensure that the product has high reliability and excellent long-term stability.
The sensor includes a resistive sense of wet component and an NTC temperature measurement device, and is connected with a high-performance 8-bit microcontroller.
Experimental Conditions
– 1*SunFounder Uno board
– 1*USB data cable
– 1*Humiture sensor module
– 1*I2C LCD1602
– Jumper wires
Experimental Principle
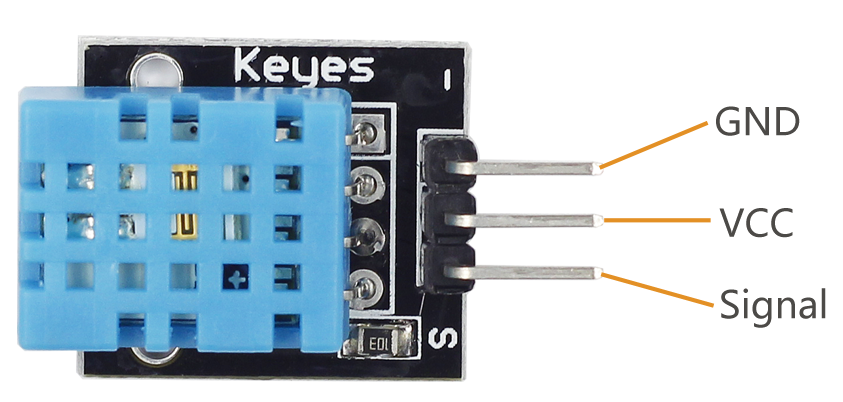
Only three pins are available for use: VCC, GND, and DATA. The communication process begins with the DATA line sending start signals to DHT11, and DHT11 receives the signals and returns an answer signal. Then the host receives the answer signal and begins to receive 40-bit humiture data (8-bit humidity integer + 8-bit humidity decimal + 8-bit temperature integer + 8-bit temperature decimal + 8-bit checksum). For more information, please refer to DHT11 datasheet.
Experimental Procedures
Step 1: Connect the circuit
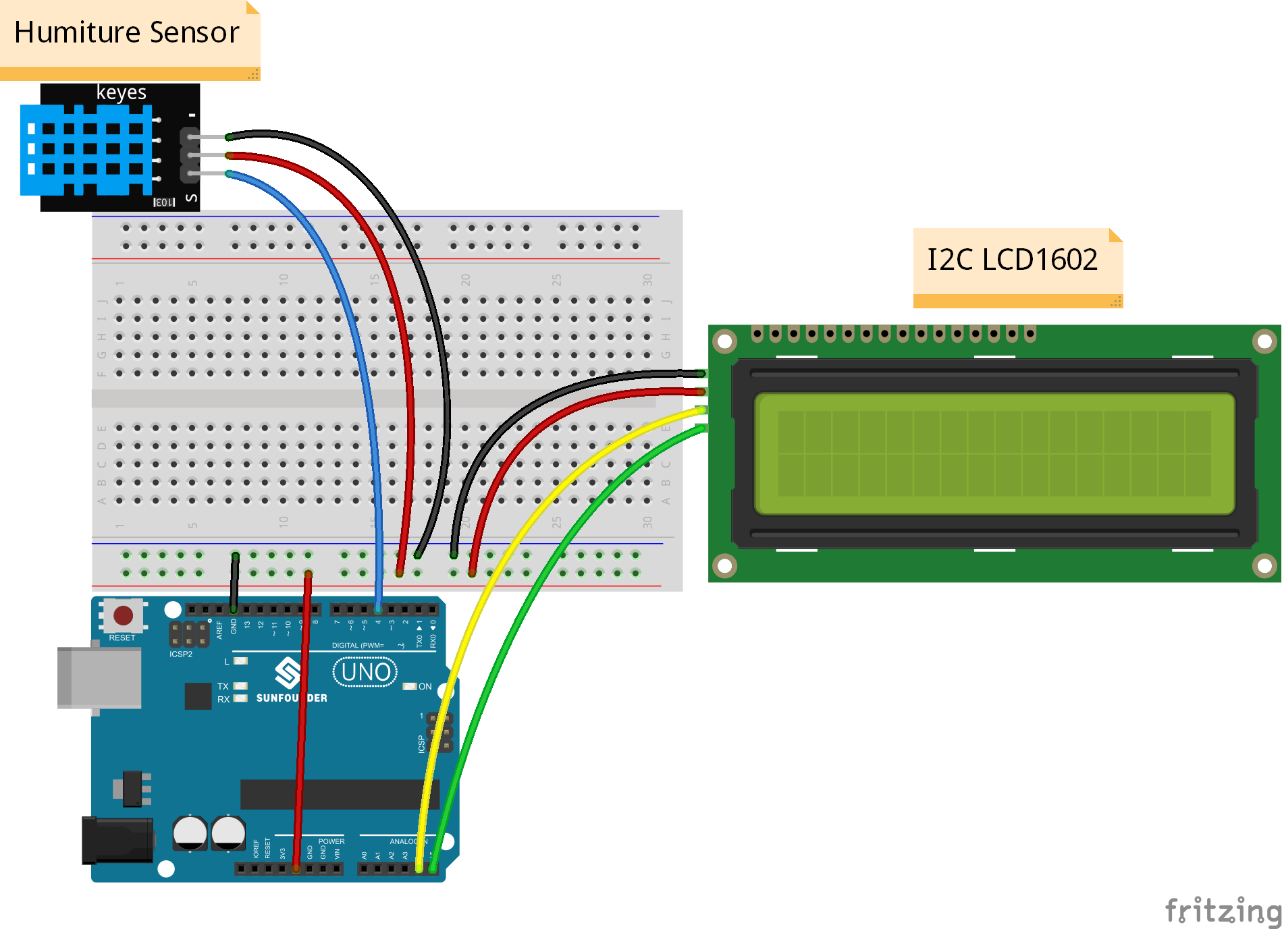
The wiring between the humiture sensor module and the SunFounder Uno board is as shown below:
| Humiture Sensor | SunFounder Uno |
| “-” | GND |
| + | 5V |
| S | 4 |
The wiring between the I2C LCD1602 and the SunFounder Uno board:
| I2C LCD1602 | SunFounder Uno |
| GND | GND |
| VCC | 5V |
| SDA | A4 |
| SCL | A5 |
Step 2: Program (Please refer to the example code in LEARN -> Get Tutorials on our website)
Note: Here you need to add a library. Refer to the description in Lesson 4 previously in the manual.
Step 3: Compile the code
Step 4: Upload the sketch to the SunFounder Uno board
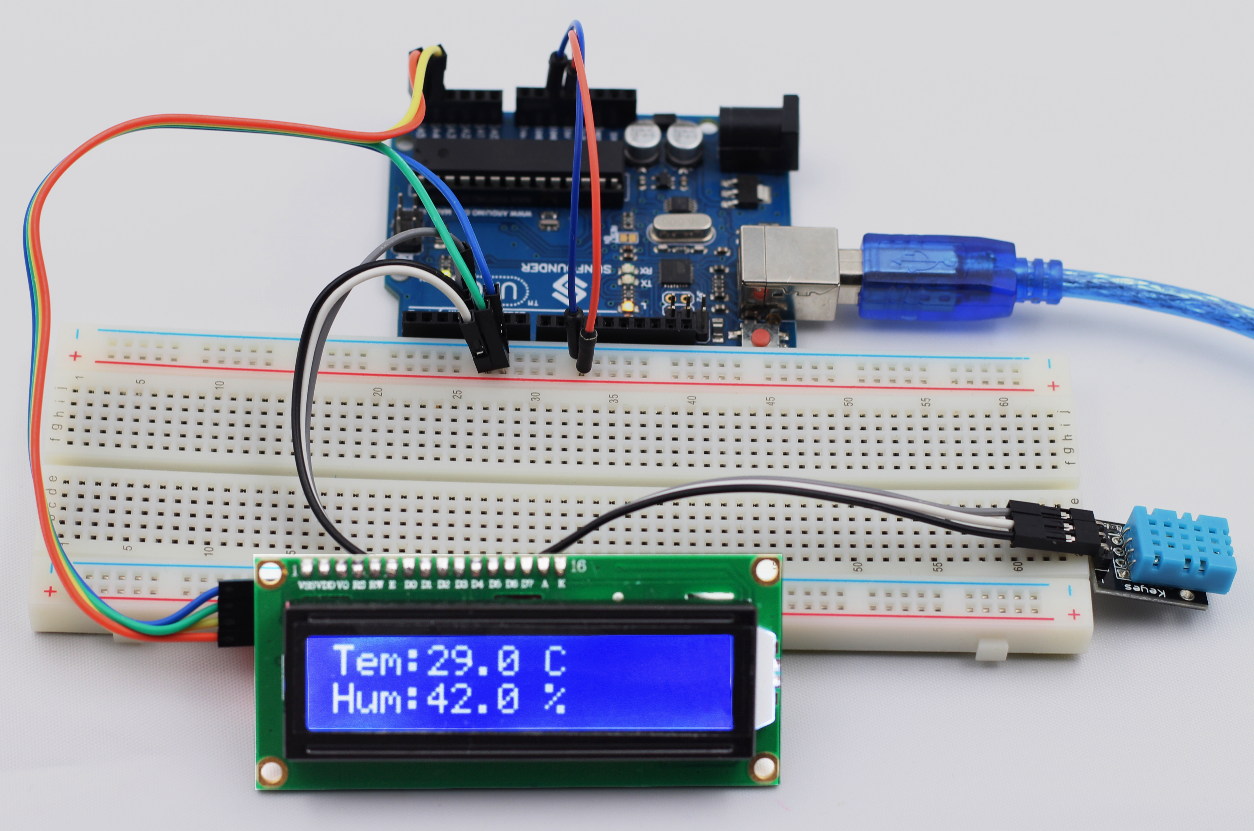
Now, you can see the current value of humidity and temperature displayed on the I2C LCD1602.
Code
| /***************************************************** * name:Humiture Detection * function:you can see the current value of humidity and temperature displayed on the I2C LCD1602. ******************************************************/ //Email:support@sunfounder.com //Website:www.sunfounder.com//include the libraries #include <dht.h> #include <LiquidCrystal_I2C.h> #include <Wire.h> LiquidCrystal_I2C lcd(0x27,16,2); // set the LCD address to 0x27 for a 16 chars and 2 line displaydht DHT; //create a variable type of dhtconst int DHT11_PIN= 4;void setup() { Serial.begin(9600); //initialize the serial monitor lcd.init(); //initialize the lcd lcd.backlight(); //open the backlight }void loop() { // READ DATA //Serial.println(“DHT11:”); //read the value returned from sensor int chk = DHT.read11(DHT11_PIN); switch (chk) { case DHTLIB_OK: //Serial.println(“OK!”); break; case DHTLIB_ERROR_CHECKSUM: //Serial.print(“Checksum error,\t”); break; case DHTLIB_ERROR_TIMEOUT: //Serial.print(“Time out error,\t”); break; default: //Serial.print(“Unknown error,\t”); break; } // DISPLAY DATA lcd.setCursor(0, 0); lcd.print(“Tem:”); //Serial.print(“Tem:”); lcd.print(DHT.temperature,1); //print the temperature on lcd // Serial.print(DHT.temperature,1); lcd.print(char(223));//print the unit” ℃ “ lcd.print(“C”); // Serial.println(” C”); lcd.setCursor(0, 1); lcd.print(“Hum:”); //Serial.print(“Hum:”); lcd.print(DHT.humidity,1); //print the humidity on lcd //Serial.print(DHT.humidity,1); lcd.print(” %”); //Serial.println(” %”); delay(200); //wait a while } |