Introduction
A metal touch sensor is a type of switch that only operates when it’s touched by a charged body. It has a high-frequency transistor which can conduct electricity when receiving electromagnetic signals.

Components
– 1 * Raspberry Pi
– 1 * Network cable (or USB wireless network adapter)
– 1 * Metal touch sensor module
– Several jumper wires
Experimental Principle
In this experiment, touch the base electrode of a transistor with fingers to make it conduct electricity, for human body itself is a kind of conductor and an antenna that can receive electromagnetic waves in the air. These electromagnetic wave signals collected by human body are amplified by the transistor and processed by the comparator on the module to output steady signals.
Experimental Procedures
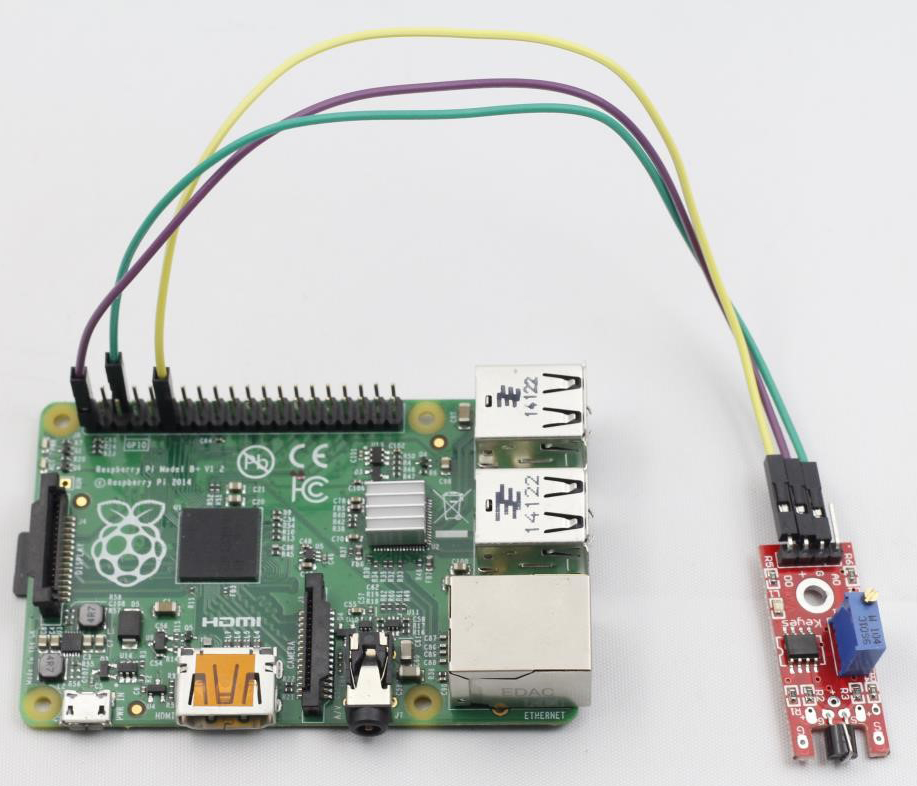
Step 1: Build the circuit
Raspberry Pi Metal Touch Sensor
GPIO0 ——————————— DO
3.3V ———————————– +
GND ———————————– G
Step 2: Edit and save the code (see path/Rpi_SensorKit_code/24_metalTouchSensor/metalTouchSensor.c)
Step 3: Compile
gcc metalTouchSensor.c -lwiringPi
Step 4: Run
./a.out
Touch the base electrode of the transistor, and a string “touched” will be displayed on the screen.
metalTouchSensor.c
#include <wiringPi.h>
#include <stdio.h>

#define TouchPin    0
#define LedPin      1

int main(void)
{
	if(wiringPiSetup() == -1){ //when initialize wiring failed,print messageto screen
		printf("setup wiringPi failed !");
		return 1;
	}

	pinMode(TouchPin, INPUT);
	pinMode(LedPin,  OUTPUT);

	while(1){
		if(digitalRead(TouchPin) == HIGH){
			printf("touched\n");
			digitalWrite(LedPin, LOW);     //led on
			delay(100);
			digitalWrite(LedPin, HIGH);    //led off
		}
	}

	return 0;
}
Python Code
#!/usr/bin/env python
import RPi.GPIO as GPIO

TouchPin = 11
LedPin   = 12

def setup():
	GPIO.setmode(GPIO.BOARD)       # Numbers GPIOs by physical location
	GPIO.setup(LedPin, GPIO.OUT)   # Set LedPin's mode is output
	GPIO.setup(TouchPin, GPIO.IN, pull_up_down=GPIO.PUD_UP)
	GPIO.output(LedPin, GPIO.HIGH) # Set LedPin high(+3.3V) to off led

def loop():
	while True:
		if GPIO.input(TouchPin) == GPIO.LOW:
			print '...led on'
			GPIO.output(LedPin, GPIO.LOW)  # led on
		else:
			print 'led off...'
			GPIO.output(LedPin, GPIO.HIGH) # led off

def destroy():
	GPIO.output(LedPin, GPIO.HIGH)     # led off
	GPIO.cleanup()                     # Release resource

if __name__ == '__main__':     # Program start from here
	setup()
	try:
		loop()
	except KeyboardInterrupt:  # When 'Ctrl+C' is pressed, the child program destroy() will be  executed.
		destroy()