Introduction
In this lesson, we will program the buzzer to make a different tone and play a piece of music in this way.
![]()
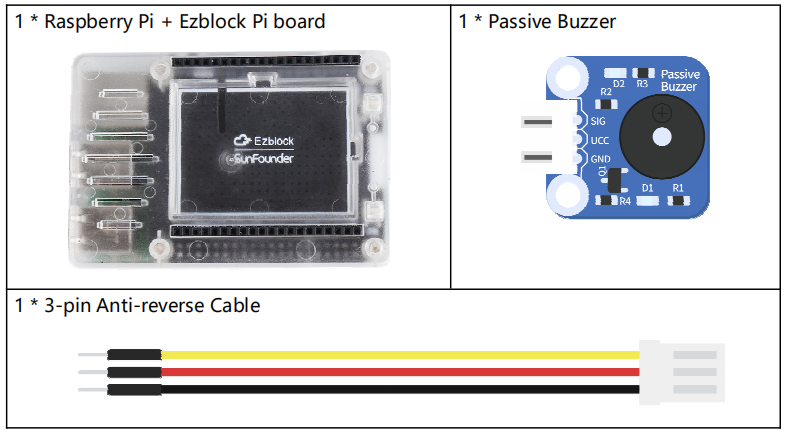
![]() Components
Components
Programming Steps
Step 1
After creating a new project, click on the Simulation icon on the left side of the page to enter the Simulation page.

Step 2
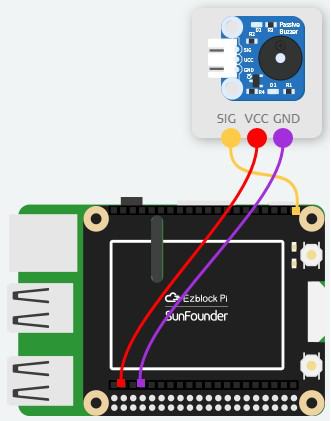
Find the buzzer module and drag it to the right area. Here we connect the SIG pin to the P0 port, then connect VCC and GND to 3.3V and GND respectively.
Step 3
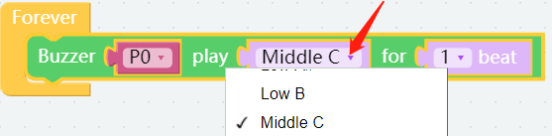
Return to the Programming page, then click on the Sensor Kit category to drag the Buzzer block to the Forever block.

Step 4
Click on the inverted triangle at the tone and select the desired pitch on the drop- down menu.
Step 5
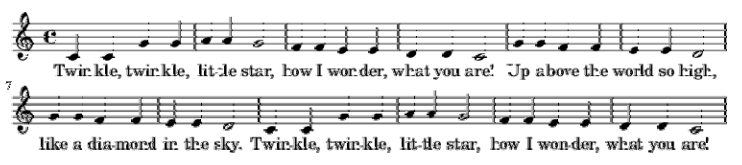
We already know how to make a sound, now we find a notation of Little Star and write it into the program.
Step 6
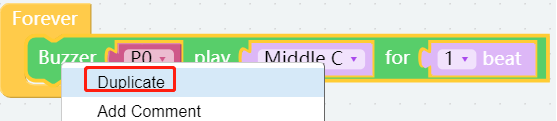
Long press the Buzzer block and select Duplicate to copy a same block.
Step 7
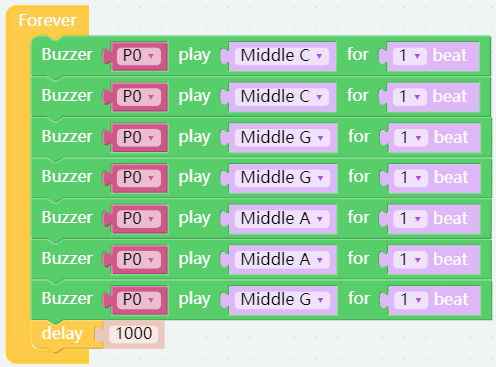
Copy for 5 times and change the Low C to other notes as shown below. Place a delay block under the Buzzer block. Then change the value to 1000 to let the buzzer pause for 1s after the music is done .
Step 8
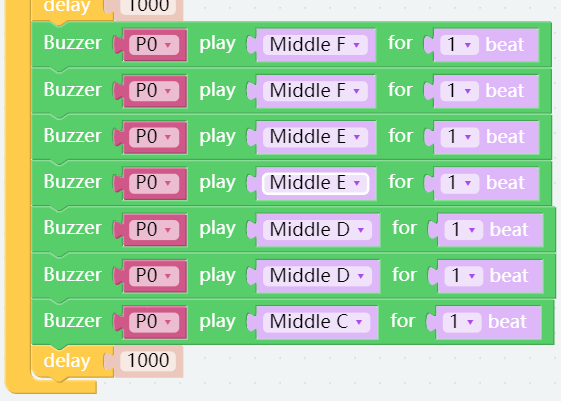
Then place 7 Buzzer blocks under the delay block, and change the values as shown below. Similarly, place a delay block with a value changed to 1000.
Step 9
Our codes are done here. Go to the Simulation page and click on the Run button. If the buzzer can play music normally, there is no problem with the code. Now save your project, connect the Bluetooth and click Flash to compile and download the code.
