Introduction
In this lesson, we will use the tilt switch and LED module to determine if an object is tilted.
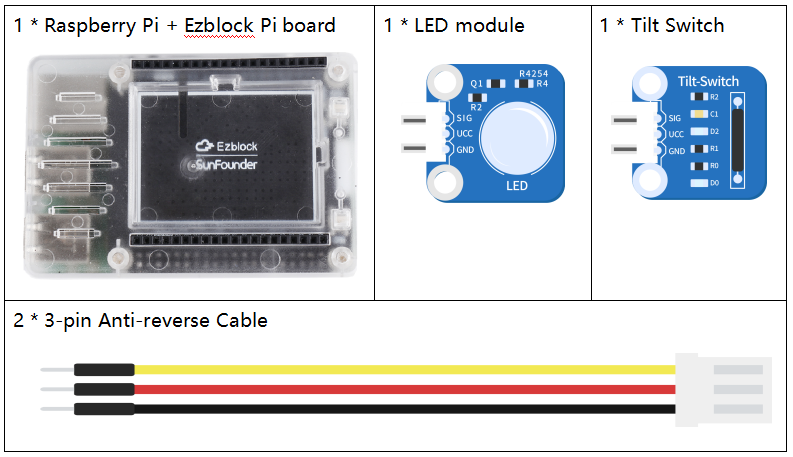
Components
Programming Steps
Step 1
Create a new project, then click on the Simulation icon on the left side of the page to enter the Simulation page.

Step 2
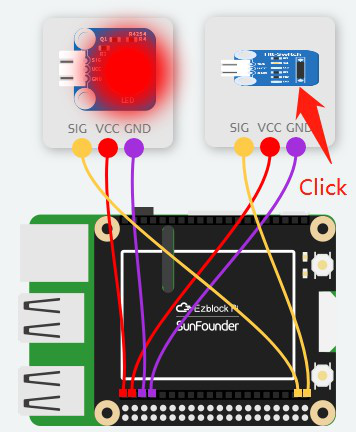
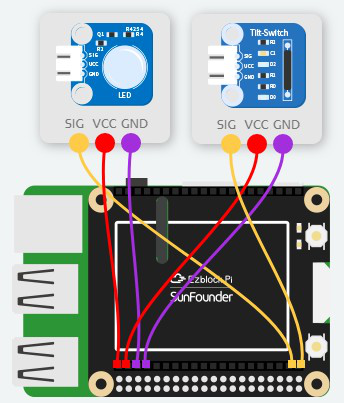
The signal pin SIG of the tilt switch is connected to D0, and the LED to D1. Then connect the VCC and GND to 3.3V and GND respectively. When the tilt switch is working normally, a low level signal 0 is output to D0, and D1 is set to 1 to light it.
Step 3
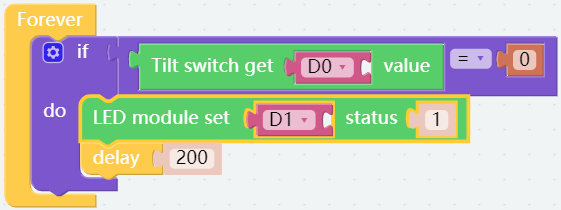
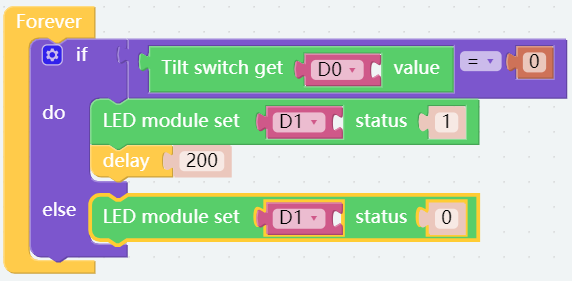
Place an if do block that is under Logic category into Forever block.

Step 4
Then place a Comparison Operator ( = ) block after the if block to create a judgment condition.

Step 5
Place the Tilt switch block under the Sensor Kit category into the first slot. The second slot is placed a number 0 in the Math category to determine if the tilt switch is on work properly.

Step 6
When the module tilts, turn on the LED module and extend the lighting time to 200ms.
Step 7
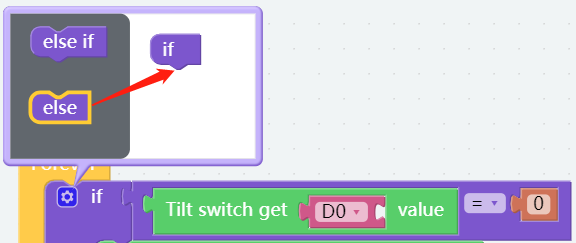
Click the Settings icon in the upper left corner of the if do block, place the else block below the if block to convert to the if do else block.
Step 8
If tilt switch does not have a value of 0, it is extinguished by setting the led module state to 0.
Step 9
Go to the Simulation page and click on the Run button, then click the tilt switch to simulate tilt. If the light is on, there is no problem with the code. Now save your project, connect the Bluetooth and click Flash to compile and download the code.