Overview
This lesson is how to check whether the Infrared block can be operated normally and how to control the Lizard by IR Remote.
Programming
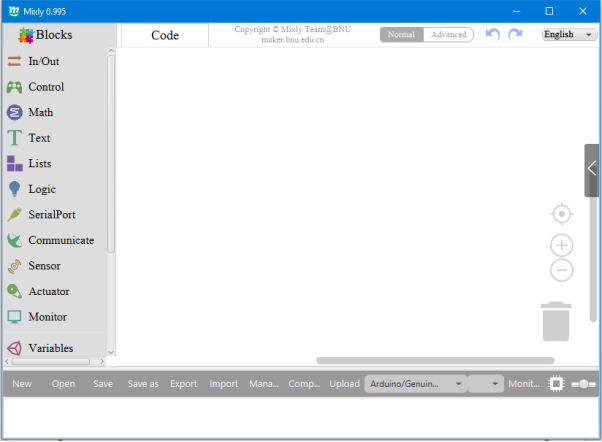
Click the icon on the desktop to open the Mixly and you’ll be on the homepage:
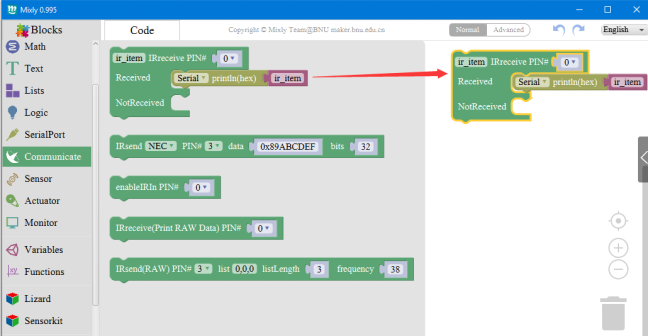
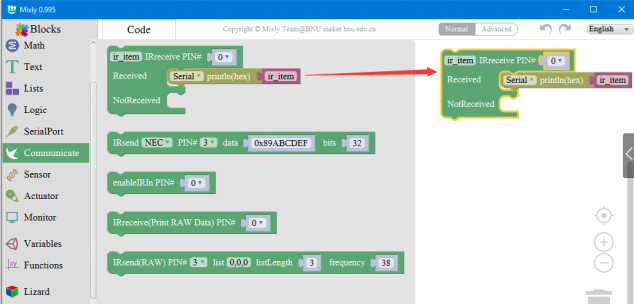
Find the module of IRreceive PIN# in the Communicate category. Click and drag the IRreceive PIN# block into the coding area:
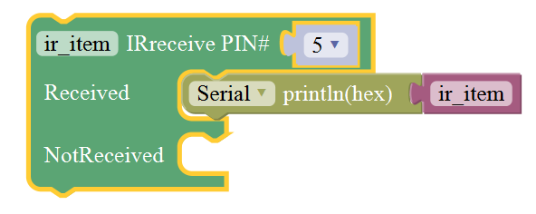
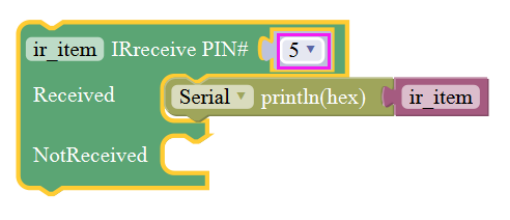
Set the value of IRreceive PIN in the drop-down list as 5.
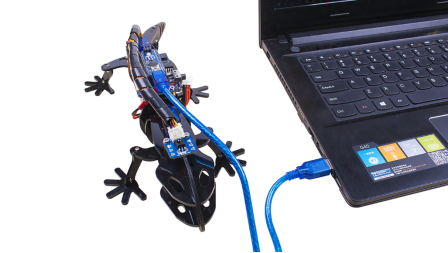
Connect the Lizard with computer as shown in the picture.
Select the board type: Arduino Nano, and select the serial port for upload:

Here just take COM3 as an example. Upload the program to Lizard:

Then open the Monitor in the serial port.

Press the button of 2 (forward), 4 (left), 6 (right) and 8 (backward) on the IR remote controller and the Serial port Monitor will show numbers as below:
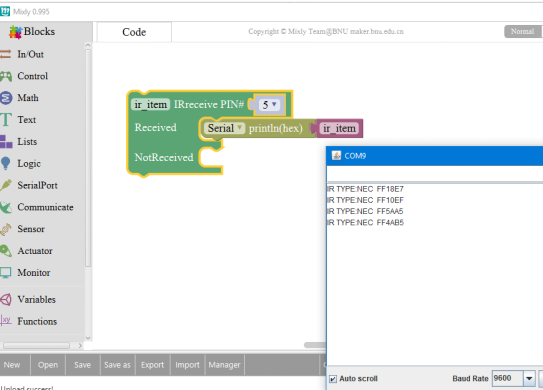
The test of the Infrared module completed now.
After testing the infrared module, the Lizard can receive and send data normally, and the code can be controlled by IR remote controller to move.
Firstly, record the hexadecimal of the pressing button of 2, 4, 6 and 8, then begin the new programming.
Step I: Find the module of IRreceive PIN# in the Communicate category. Click and drag the IRreceive PIN# block into the coding area:
Correct the IR interface as 5;
Step II: Find the Count with Module in the Control category.
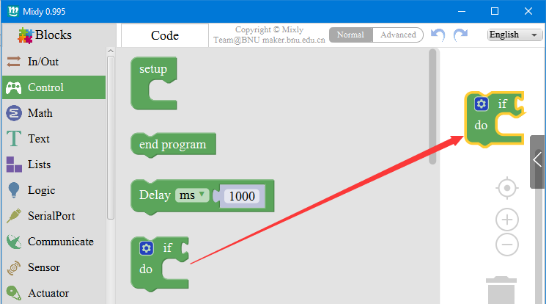
Click and drag the Count with Module block into the coding area and combine with the previous modules;

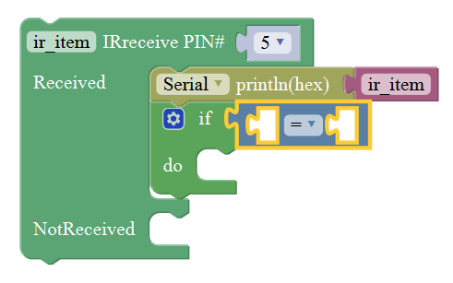
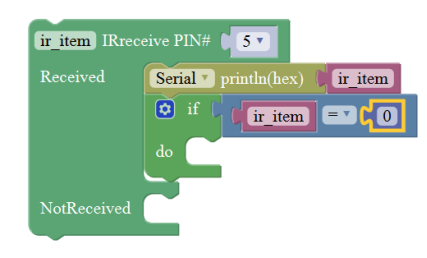
Step III: Find = module in Logic category, click and drag the = Module block into the coding area.

Combine it with previous modules together;
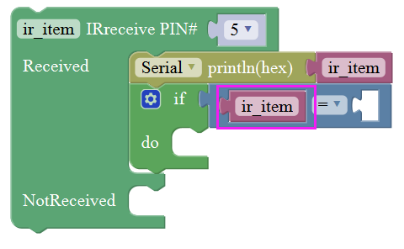
Step IV: Find ir item in Variables category , click and drag the ir item block into the coding area.
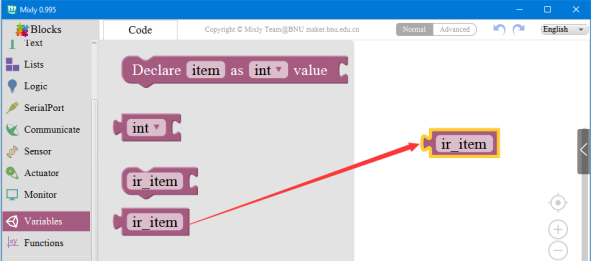
Combine it with previous modules;
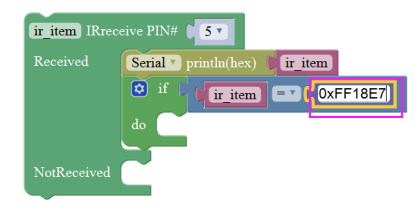
Step V: Find the module as shown below in Math category.
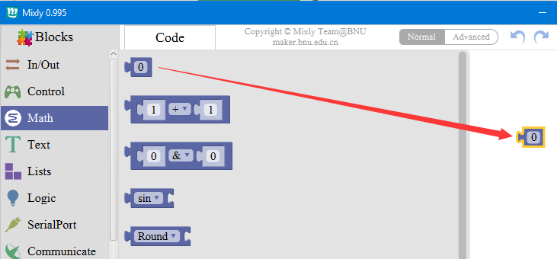
Click and drag this Module block into the coding area and combine it with previous modules;
Enter the hexadecimal value of pressing the button of 2.
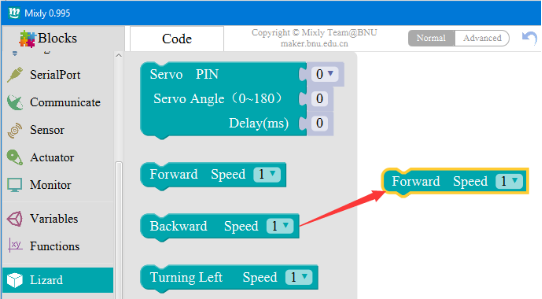
Step VI: Find the Forward Speed block in the Lizard category.
Click and drag the Forward Speed block into the coding area and combine it with previous modules together;
After combining, it looks as shown below:
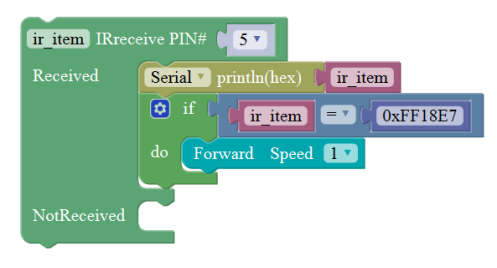
Now the combining code has realized the function of pressing 2 on the remote controller to command the Lizard to go forward.
Then the function of controlling the Lizard to move backward, turning left and turning right can all be realized by pressing 8, 4 and 6 on the remote controller. The modules need to be used is same with control it to go forward, thus here just skip.
The whole graphical program is as shown below:

Connect the Lizard with computer as shown in the picture.

Select the board type: Arduino Nano, and select the serial port for upload:

Here just take COM3 as an example. Upload the program to Lizard:

When the code is upload successfully, switch on the power you can control the Lizard to go in four directions. Here the number 2, 4, 6 and 8 are used, you can change to any keys that you like to control the Lizard. You can stretch your imagination to create more interests in the process of learning.