Introduction
In this lesson, a moisture sensor will be used to detect the moisture in the soil. The greater the moisture is, the greater the read value will be on the soil sensor. We can judge if the pot needs watering by reading the value on the moisture sensor.
![]()
![]() Components
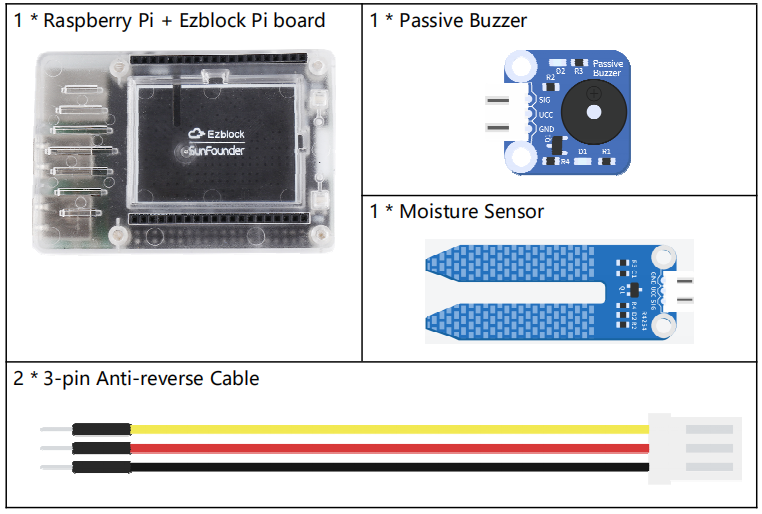
Components
![]() Programming Steps
Programming Steps
Step 1
After creating a new project, click on the Simulation icon on the left to enter the Simulation page.

Step 2
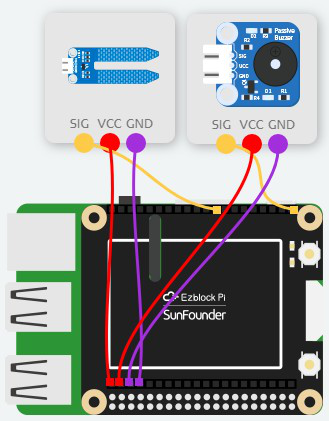
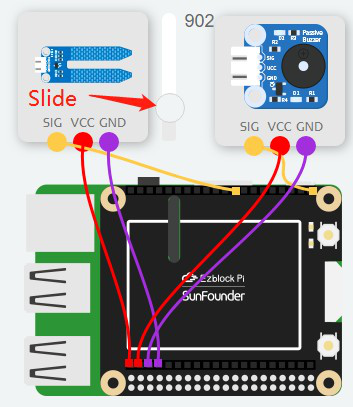
Connect the Moisture Sensor module to A0 and Passive Buzzer module to P0 of the Ezblock Pi. Then connect the VCC and GND to 3.3V and GND respectively.
Step 3
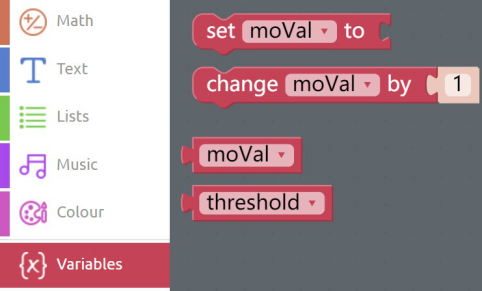
Click the Create variable button in the Variables category to create 2 variables called threshold and moVal.
Step 4
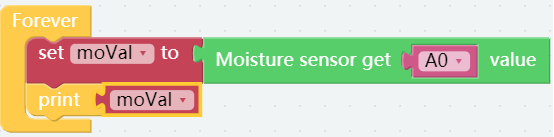
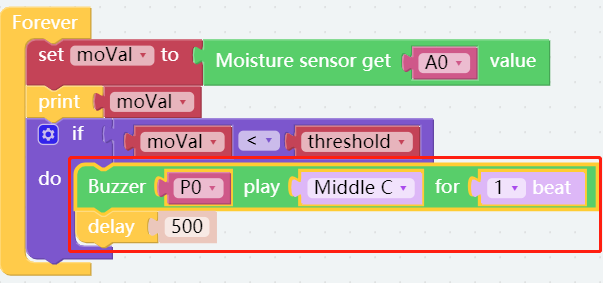
Read the value of the moisture sensor and assign it to the variable moVal.

Step 5
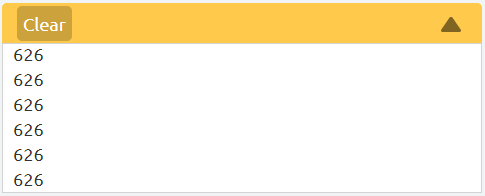
Take a print block from the Basic category to print the value of the moisture sensor in the Debug Monitor. The moVal block comes from the Variables category.
Step 6
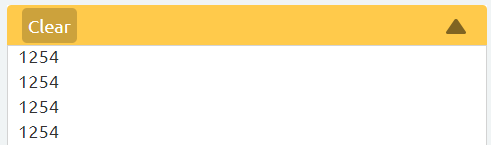
Connect the Bluetooth and click on Flash button to compile and download the code. Look at the Debug Monitor on the left to get the value of the sensor under normal conditions.
Step 7
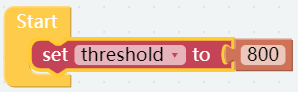
Through the read value in the Debug Monitor, set the threshold to 800 for the variable, threshold in the Start block.
Step 8
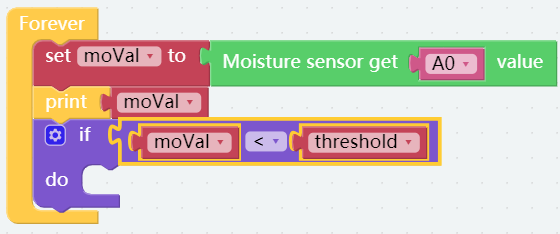
A judgment condition is set by using the if do block and the Comparison Operator ( = ) block to judge if the moVal is less than the threshold.
Step 9
If the conditon is met, let the buzzer sound, and you can also modify the value of note and beat.
Step 10
Our codes are done here. Go to the Simulation page and click on the Run button, then drag the slider to simulate the value read on moisture sensor. If the reading value is <800, the buzzer will alarm, indicating that there is no problem with the code.
Step 11
Now save your project, connect the Bluetooth and click Flash to compile and download the code. You can see the value of moisture sensor on Debug Monitor.