Introduction
In this experiment, you will learn how to turn on or off LEDs through a computer and the Serial Monitor. Serial Monitor is used for communication between the Uno board and a computer or other devices. It is a built-in software in the Arduino environment and you can click the button on the upper right corner to open it. You can send and receive data via the serial port on the Uno board and control the board by input from the keyboard.
In this experiment, since we use colored LEDs as loads, you can enter a color among red, green, and blue on Serial Monitor in the IDE. The corresponding LED on the SunFounder Uno board will then light up.
Components
– 1 * SunFounder Uno board
– 1 * Breadboard
– 3 * LED
– 3 * Resistor (220Ω)
– Jumper wires
– 1 * USB cable
Principle
Here, the Serial Monitor serves as a transfer station for communication between your computer and the SunFounder Uno board. First, the computer transfers data to the Serial Monitor, and then the data is read by the SunFounder Uno board. Finally, the Uno will perform related operations.
Experimental Procedures
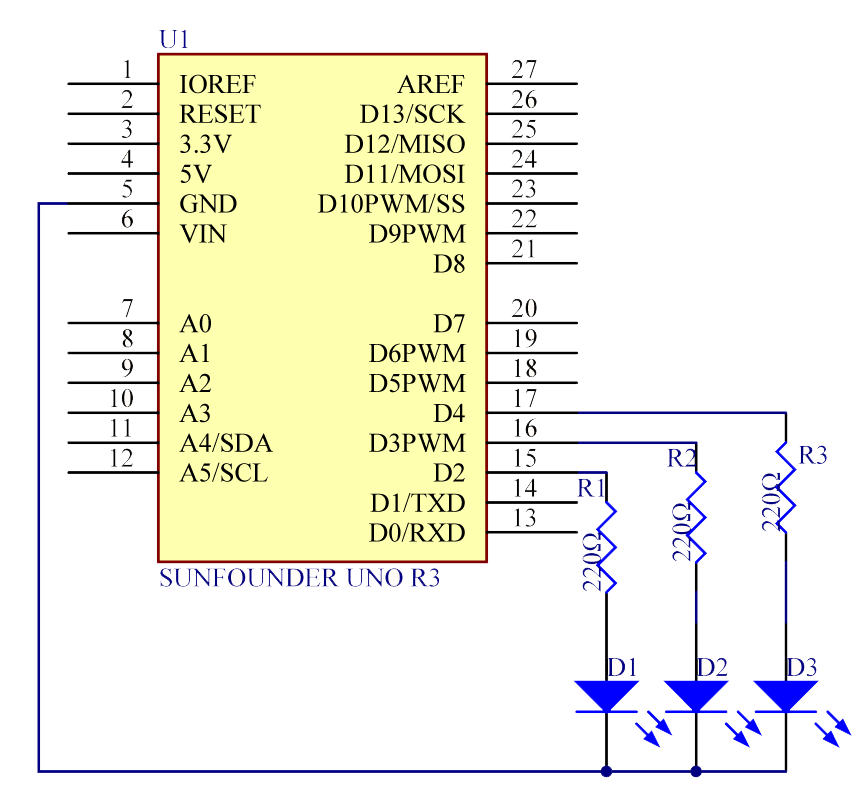
Step 1: Build the circuit
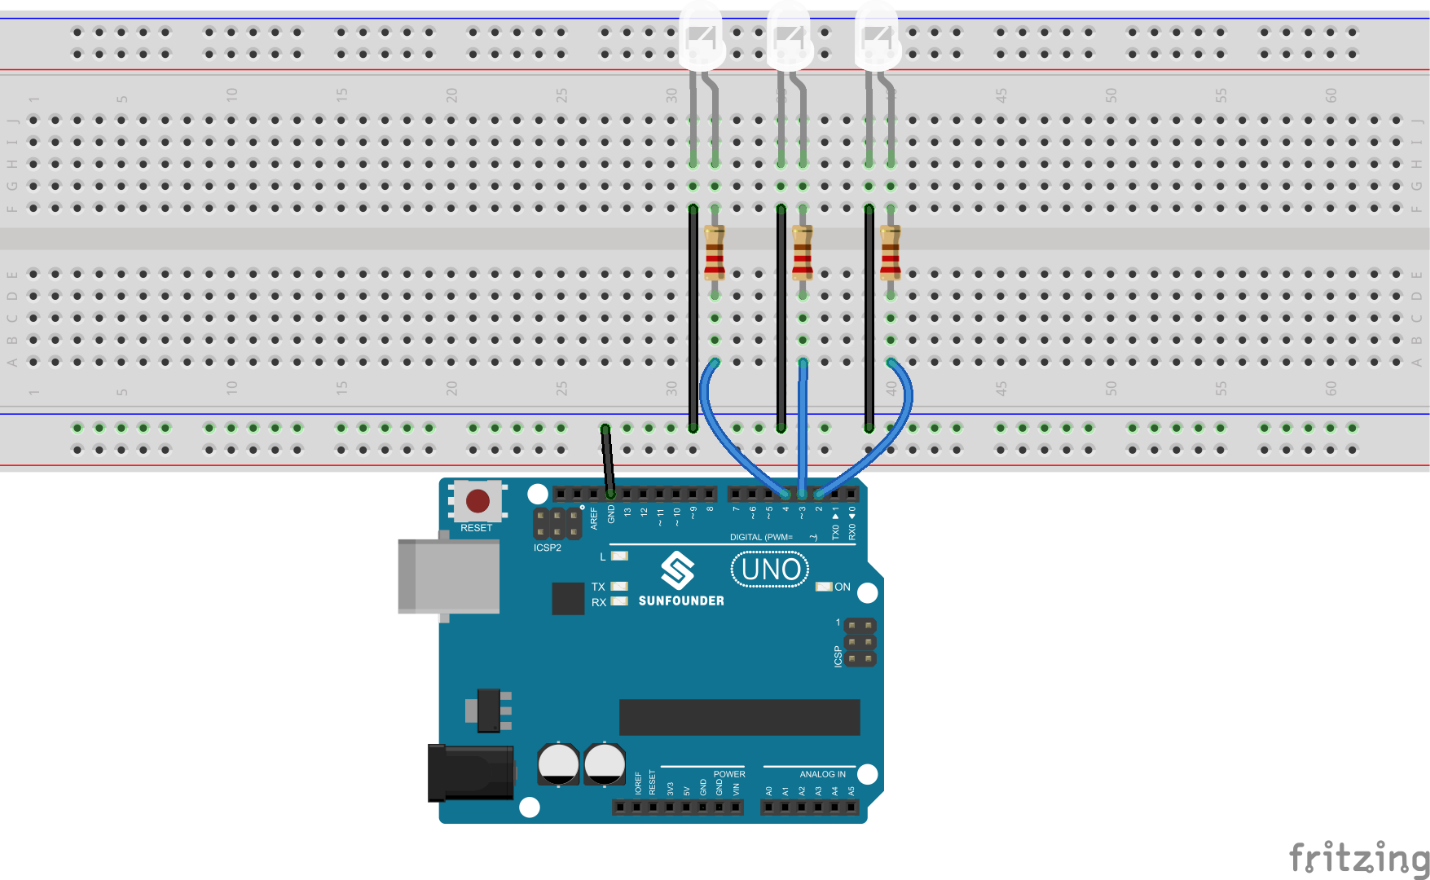
The schematic diagram
Step 2: Program (Please refer to the example code in LEARN -> Get Tutorials on our website)
Step 3: Compile the code
Step 4: Upload the sketch to the SunFounder Uno board
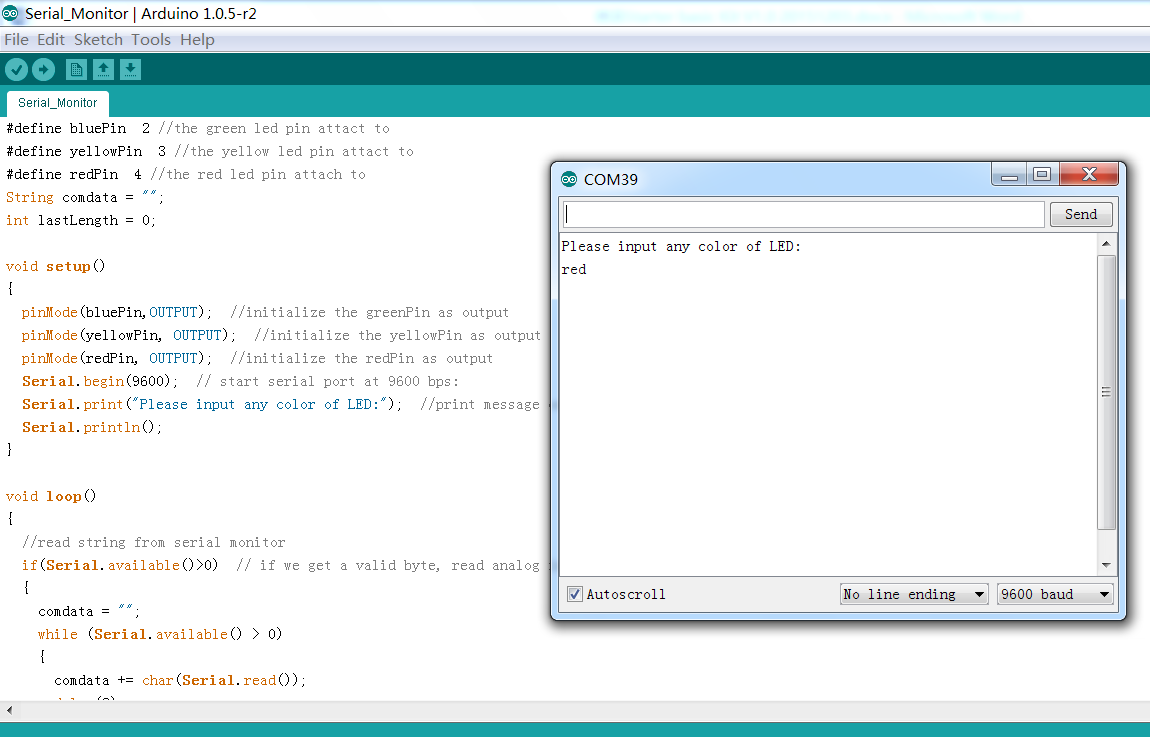
Now, click the Serial Monitor button at the upper right corner in the IDE. Then the Serial Monitor window will appear.
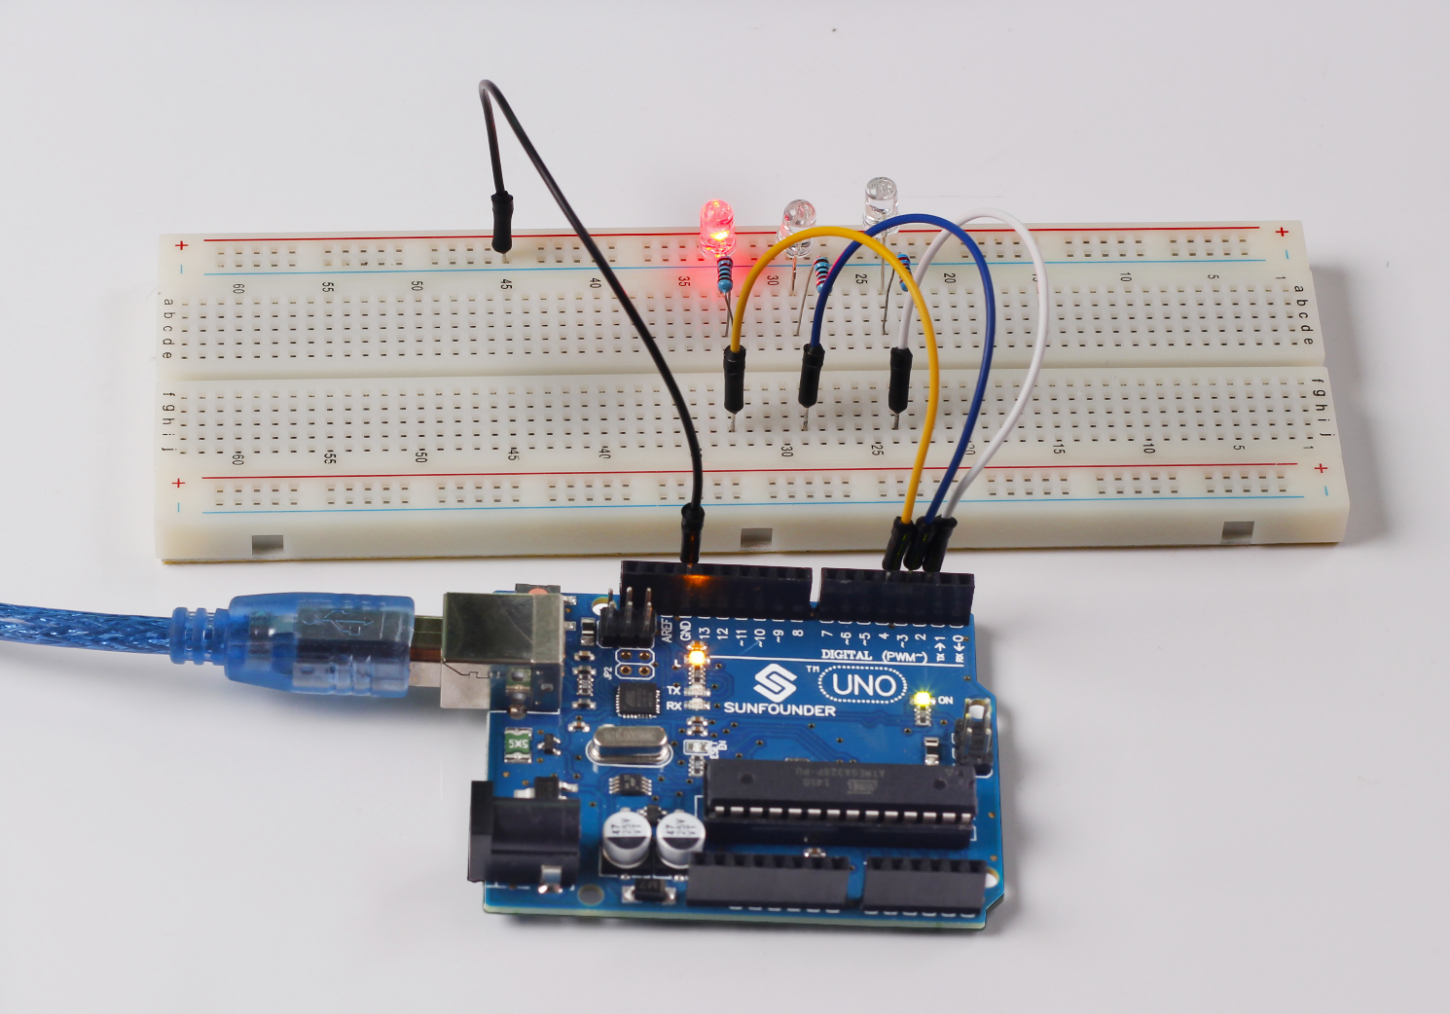
With this window, you can not only send data from your computer to the SunFounder Uno board, but also receive data from the board and display it on the screen. When you open the window, it will display “Please input any color of LED:“. You can input a color here. If you enter red, green, or blue, click Send, then the corresponding LED on the breadboard will light up. However, if you enter any color other than these three, no LEDs will be on.
For example, if you input red, you will see the red LED light up.
Code
| //Serial Monitor // open the serial monitor ,if you input red, you will see the red LED light up //Email:support@sunfounder.com //Website:www.sunfounder.com //2015.5.7 const int greenPin= 2; //the green led pin attact to const int yellowPin= 3; //the yellow led pin attact to const int redPin= 4; //the red led pin attach to String comdata = “”; int lastLength = 0;void setup() { pinMode(greenPin,OUTPUT); //initialize the greenPin as output pinMode(yellowPin, OUTPUT); //initialize the yellowPin as output pinMode(redPin, OUTPUT); //initialize the redPin as output Serial.begin(9600); // start serial port at 9600 bps: Serial.print(“Please input any color of LED:”); //print message on serial monitor }void loop() { //read string from serial monitor if(Serial.available()>0) // if we get a valid byte, read analog ins: { comdata = “”; while (Serial.available() > 0) { comdata += char(Serial.read()); delay(2); } Serial.println(comdata); } if(comdata == “red”) { digitalWrite(redPin, HIGH);//turn the red led on digitalWrite(greenPin, LOW);//turn the green led off digitalWrite(yellowPin, LOW);//turn the yellow led off } else if(comdata == “yellow”) { digitalWrite(redPin, LOW);//turn the red led off digitalWrite(greenPin, LOW);//turn the green led off digitalWrite(yellowPin, HIGH);//turn the yellow led on } else if(comdata == “green”) { digitalWrite(redPin, LOW);//turn the red led off digitalWrite(greenPin, HIGH);//turn the green led on digitalWrite(yellowPin, LOW);//turn the yellow led off } else { digitalWrite(redPin, LOW);//turn the red led off digitalWrite(greenPin, LOW);//turn the green led off digitalWrite(yellowPin, LOW);//turn the yellow led off } } |
Video