Introduction
A photoresistor or photocell is a light-controlled variable resistor. The resistance of a photoresistor decreases with increasing incident light intensity; in other words, it exhibits photoconductivity. A photoresistor can be applied in light-sensitive detector circuits, and light- and dark-activated switching circuits.
Components
– 1 * SunFounder Uno board
– 1 * USB data cable
– 1 * Photoresistor
– 1 * Resistor (10KΩ)
– 8 * LED
– 8 * Resistor (220Ω)
– Jumper wires
– 1 * Breadboard
Experimental Principle
The resistance of the photoresistor changes with incident light intensity. If the incident light intensity is high, the resistance reduces; if low, increases.
In this experiment, we will use eight LEDs to indicate light intensity. The higher the light intensity is, the more the LED is lit. When the light intensity is high enough, all the LEDs will be lit. When there is no light, all the LEDs will go out.
Experimental Procedures
Step 1: Build the circuit
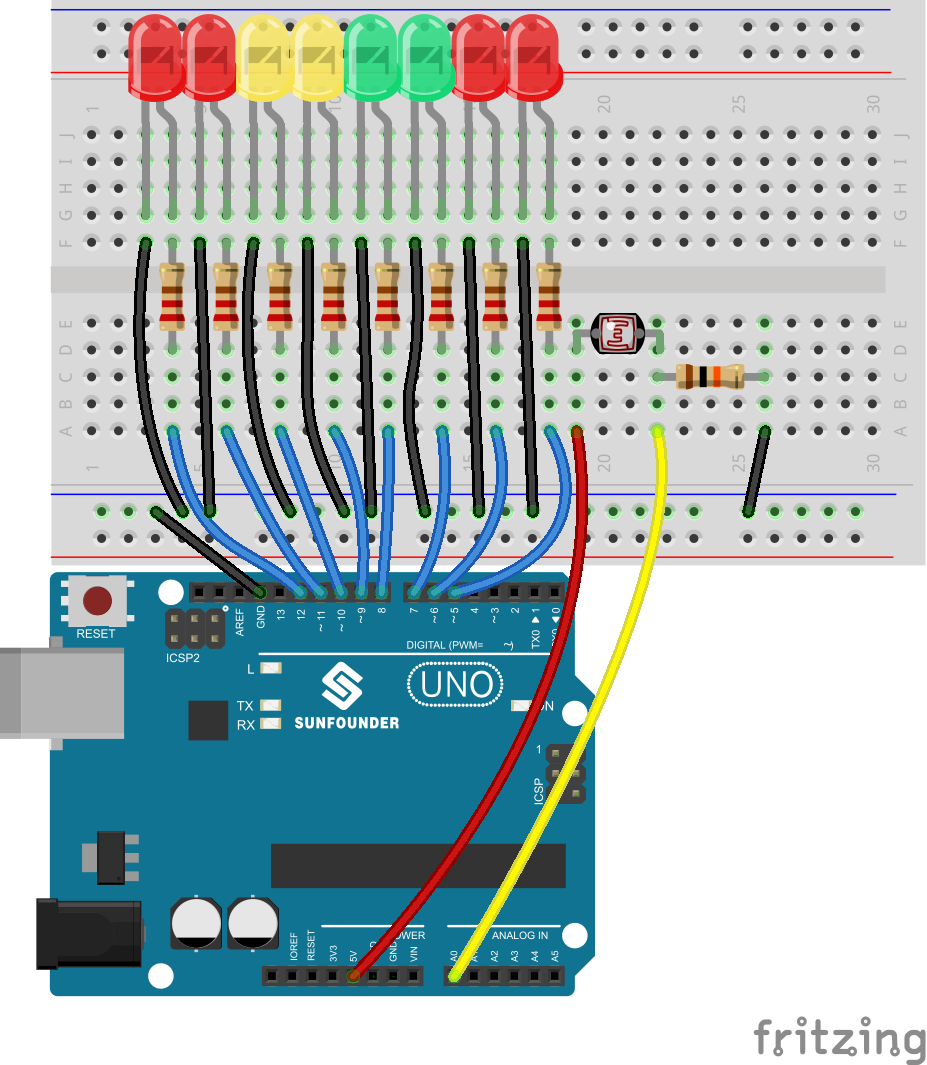
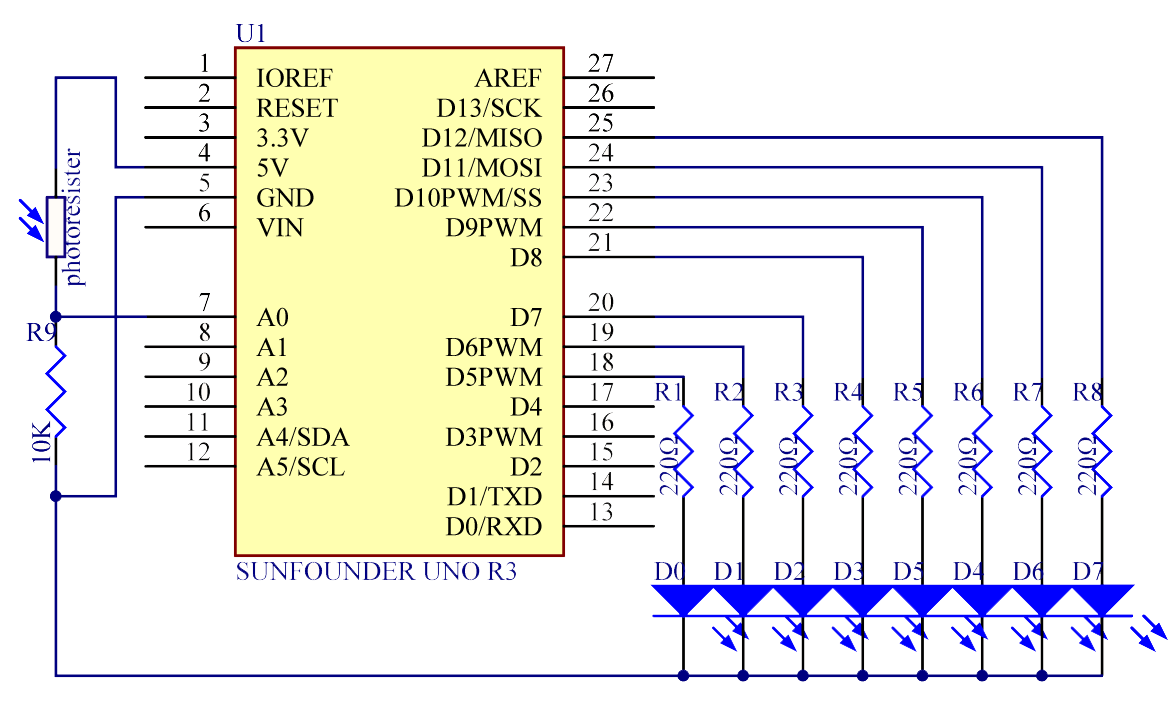
The schematic diagram
Step 2: Program (Please refer to the example code in LEARN -> Get Tutorial on our website)
Step 3: Compile the code
Step 4: Upload the sketch to the SunFounder Uno board
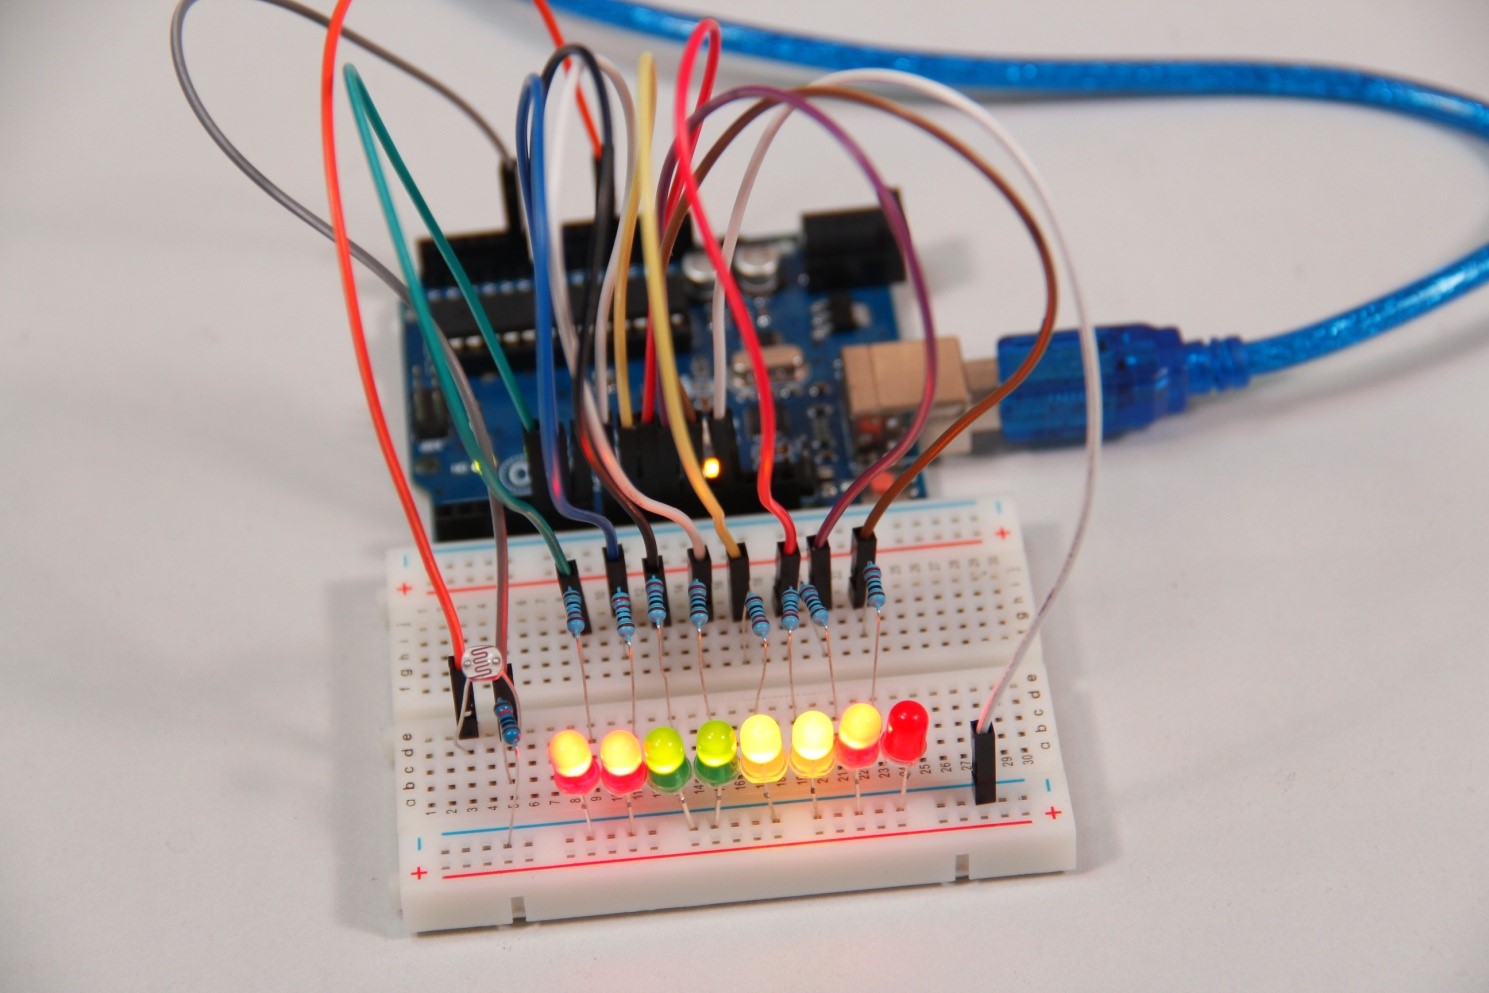
Now, if you shine the photoresistor with a certain light intensity, you will see several LEDs light up. If you increase the light intensity, you will see more LEDs light up. When you place it in dark environment, all the LEDs will go out.
Exploration
In addition, you can replace the photoresistor with a microphone to use LEDs to indicate sound intensity. The higher the sound intensity is, the more LEDs are lit. You can realize this effect by yourself.
Code
| /************************************ * name:Photoresistor * function: if you shine the photoresistor with a certain light intensity, you will see several LEDs light up. * If you increase the light intensity, you will see more LEDs light up. * When you place it in dark environment, all the LEDs will go out. *********************************************/ //Email: support@sunfounder.com //Website: www.sunfounder.comconst int NbrLEDs = 8;//8 leds const int ledPins[] = {5, 6, 7, 8, 9, 10, 11, 12};//8 leds attach to pin 5-12 respectively const int photocellPin = A0; //photoresistor attach to A0 int sensorValue = 0; // value read from the sensor int ledLevel = 0; // sensor value converted into LED ‘bars’void setup() { for (int led = 0; led < NbrLEDs; led++) { pinMode(ledPins[led], OUTPUT);// make all the LED pins outputs } }void loop() { sensorValue = analogRead(photocellPin); //read the value of A0 ledLevel = map(sensorValue, 300, 1023, 0, NbrLEDs); // map to the number of LEDs for (int led = 0; led < NbrLEDs; led++)// { if (led < ledLevel ) //When led is smaller than ledLevel, run the following code. { digitalWrite(ledPins[led], HIGH); // turn on pins less than the level } else { digitalWrite(ledPins[led],LOW); // turn off pins higher than } } } |
Video