Build Circuit
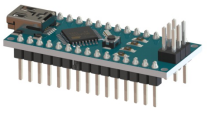
- Insert SunFounder Nano board into the Sensor Shield. Note: The USB port should be at the same side with blue power supply terminal.
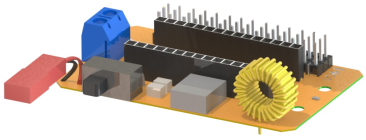
- Insert the battery JST female pin into the red power of the Sensor Shield.
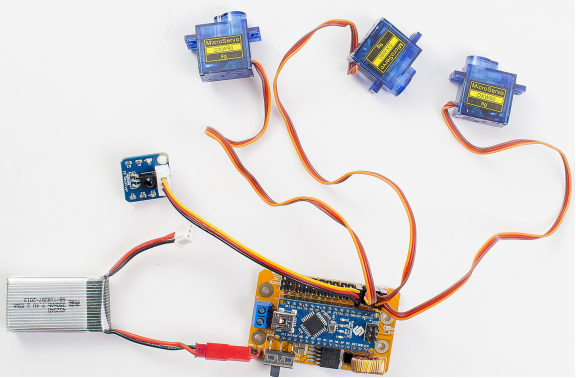
- Connect 3 servos and Infrared receive module with sensor shield. Insert 3 rocker arms into servos in that observe if they are rotate or not.
Note: The Black wire of IR Receiver module connect to sensor shield pin 5, then yellow wire connect to GND pin
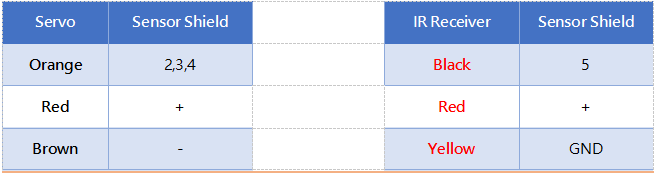

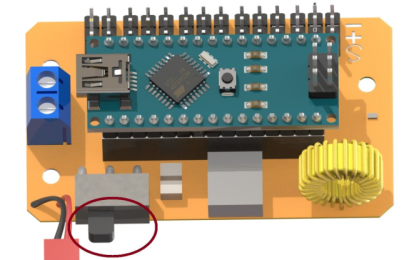
Pay attention to the colors and the directions of the anti-reverse cable.

Upload the code
- If everything looks good, connect the Sensor Shield to your PC with a USB cable, then the blue LED on SunFounder Nano board will light up.
If there display “USB Device not recognized”, it means that you haven’t installed the driver, thus you need to install the driver below:
- For Windows users, run PL2303_Prolific_DriverInstaller_v1180B in the folder Driver.
- For Mac users, refer to the folder PL2303_MacOSX_1_6_1_20170620 in the folder Driver.
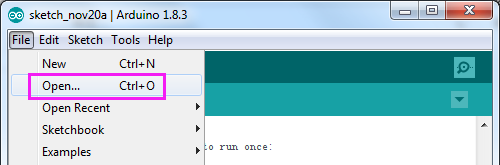
- Open the Arduino Software (IDE), Select File->Open. On the pop-up window, go to the Bionic Robot Kit for Arduino – Lizard -> Code -> Test directory and find Test.ino. Click it to open.
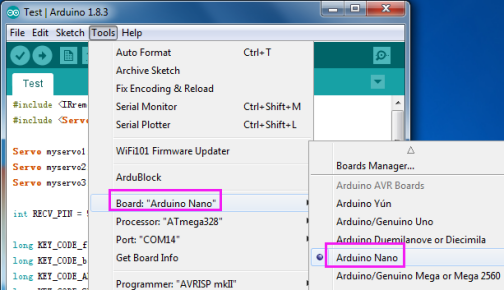
- Select a board. Here we select Arduino Nano. The Processor is ATmega328.
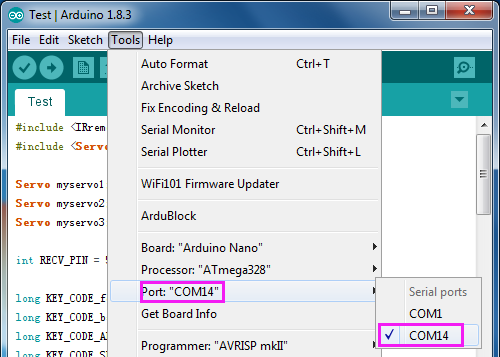
- Go to Tools -> Port to select the port. Your serial port may be different from what’s shown here (right-click My Computer on desktop, click Properties>Device Manager>Ports).
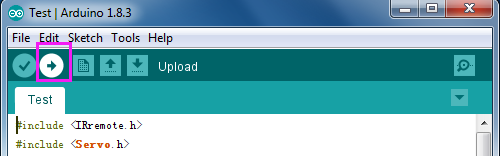
- Click the8 following button to upload.
- Wait for a moment until the following information appears at the bottom of the window, which indicates it is uploaded successfully.

Servo Test
- Switch on the power, you will find the 3 servos rotate from 0 degree to 180 degree and then stop at 90 degree. If you haven’t seen clear of the process, you can press the Reset button on the Nano board, the servo will rotate again.
Test IR Receiver
- Click File -> Preference to enable display line numbers, then select OK.

- Comment line 31 by “//”, uncomment line 32 and then upload the code again.

- Open the Serial Monitor
on the top-right of Arduino IDE, held and press the button of the IR Remote Controller toward IR receive module.
- You will see it display the value of button on the Serial Monitor.
Note: Press the button on the remote controller gently. If you press the button forcefully, it will be default as long press and display FFFFFFF.
After testing, extract the servo and the Infrared Module.
Note: The axis of the servos is not moved accidentally in the subsequent installation. If the axes are moved, adjust them again before the installation.
Now let’s begin to assemble the Lizard robot.